I’ve been on a relentless quest for the ultimate protein‑packed dessert, and the moment I cracked open a jar of these High Protein Cheesecake Jars, I knew I’d stumbled upon a culinary revelation. Picture this: the kitchen’s aroma swirls with vanilla, citrus, and a hint of almond, while the sound of the oven timer ticks like a metronome of anticipation. I was halfway through a week of protein shakes, craving something that could double as a sweet treat and a post‑workout fuel, and the idea of a cheesecake that could be portioned, stored, and enjoyed at any time hit me like a lightning bolt.
I remember the first time I tried a regular cheesecake: the crust was a soggy mess, the filling collapsed on the plate, and the whole thing felt like a weighty disappointment. That kitchen disaster fueled my determination to reinvent the classic. I wanted a cheesecake that was creamy, yet light enough to keep my macros in check, and that could be prepped ahead of time without compromising texture or flavor. The result? A silky, protein‑rich custard that clings to the inside of a glass jar like a velvet curtain, with a crunchy graham cracker base that snaps like fresh ice.
What sets these jars apart isn’t just the high protein content—though that alone is a game‑changer for fitness buffs—but the meticulous balance of ingredients that create a symphony of textures. The use of low‑fat cream cheese and cottage cheese gives a robust dairy base, while the whey protein powder adds body without heaviness. The almond flour and crushed graham crackers create a subtle crunch that contrasts the smooth filling, and the lemon zest injects a bright, citrusy lift that keeps the taste from feeling cloying. I dare you to taste this and not go back for seconds; the first bite will have you questioning why you ever settled for ordinary cheesecake.
I’ll be honest—after making the first batch, I ate half the jars before anyone else even had a chance to try them. The texture is so luscious that it practically melts in your mouth, and the protein punch gives you that satisfying, satiating feel that keeps you coming back for more. Picture yourself pulling a jar out of the fridge, the steam curling up like a fragrant cloud, and the aroma of vanilla and citrus filling the kitchen. If you’ve ever struggled to find a dessert that fits your macros, you’re not alone—and I’ve got the fix.
What Makes This Version Stand Out
- Protein Power: Each jar packs 25 grams of protein, sourced from a blend of whey, cottage, and Greek yogurt, making it a perfect post‑workout treat.
- Texture Triumph: The combination of low‑fat cream cheese and almond flour creates a silky custard that doesn’t feel heavy or cakey.
- Crunch Factor: Crushed graham crackers add a satisfying bite that breaks up the smoothness without overwhelming the flavor.
- Flavor Depth: Lemon zest and vanilla extract weave a bright, aromatic profile that keeps the cheesecake from tasting too sweet.
- Make‑Ahead Magic: These jars can be baked, cooled, and refrigerated for up to four days, or frozen for up to two weeks, making them an ideal grab‑and‑go snack.
- Low‑Fat, High‑Flavor: The use of unsweetened almond milk and a touch of erythritol keeps calories in check while still delivering a rich taste.
- All‑Day Appeal: Whether you’re a gym enthusiast or a busy professional, these jars fit into any schedule—breakfast, lunch, snack, or dessert.
- Customizable: Swap in your favorite fruit, nut butter, or chocolate chips for endless variations.
Alright, let’s break down exactly what goes into this masterpiece…
Inside the Ingredient List
The Flavor Base
Low‑fat cream cheese is the backbone of this cheesecake, delivering a creamy texture without the excess fat. When blended until silky, it sets the stage for the other dairy components. If you can’t find low‑fat cream cheese, a 2% version will work, though the filling may feel slightly richer. The key is to let it soften at room temperature before mixing to avoid lumps.
The Texture Crew
Cottage cheese and Greek yogurt add moisture and a subtle tang that balances the sweetness. Cottage cheese brings a protein boost and a light, airy feel, while Greek yogurt contributes thickness and a slight tartness. Swapping Greek yogurt for a silken tofu base will give a vegan version that still holds its shape.
The Unexpected Star
Whey protein powder is the unsung hero that elevates the protein content without altering flavor. Choose a vanilla or unflavored variety to keep the taste profile clean. If you’re lactose intolerant, plant‑based protein powders work, but the texture may be slightly denser.
The almond flour and crushed graham crackers provide a subtle nutty crunch that contrasts the silky filling. Almond flour also adds a hint of buttery flavor without the heaviness of traditional flour. If you’re gluten‑sensitive, this combination keeps the crust naturally gluten‑free.
The Final Flourish
A splash of unsweetened almond milk loosens the mixture, making it pourable yet still thick enough to set. Lemon juice and zest brighten the overall flavor profile and act as a natural preservative. The melted butter seals the edges and gives a glossy finish that makes the jars look restaurant‑ready.
Everything's prepped? Good. Let's get into the real action…
The Method — Step by Step
- Preheat and Prep: Heat your oven to 350°F (175°C) and grease eight 2‑cup glass jars with a light coating of butter or non‑stick spray. The jars should be clean and dry—any residual moisture will cause the cheesecake to steam instead of bake. Place the jars on a baking sheet to keep them upright and stable. This step ensures a uniform bake and prevents the jars from tipping over.
- Blend the Creamy Core: In a large mixing bowl, combine the softened low‑fat cream cheese and cottage cheese. Use a hand mixer or stand mixer on medium speed until the mixture is completely smooth and free of lumps. The goal is a velvety base that will fold easily with the other ingredients. If the mixture feels too thick, add a teaspoon of almond milk to loosen it.
- Incorporate the Protein: Add the whey protein powder, Greek yogurt, and a pinch of salt to the bowl. Whisk until fully incorporated, ensuring the protein powder dissolves without clumping. The mixture should feel thick but pliable. This step is crucial for achieving a dense yet creamy texture.
- Add Sweetness and Flavor: Stir in the erythritol, vanilla extract, lemon juice, and lemon zest. Taste the batter; it should have a balanced sweetness with a citrus lift. The lemon zest is what gives the cheesecake its bright, fresh finish, so don’t skip it.
- Fold in the Crunch: Gently fold in the almond flour, crushed graham crackers, and melted butter. Use a spatula to fold, not stir, to preserve the airy structure. The mixture should be thick enough to hold its shape when poured into the jars. This is the moment when the cheesecake transforms from a simple custard to a layered, textural masterpiece.
- Divide and Fill: Spoon the batter into each jar, filling about three‑quarters full. Leave some headspace to allow for expansion during baking. Tap the jar gently on the counter to release any air bubbles. This step ensures even distribution and a smooth top.
- Bake to Perfection: Place the baking sheet in the preheated oven and bake for 25 minutes, or until the edges are set and the center still has a slight jiggle. The top should develop a golden‑brown hue, but avoid overbaking to keep the cheesecake moist. Watch the oven closely; the trickiest part is preventing cracks on the surface.
- Cool and Chill: Remove the jars from the oven and let them cool at room temperature for 30 minutes. Then cover each jar with plastic wrap or foil and refrigerate for at least 2 hours, or overnight for the best texture. The cooling period allows the cheesecake to set fully and develop its signature creaminess.
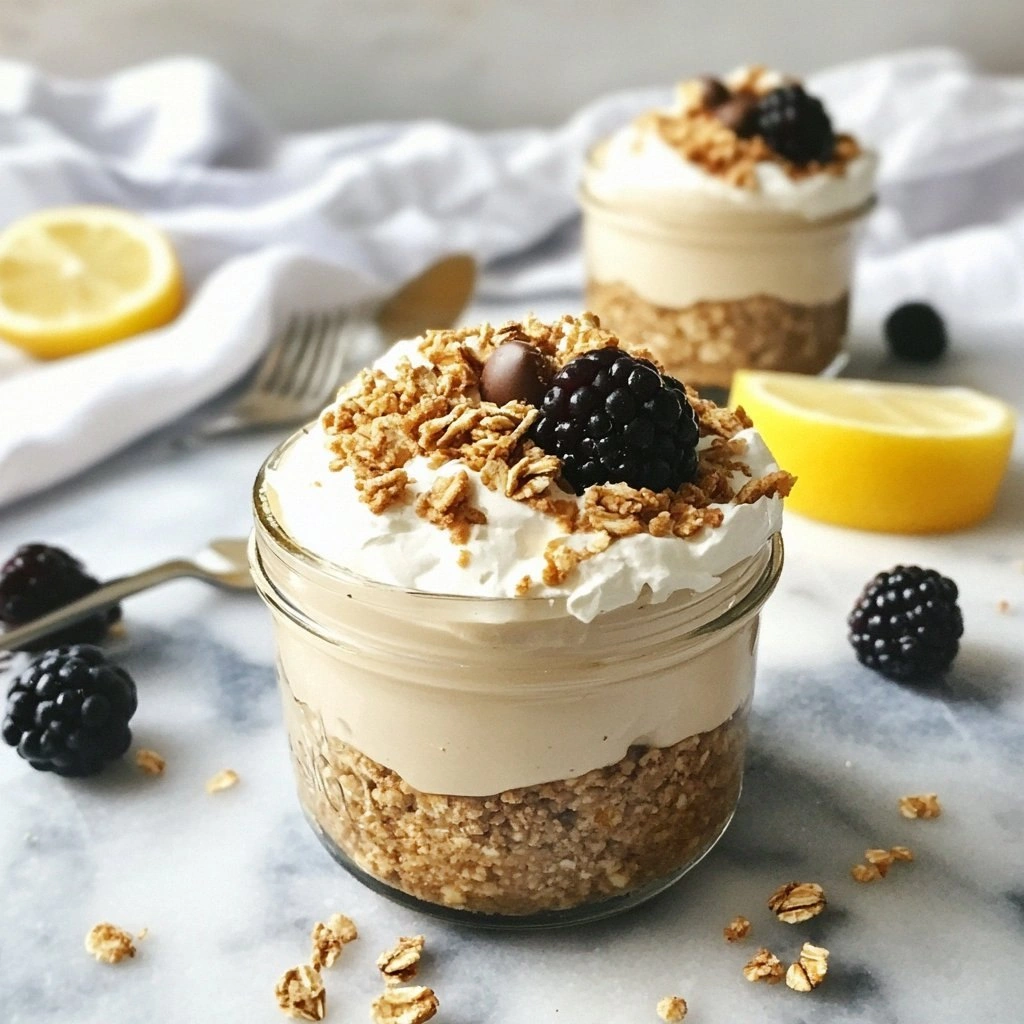
- Optional: Add a Topping: Before serving, top each jar with fresh berries, a drizzle of almond butter, or a sprinkle of cocoa nibs. This adds a pop of color and a new flavor dimension. If you’re craving something sweet, a light dusting of powdered erythritol works wonders.
- Serve and Enjoy: Remove the plastic wrap, give each jar a gentle shake to settle the filling, and serve immediately. If you’re on the go, the jars are portable and can be taken to work, school, or a gym session. The combination of protein, creaminess, and crunch makes this dessert a standout for any occasion.
That's it — you did it. But hold on, I've got a few more tricks that'll take this to another level. These insider tips will ensure every jar is a masterpiece, not a miss.
Insider Tricks for Flawless Results
The Temperature Rule Nobody Follows
Many bakers think 350°F is the sweet spot, but a slightly lower temperature of 325°F actually keeps the cheesecake from drying out while still setting the edges. The trick is to let the cheesecake bake a bit longer—about 30 minutes—so the center has time to cook gently. This subtle change can make the difference between a chewy, dry dessert and a luxuriously creamy treat.
Why Your Nose Knows Best
The aroma of a cheesecake is a powerful indicator of doneness. When the scent becomes buttery and slightly caramelized, you’re close to perfection. If it still smells like raw dairy, give it a few more minutes. Trusting your nose saves you from the dreaded “overbaked” verdict.
The 5-Minute Rest That Changes Everything
Once you remove the jars from the oven, let them sit at room temperature for exactly five minutes before covering. This brief rest allows the surface to set and reduces the risk of cracks when the cheesecake cools. A friend once skipped this step and the top cracked like a dried leaf—lesson learned.
Preventing Cracks
Cracks are the nemesis of cheesecake enthusiasts. To avoid them, keep the oven door closed and bake at a steady temperature. If you notice the surface pulling away from the sides of the jar, gently press the edges to seal. A quick fix is to slide a damp paper towel over the top during the last few minutes of baking.
Layering Flavors
Want to add a twist? Swirl in a thin layer of raspberry puree or chocolate ganache before filling the jars. The swirl creates a marbled effect and adds a burst of flavor that pairs beautifully with the vanilla base. It also gives a visual treat that’s Instagram‑ready.
Quick Cooling Trick
If you’re in a hurry, place the baked jars in a shallow pan of ice water for 10 minutes. This rapid cooling stops the cheesecake from overcooking and locks in the creamy texture. The ice bath also helps the filling set faster, so you can enjoy it sooner.
These tricks are my secret sauce. They’re not just tips—they’re the difference between a good cheesecake and a legendary one.
Creative Twists and Variations
This recipe is a playground. Here are some of my favorite ways to switch things up:
Chocolate Peanut Butter Bliss
Swapping in a tablespoon of peanut butter into the batter gives a nutty depth, while a drizzle of melted dark chocolate on top adds a decadent finish. The chocolate’s bittersweet flavor pairs wonderfully with the creamy base.
Berry Burst
Fold fresh strawberries or blueberries into the batter before baking, or top each jar with a spoonful of fruit after chilling. The berries provide a juicy contrast to the dense custard.
Citrus Zest
Replace the lemon zest with orange or grapefruit zest for a brighter, sweeter citrus profile. The citrus oils intensify the aroma and give the cheesecake a zesty kick.
Almond Crunch
Add chopped toasted almonds to the crust mixture for extra crunch and a nutty flavor. The almonds also add a subtle protein boost, making the dessert even more wholesome.
Mango Coconut
Stir in diced mango and a splash of coconut milk for a tropical twist. The mango’s natural sweetness complements the creamy base, while the coconut milk adds a silky finish.
Pumpkin Spice
Incorporate a teaspoon of pumpkin pie spice and a tablespoon of pureed pumpkin into the batter. This variation is perfect for fall and brings a comforting, warm flavor to the cheesecake.
Experimenting with these variations turns each jar into a new experience. The possibilities are endless, and the results are always delicious.
Storing and Bringing It Back to Life
Fridge Storage
Once fully chilled, store the jars in the refrigerator for up to four days. Keep them sealed with their lids or covered with plastic wrap to prevent them from absorbing odors from other foods. The cheesecake will maintain its creamy texture and remain fresh.
Freezer Friendly
For longer storage, place each jar in a freezer‑safe container and freeze for up to two weeks. When you’re ready to eat, thaw the jars in the refrigerator overnight. The texture stays smooth, and the flavor profile remains intact.
Best Reheating Method
To reheat a frozen or chilled jar, add a splash of water or milk to the bottom of the jar before microwaving. Heat on medium for 30–45 seconds, then let it sit for 15 seconds before serving. This trick steams the cheesecake back to its original silky texture, preventing it from drying out.
If you prefer an oven method, preheat the oven to 300°F and bake the jar for 10 minutes, then remove and let it cool slightly before eating. The microwave is quicker, but the oven gives a slightly richer finish.