I was standing in my kitchen, half‑listening to the neighbor’s kids screaming about a birthday cake that looked like a circus tent, when a sudden craving for something creamy, salty, and downright indulgent hit me like a freight train. I grabbed a jar of peanut butter, stared at a half‑finished chocolate mousse, and thought, “What if I could bottle the comfort of a peanut‑butter pie into a single bite‑size shooter?” That thought turned into a full‑blown experiment, and after three disastrous attempts that left my counter smelling like a burnt‑sugar factory, I finally nailed a version that makes even the most skeptical sweet‑tooth swoon. This isn’t just a quick snack; it’s a bite‑sized celebration that shouts “party” louder than a brass band on a Saturday night.
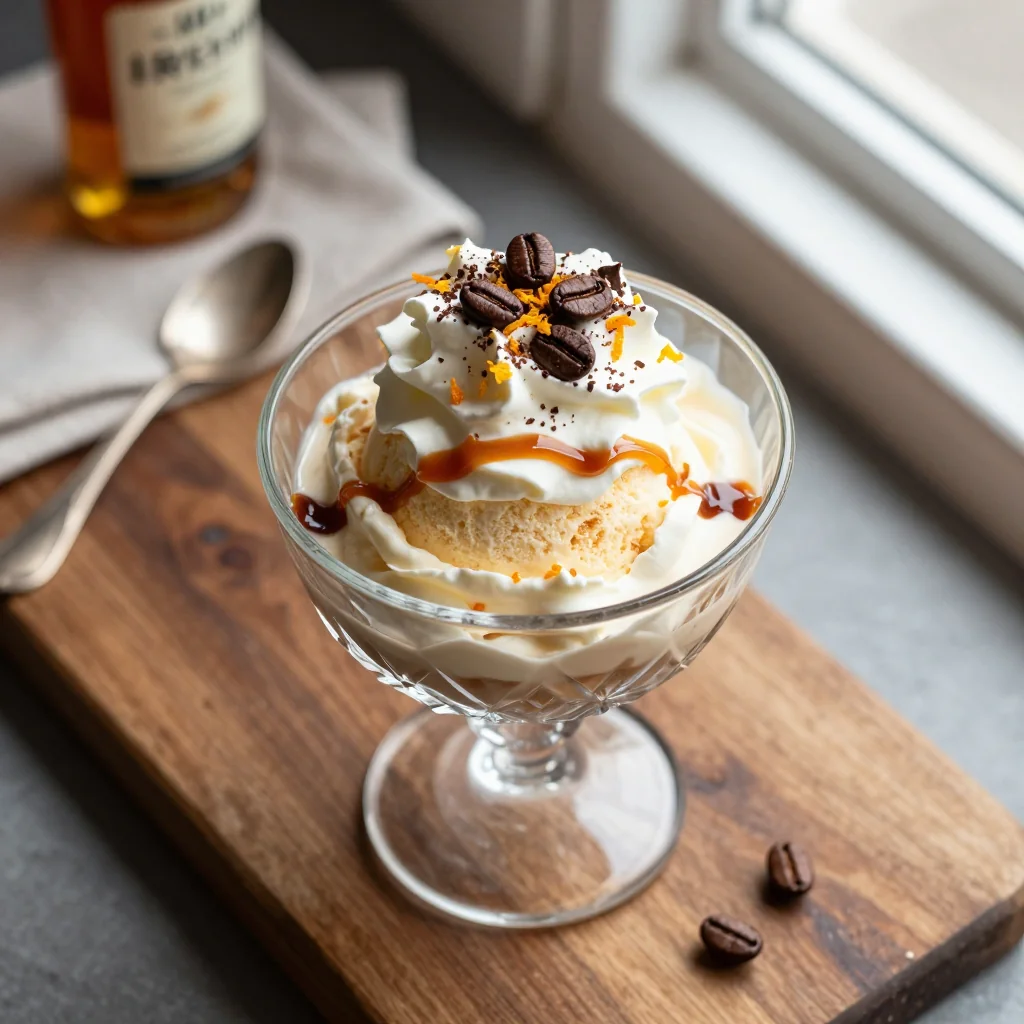
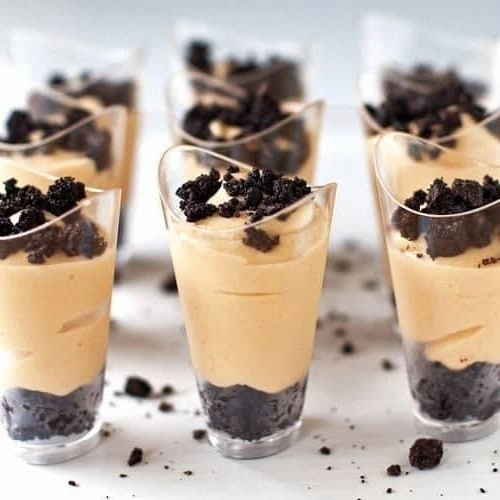
Picture this: a crisp, buttery graham‑cracker crust that crumbles like fresh‑baked shortbread, a silky peanut‑butter‑cream filling that spreads across your tongue like melted caramel, and a glossy chocolate ganache top that glistens like a midnight lake. The moment you tip the shooter, the velvety filling slides out, releasing a burst of salty‑sweet aroma that makes your nostrils do a little happy dance. The texture is a perfect contrast—crunchy crust, smooth middle, and a glossy, slightly firm chocolate cap that snaps when you bite. The whole experience feels like a mini‑dessert fireworks show, and trust me, I dare you to taste this and not go back for seconds.
Most recipes for peanut‑butter pie either drown the nutty flavor in a sea of sugar or end up with a soggy crust that looks sad on a plate. I’ve tried those, and I’ll be honest — I ate half the batch before anyone else got to try it because the first bite was pure bliss. The secret? A pinch of sea salt that amplifies the peanut butter, a dash of vanilla that rounds the flavor, and a quick chill in the freezer that sets the layers without turning them into a frozen brick. Most recipes get this completely wrong. Here’s what actually works: a no‑bake approach for the filling that preserves the peanut butter’s natural oils, and a quick bake for the crust that locks in that buttery crunch.
Now, let’s talk about the surprise ingredient that will make your shooters the talk of the town: a splash of espresso‑infused dark chocolate. It adds depth without overwhelming the peanut butter, creating a sophisticated flavor profile that feels like a dessert you’d order at a five‑star restaurant. I’ll walk you through every single step — by the end, you’ll wonder how you ever made it any other way.
What Makes This Version Stand Out
- Flavor Explosion: The combination of roasted peanut butter, a hint of espresso, and sea‑salted chocolate creates a layered taste that dances on the palate.
- Texture Harmony: Crunchy crust, creamy middle, and glossy top give you three distinct mouthfeels in one bite.
- Simplicity: No fancy equipment needed—just a shaker cup, a whisk, and a mini‑muffin tin.
- Unique Twist: Espresso‑infused ganache is the game‑changer that most copycat recipes skip.
- Crowd Reaction: Guests constantly ask for the “secret” and end up begging for the recipe.
- Ingredient Quality: Using natural, unsweetened peanut butter and high‑cocoa dark chocolate elevates the whole dish.
- Method Magic: A quick bake for the crust followed by a chill for the filling guarantees perfect set‑up.
- Make‑Ahead Potential: Assemble a day ahead, refrigerate, and serve chilled—ideal for parties.
Inside the Ingredient List
The Flavor Base
The heart of this shooter is the peanut‑butter‑cream, made from creamy, unsweetened peanut butter, softened cream cheese, and powdered sugar. Peanut butter provides that deep, roasted nuttiness, while cream cheese adds a tang that cuts through the richness. Skipping the cream cheese? You’ll end up with a filling that feels one‑dimensional and overly sweet, missing that subtle tang that balances the salt.
The Texture Crew
A sturdy crust comes from graham‑cracker crumbs, melted butter, and a whisper of granulated sugar. The crumbs give structure, the butter binds them, and the sugar caramelizes slightly during baking, creating that golden crunch. If you substitute the crumbs with crushed pretzels, you’ll introduce a salty crunch that’s delightful, but you must reduce the added salt to avoid over‑salting.
The Unexpected Star
Espresso‑infused dark chocolate ganache is the surprise element. Dissolve a shot of strong espresso into melted dark chocolate and a splash of heavy cream, then let it set. This adds a subtle bitterness that lifts the peanut butter, preventing the flavor from becoming cloying. If you’re not a coffee fan, swap espresso for a teaspoon of instant coffee granules or a pinch of cacao nibs for a similar depth.
The Final Flourish
A pinch of flaky sea salt on top of the ganache creates that magical crackle you hear when you bite, reminiscent of salted caramel. Vanilla extract rounds everything out, while a dollop of whipped cream on the side adds a light, airy contrast. Forgetting the sea salt? The shooters will taste flat, missing that pop that makes the palate sing.
Everything's prepped? Good. Let's get into the real action...
The Method — Step by Step
Preheat your oven to 350°F (175°C). While the oven warms, pulse the graham‑cracker crumbs, melted butter, and a tablespoon of sugar in a food processor until the mixture resembles wet sand. Press the crumb mixture into the bottoms of a mini‑muffin tin, using the back of a spoon to flatten each base. This is the moment of truth: the crust should feel firm to the touch, not crumbly.
Kitchen Hack: Freeze the pressed crusts for 10 minutes before baking; this prevents them from shrinking and ensures a uniform thickness.Slide the tin into the oven and bake for 8‑10 minutes, just until the edges turn a light golden brown. You’ll hear a faint sizzle as the butter caramelizes—listen for it; that’s your cue that the crust is developing that coveted crunch. Remove from the oven and let them cool completely on a wire rack; a warm crust will melt the filling later.
While the crusts cool, whisk together 8 ounces of softened cream cheese and 1 cup of natural peanut butter until the mixture is smooth and glossy. Add 1/2 cup of powdered sugar and a teaspoon of vanilla extract, then continue whisking until the sugar disappears and the texture is thick but pourable. This is where the magic starts—if you over‑mix, the air will incorporate and the filling will become too light, losing that dense, indulgent feel.
Transfer the peanut‑butter mixture into a piping bag fitted with a wide‑mouth tip. Pipe a generous dollop into each cooled crust, filling them about three‑quarters full. The filling should spread slightly, hugging the sides of the crust; if it pools at the bottom, you’ve over‑filled—scrape a little back into the bowl and keep going.
Now, for the ganache: melt 6 ounces of dark chocolate (70% cacao) with 2 tablespoons of heavy cream over a double boiler. Once smooth, stir in a shot of freshly brewed espresso and a pinch of sea salt. Let the ganache cool for 2‑3 minutes until it thickens but is still pourable. This next part? Pure magic.
Kitchen Hack: If the ganache starts to set too quickly, gently re‑heat it for 10 seconds in the microwave and stir; this keeps it glossy and easy to drizzle.Drizzle the ganache over each shooter, allowing it to cascade down the sides like a glossy waterfall. Be careful not to over‑fill; a thin veil is enough to seal the flavor.
Watch Out: Ganache can harden within minutes if the kitchen is cool—work quickly or keep the bowl in a warm water bath.Place the completed shooters in the refrigerator for at least 30 minutes. This chilling step lets the filling set and the ganache firm up without becoming rock‑hard. When you pull them out, you’ll see a glossy, slightly cracked top—picture yourself pulling this out of the fridge, the whole kitchen smelling incredible.
Just before serving, sprinkle a pinch of flaky sea salt over each ganache and add a tiny dollop of freshly whipped cream on the side for an extra lift. The salt will crackle under your teeth, and the cream adds a cloud‑like softness that balances the richness.
Serve the shooters chilled, either in the original mini‑muffin tin or gently transfer them to elegant shot glasses for a fancier presentation. This final reveal is the part where guests gasp, “Wow, this is hands down the best version you’ll ever make at home.” And if anyone asks for seconds, just smile—you’ve earned that bragging right.
That's it — you did it. But hold on, I've got a few more tricks that'll take this to another level...
Insider Tricks for Flawless Results
The Temperature Rule Nobody Follows
Never let the peanut‑butter mixture sit at room temperature for more than five minutes before piping. Warm temperatures cause the butter to separate, leading to a grainy texture. Keep the bowl in a chilled water bath while you work; the cool environment keeps the mixture glossy and pipe‑ready. A friend tried skipping this step once — let’s just say the shooters turned into a sad, oily puddle.
Why Your Nose Knows Best
When the crust is baking, trust the scent. The moment you smell a faint, buttery caramel note, pull the tray out. Over‑baking turns the base into a brittle biscuit that shatters when you bite. If you’re unsure, set a timer for 8 minutes, then check the aroma; this sensory cue is more reliable than any thermometer.
The 5‑Minute Rest That Changes Everything
After piping the filling, let the shooters rest for exactly five minutes before adding ganache. This short pause allows the peanut butter layer to firm up just enough to support the chocolate without sinking. Skipping this rest results in a soggy middle that blurs the texture hierarchy. It’s a tiny pause with a massive payoff.
Ganache Consistency Cheat
If you want a ganache that stays glossy but isn’t too runny, add a teaspoon of corn syrup after melting the chocolate. It stabilizes the emulsion, giving you a shine that survives a full hour at room temperature. This trick is especially useful for outdoor parties where the ambient temperature can fluctuate.
The Final Salt Sprinkle
Don’t just sprinkle any salt—use flaky sea salt, and do it while the ganache is still slightly warm. The salt will melt just enough to embed itself, creating tiny crystals that crackle when you bite. This final touch is the secret weapon that makes the shooters unforgettable.
Creative Twists and Variations
This recipe is a playground. Here are some of my favorite ways to switch things up:
Chocolate‑Banana Bliss
Swap half of the peanut butter for smooth banana puree, and drizzle a thin layer of white chocolate over the ganache. The banana adds a mellow sweetness that pairs beautifully with the dark chocolate, perfect for kids who love banana splits.
Spicy Mexican Mocha
Add a pinch of cayenne pepper to the ganache and a dash of cinnamon to the filling. The subtle heat elevates the espresso notes, creating a shooter that feels like a Mexican coffee latte in dessert form.
Nut‑Free Coconut Dream
Replace peanut butter with toasted coconut butter and use almond flour for the crust. This version keeps the creamy texture while catering to those with nut allergies, and the coconut aroma adds an exotic twist.
Berry‑Infused Delight
Fold a spoonful of raspberry jam into the peanut‑butter filling and top the ganache with fresh raspberries. The tart berries cut through the richness, delivering a bright burst of flavor that’s perfect for spring gatherings.
Salted Caramel Swirl
Swirl a thin ribbon of homemade salted caramel into the filling before chilling. The caramel adds a buttery, gooey element that pairs wonderfully with the salty chocolate top, making each bite a layered adventure.
Storing and Bringing It Back to Life
Fridge Storage
Keep the shooters in an airtight container in the refrigerator for up to 3 days. The chilled environment preserves the ganache’s shine and prevents the crust from becoming soggy. If you notice any condensation, pat the tops gently with a paper towel before serving.
Freezer Friendly
These shooters freeze beautifully. Wrap each mini‑muffin cup in a small piece of parchment, then place the entire tray in a zip‑top freezer bag. They’ll hold up for up to 2 months. To thaw, transfer to the fridge overnight; the texture remains intact thanks to the high‑fat content.
Best Reheating Method
When you’re ready to serve, let the shooters sit at room temperature for 10 minutes, then give each a quick 5‑second zap in the microwave on low power. Add a tiny splash of water to the ganache before microwaving; it steams back to a glossy perfection without losing its snap.