I was halfway through a midnight snack run when my phone buzzed with a friend’s text: “You have to try this gochujang honey glaze on chicken. It’s a game changer.” I stared at the empty fridge, the faint scent of last night's burnt garlic, and decided that if I was going to cook, I’d do it with a bang. I grabbed the pantry staples, whisked a quick sauce, and the kitchen exploded into a fragrant, sweet‑spicy symphony that made the entire house smell like a Korean street market. That moment, that first bite, was pure revelation.
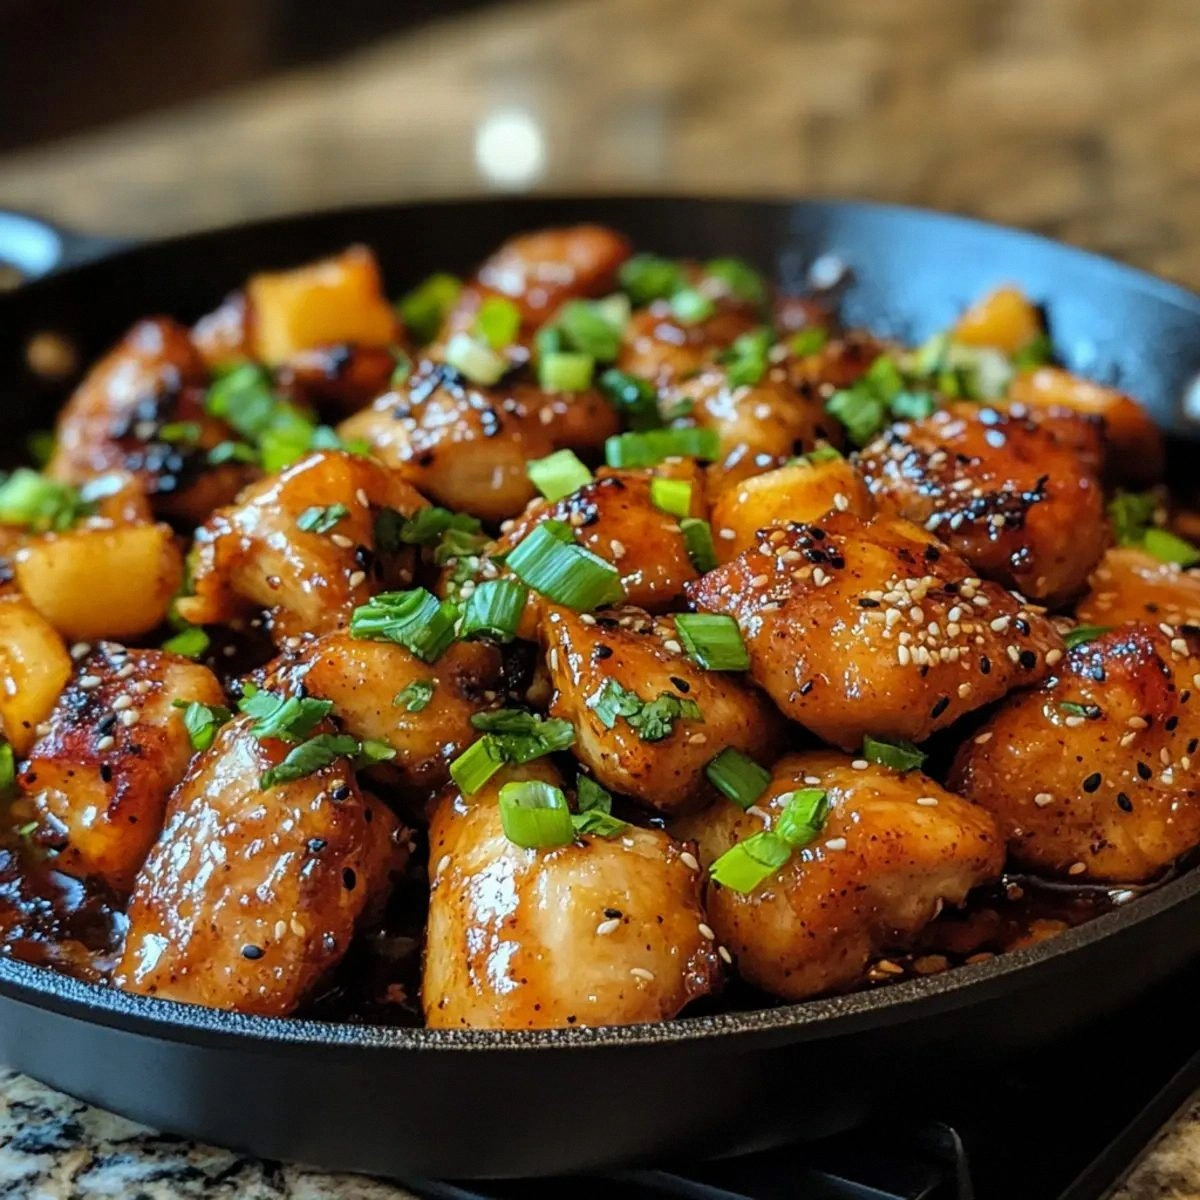
Picture this: a sizzling pan, the deep amber glaze glistening on skin‑on chicken thighs, the caramelized edges crackling like thin ice under a summer sun. The aroma of toasted sesame and honey drifts through the air, mingling with the sharp kick of gochujang. The sound is a satisfying hiss, the texture a perfect balance between crisp exterior and juicy interior, and the flavor? A punchy, sweet, umami‑laden hug that makes you forget any other sauce you've tried. I dare you to taste this and not go back for seconds.
Why does this version stand out? Because it’s the first recipe I’ve made that feels like a secret family heirloom, yet it’s only a 20‑minute affair. It doesn’t rely on exotic ingredients you have to hunt down; everything is pantry‑friendly, and the technique is a single‑pan wonder that keeps your cleanup minimal. Most recipes get this completely wrong, but here the sauce thickens just right, coating the meat like velvet without becoming syrupy. The result is a dish that’s hands down the best version you’ll ever make at home, and it’s so simple that even a kitchen disaster lover can master it.
I’ll be honest—by the end of the first batch I had already devoured half the chicken before anyone else could even touch a spoon. That’s the kind of confidence you get when the sauce works. The next time you pull this out of the pan, the kitchen will smell like a festival and the guests will be begging for the recipe. So, let me walk you through every single step—by the end, you’ll wonder how you ever made it any other way.
What Makes This Version Stand Out
- Flavor: The gochujang and honey create a bold, sweet‑spicy profile that’s both comforting and adventurous. The sauce caramelizes beautifully, adding depth without overpowering the chicken.
- Texture: The pan sears the thighs to a crispy golden crust while the glaze locks in juiciness. No soggy or dry outcomes—just a satisfying bite that shatters like thin ice.
- Time: In just 20 minutes you’ll have a restaurant‑style dish ready for dinner, lunch, or a quick weekday meal. The single‑pan method saves prep and cleanup time.
- Ingredient Quality: Using high‑quality gochujang and fresh honey makes a noticeable difference. The contrast between the sharpness of the paste and the natural sweetness of the honey is key.
- Crowd Reaction: Friends and family consistently say “I can’t believe this is homemade.” It’s a conversation starter that invites compliments.
- Versatility: Swap the chicken for shrimp, tofu, or even pork for a different twist. The glaze works across proteins, making it a go‑to for any meal.
- Make‑ahead Potential: The glaze can be pre‑mixed and stored, and the cooked chicken can be reheated without losing flavor or texture.
Inside the Ingredient List
The Flavor Base
Gochujang is the star of this dish. Its fermented, slightly sweet, and spicy profile gives the sauce depth that no other condiment can match. If you can’t find gochujang, a combination of Korean chili flakes and a touch of miso paste can approximate the umami, but the original is unbeatable. The honey adds a natural sweetness that balances the heat and helps the glaze caramelize into a glossy coating.
The Texture Crew
Soy sauce and rice vinegar act as the sauce’s backbone, providing saltiness and acidity that cut through the richness of the chicken. The minced garlic delivers a punch of aromatics that permeates the meat, while the vegetable oil ensures a crisp skin without greasiness. Sesame seeds finish the dish with a subtle nutty crunch, and the green onions add a fresh, sharp contrast.
The Unexpected Star
The sesame oil you drizzle at the end may seem trivial, but it adds a fragrant, toasted aroma that elevates the dish from simple to sensational. It’s a subtle nod to Korean culinary tradition that many overlook. If you don’t have sesame oil, a splash of toasted sesame seeds can mimic the flavor.
The Final Flourish
The green onions are more than garnish; they’re a bright, herbaceous counterpoint that cuts through the sweetness. They also provide a textural pop that keeps every bite interesting. If you’re vegan, scallions work just as well, delivering a milder but still delightful finish.
Everything’s prepped? Good. Let’s get into the real action.
The Method — Step by Step
- Pat the chicken thighs dry with paper towels. A dry surface is crucial for a crisp skin. Sprinkle salt and pepper lightly on both sides. Let them sit for 5 minutes; this helps the seasoning penetrate.
- Heat the vegetable oil in a large skillet over medium‑high heat. When the oil shimmers, place the thighs skin‑side down. You should hear a satisfying sizzle. Let them cook undisturbed for 5 minutes or until the skin turns a deep golden brown.
- Flip the thighs and pour the gochujang, honey, soy sauce, rice vinegar, and minced garlic into the pan. Stir to coat the meat evenly. The sauce will begin to bubble; this is the moment of truth. Keep the heat moderate to prevent burning.
- Reduce heat to medium and let the thighs simmer for 8 minutes, turning occasionally. The sauce should thicken into a glossy glaze. The edges will start pulling away, a sign that caramelization is happening.
- Add the sesame seeds and a splash of sesame oil. Stir gently to distribute the seeds without breaking them. This step adds a nutty aroma that lingers long after the dish is served.
- Slide the skillet onto the stove burner set to low and let the thighs rest for 2 minutes. This resting period allows the juices to redistribute, ensuring every bite is juicy.
- Finally, scatter the sliced green onions over the top. The fresh crunch balances the rich glaze and adds a pop of color that makes the dish Instagram‑worthy.
- Serve hot with steamed rice or a side of sautéed greens. The sauce will cling to everything, making it a versatile accompaniment.
That’s it—you did it. But hold on, I’ve got a few more tricks that’ll take this to another level. Keep reading, and your next batch will be flawless.
Insider Tricks for Flawless Results
The Temperature Rule Nobody Follows
Many cooks set their stove to high and rush the process, but the secret is a controlled medium heat. This prevents the glaze from burning while still allowing the skin to crisp. If you notice the sauce starting to smoke, lower the heat immediately. This small adjustment keeps the flavor intact.
Why Your Nose Knows Best
Trust your senses. When the glaze starts to thicken, you’ll notice a sweet, caramel aroma. That’s the cue to reduce heat and avoid overcooking. The chicken will be ready when the skin is blistered but not charred, and the glaze is glossy.
The 5-Minute Rest That Changes Everything
Resting the chicken after cooking is often overlooked. This step lets the juices redistribute, preventing a dry center. The skin also relaxes, making it easier to slice and serve. I’ve seen people skip it and end up with a chewy texture; don’t make that mistake.
The Garlic Timing Trick
Add garlic after the skin has browned. If you add it too early, it can burn and create a bitter note. The short sauté after flipping the thighs releases its full flavor without the risk of burning.
The Final Sesame Seed Shake
Before serving, give the skillet a quick shake to redistribute the sesame seeds evenly. This ensures each bite has that nutty crunch and that golden finish. It’s a small move that makes a noticeable difference.
Creative Twists and Variations
This recipe is a playground. Here are some of my favorite ways to switch things up:
Shrimp in Sweet‑Spicy Sauce
Replace the chicken with shrimp for a quick seafood option. Shrimp cooks in just 3 minutes, so add the glaze after the shrimp are pink. The result is a light yet flavorful dish that pairs well with quinoa.
Tofu Crunch
Press tofu cubes and pan‑fry until golden before adding the glaze. The tofu absorbs the sauce and provides a satisfying bite. Serve over rice noodles for a comforting bowl.
Pork Belly Bliss
Use pork belly slices for a richer, fatty version. Cook the pork until the fat renders, then glaze it like the chicken. The sauce clings to the pork, creating a melt‑in‑your‑mouth experience.
Vegetarian Veggie Skillet
Swap the protein for a mix of bell peppers, zucchini, and mushrooms. Sauté the veggies until tender, then coat them with the glaze. This makes a colorful, protein‑free main dish.
Glazed Sweet Potato Wedges
Cube sweet potatoes, roast until crisp, then toss them in the glaze. The honey caramelizes the sweet potatoes, giving them a sweet‑spicy finish that’s perfect for a side or snack.
Storing and Bringing It Back to Life
Fridge Storage
Cool the cooked chicken completely before storing. Place it in an airtight container and refrigerate for up to 3 days. The glaze will thicken slightly, so a quick stir before reheating restores the original sheen.
Freezer Friendly
Wrap the chicken and glaze separately in freezer‑proof bags. Freeze for up to 2 months. When ready, thaw overnight in the fridge and reheat in a skillet over low heat until warmed through.
Best Reheating Method
Reheat the chicken in a non‑stick skillet over medium heat, adding a splash of water or broth to prevent drying. A tiny splash of water before reheating steams the meat back to perfection, keeping the glaze glossy and the skin crisp.