I still remember the day I swore off carrot cake forever. It was my nephew's birthday party, and I'd spent three hours crafting what I thought would be the show-stopping centerpiece — a towering, multi-layered carrot cake with piped frosting roses so delicate they could've been in a museum. The first slice revealed a dense, gummy interior that tasted like someone had blended a spice cabinet with a bag of wet flour. The cream cheese frosting slid off in sheets, like glaciers calving into the sea. Children cried. Adults politely nibbled corners and then mysteriously needed more punch. I watched half my masterpiece get scraped into the trash while making mental vows never to attempt carrot anything again.
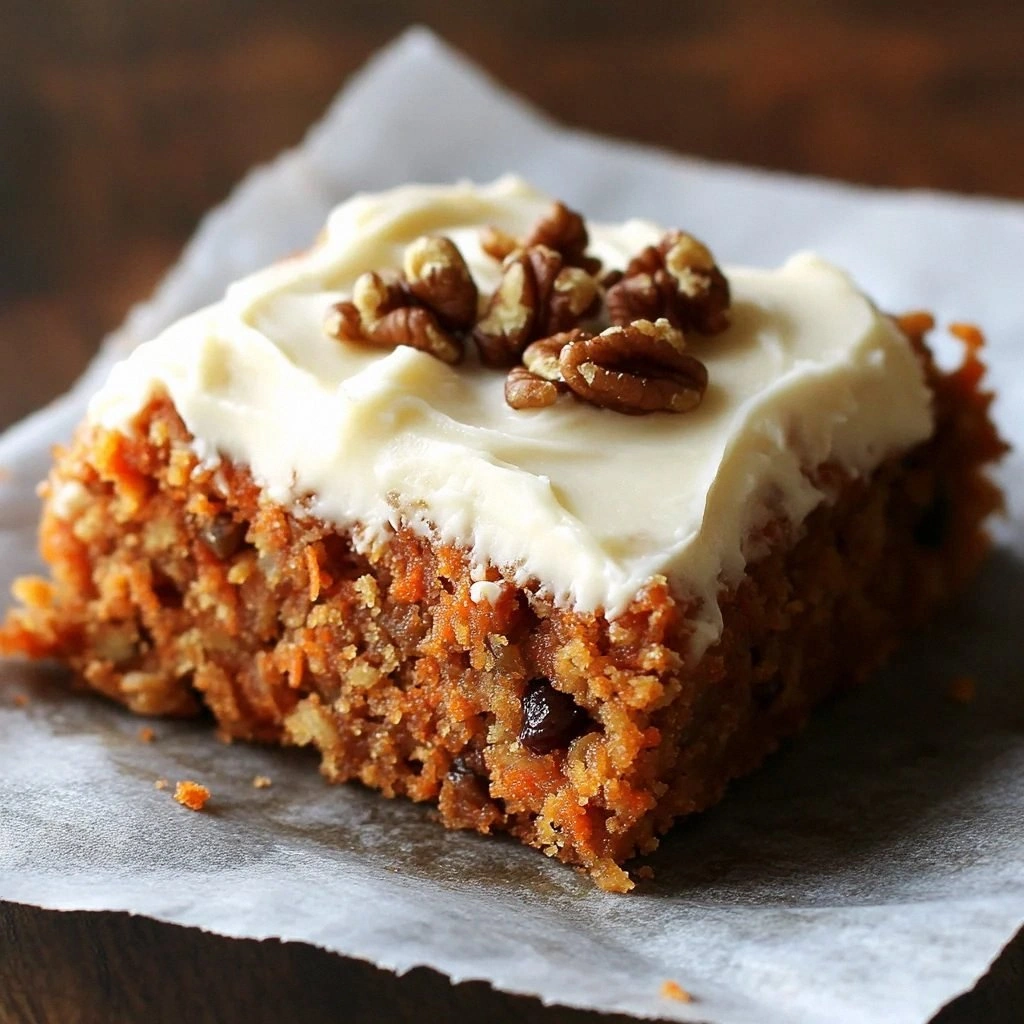
Fast forward two years, and here I am, practically bouncing with excitement to share the carrot cake bars that single-handedly restored my faith in humanity's ability to transform root vegetables into dessert magic. These aren't just good — they're the kind of good that makes you close your eyes involuntarily on the first bite, the way people do when they taste something that rewires their understanding of what dessert can be. The edges caramelize into these chewy, candy-like corners while the interior stays impossibly moist and tender. The cream cheese frosting melts across the top like silk, carrying just enough tang to make you reach for another piece before you've even finished the first. I dare you to taste this and not go back for seconds — actually, I double-dog dare you, because I ate half the batch before anyone else got to try it, and I need someone else to validate my lack of self-control.
What makes these bars different from every other carrot cake recipe out there? Picture this: instead of wrestling with layer cakes that lean like a tipsy tourist, you're spreading batter into a simple pan and ending up with perfectly portioned squares that travel like champions. The grated carrots actually stay visible, creating these gorgeous orange flecks that let everyone know you're eating vegetables (wink), while crushed pineapple sneaks in moisture and a tropical whisper that makes people ask, "Wait, what am I tasting?" The walnuts toast themselves right into the batter, releasing oils that perfume your kitchen with this nutty, buttery aroma that'll have neighbors knocking on your door with empty plates. Most recipes get this completely wrong — they treat carrots like an afterthought, but here they're the star, supported by a cast of ingredients that know exactly how to make them shine.
Okay, ready for the game-changer? We're using the oil method instead of butter, which means these bars stay moist for days (though they rarely last that long in my house). The spice blend hits that perfect nostalgic note without making you feel like you just ate a cinnamon challenge. And here's the technique twist that'll make you a convert: we're basically making carrot cake concentrate — all the flavor intensity you love, but in bar form that you can grab with one hand while holding coffee in the other. Picture yourself pulling this out of the oven, the whole kitchen smelling like warm spices and caramelized sugar, your family appearing from every corner of the house like dessert-seeking missiles. Let me walk you through every single step — by the end, you'll wonder how you ever made it any other way.
What Makes This Version Stand Out
Supreme Moisture: These bars stay lusciously tender for up to five days thanks to the oil base and pineapple trick. While traditional cakes dry out faster than your phone battery at 5%, these maintain that fresh-from-the-oven texture that makes people think you just baked them. The secret lies in how the oil coats the flour proteins, preventing them from forming tough gluten networks that turn your dessert into cardboard. Perfect Portion Control: Unlike sheet cakes that require knife skills and a prayer to cut evenly, these bars slice into picture-perfect squares every single time. Each piece delivers the ideal cake-to-frosting ratio, eliminating those awkward moments when someone gets a corner piece with barely any frosting and starts questioning their life choices. One-Bowl Wonder: Everything mixes in a single bowl, which means fewer dishes and less chance of overmixing your batter into rubber. Most recipes get this completely wrong — they have you creaming butter and sugar until your arm falls off, but we're taking the express lane to flavor town with a method so simple you'll memorize it after one round. Texture Paradise: We're talking crispy edges that shatter like thin ice, giving way to a tender crumb that practically dissolves on your tongue. The grated carrots create these tiny pockets of moisture, while optional walnuts add satisfying crunch that prevents the dreaded dessert monotony that makes you reach for your phone mid-chew. Make-Ahead Champion: These bars actually improve overnight as the spices mingle and deepen, making them the perfect dessert for dinner parties or potlucks where you want to impress without stress. Bake them Sunday, frost them Monday, serve them Tuesday, and watch people assume you spent hours in the kitchen that morning. Customizable Canvas: The base recipe welcomes mix-ins like a luxury hotel welcomes guests. Swap walnuts for pecans, add coconut flakes, throw in some ginger for zip, or keep it simple and pure — it's your party, and these bars are coming dressed however you want them. Future pacing: imagine serving these at your next gathering, watching guests' eyes light up as they discover their new favorite dessert. Crowd Psychology: Something magical happens when you serve dessert in bar form — people feel less guilty about taking one, then immediately come back for another because "they're so small." Before you know it, the pan's empty and everyone's raving about how they couldn't stop at just one. This is hands down the best version you'll ever make at home, and I'll fight anyone who says otherwise.Inside the Ingredient List
The Flavor Base
All-purpose flour provides the structural backbone that turns our carrot mixture into actual dessert rather than a sweet vegetable casserole. We're using exactly two cups — enough to give the bars body without making them dense like those fitness muffins that taste like punishment. The flour absorbs moisture from the carrots and pineapple, creating a tender crumb that holds together when you cut it but still feels delicate on your tongue. If you skip the flour entirely, you'll end up with carrot pudding (which, honestly, might not be terrible, but it's not what we're making here). For a fun twist, you can substitute up to half a cup with white whole wheat flour for a nuttier flavor that makes you feel slightly virtuous about eating dessert.
Granulated sugar does more than just sweeten — it's the secret weapon for achieving those caramelized edges that make people fight over corner pieces. The two cups might seem like overkill until you remember that carrots carry natural sweetness that needs balancing, and the pineapple adds acidic brightness that tames the sugar's intensity. As the bars bake, the sugar undergoes magical Maillard reactions, creating hundreds of new flavor compounds that make your kitchen smell like you've been hired by a bakery. Reduce the sugar at your peril — you'll end up with sad, pale bars that taste like health food, and nobody wants that kind of disappointment in their life.
The Texture Crew
Baking powder and baking soda work together like a chemical comedy duo, creating the lift that prevents our bars from becoming carrot-flavored doorstops. The baking soda neutralizes the acidic pineapple, which would otherwise give the bars a weird metallic tang, while the baking powder provides steady, reliable rise throughout baking. This double-act ensures your bars dome beautifully without collapsing into a sunken crater that screams amateur hour. If you've ever struggled with flat, dense carrot cakes, you're not alone — and I've got the fix right here in these two little leavening agents.
Vegetable oil is the moisture MVP that makes these bars stay tender for days, unlike butter-based cakes that stale faster than gossip spreads at family gatherings. The neutral flavor lets the carrots and spices shine without competing for attention, while the liquid form ensures every flour particle gets coated, preventing tough gluten development. We're using one cup — enough to make the batter pourable but not so much that your bars feel greasy like they've been sitting under a heat lamp at a convenience store. Olive oil works in a pinch, but choose a mild variety unless you want your dessert tasting like a Mediterranean vacation.
The Unexpected Star
Crushed pineapple might seem like an odd addition, but it's the moisture magician that keeps these bars impossibly tender. The enzymes in pineapple contain bromelain, which gently breaks down proteins and creates that melt-in-your-mouth texture that makes people ask for your secret. Make sure to drain it well — nobody wants soggy-bottom bars that collapse under their own weight like a bad soufflé. The pineapple's natural sweetness amplifies the carrot flavor while adding subtle tropical notes that transport you to a beach where calories don't count and dessert is always served.
Grated carrots need to be fresh, not those sad pre-shredded bags that taste like refrigerator and have the texture of plastic. Three cups might seem excessive, but they shrink during baking and provide essential moisture that keeps everything tender. The key is grating them yourself — pre-shredded carrots are too dry and won't integrate properly, leaving you with orange flecks that feel like vegetable confetti in your dessert. Choose medium carrots for the best flavor, and peel them first because nobody wants to explain why there's a carrot skin ribbon in their bite.
The Final Flourish
Walnuts and raisins are the supporting actors that elevate these bars from good to legendary, though I mark them as optional because I know some people have texture issues that I respect but don't understand. The walnuts toast themselves right in the batter, releasing oils that perfume your kitchen with nutty, buttery aromas that make neighbors question their life choices. Raisins plump during baking, becoming juicy gems that burst with concentrated sweetness against the spiced backdrop. If you've ever picked raisins out of desserts like you're mining for gold, feel free to skip them — but know that you're missing out on little pockets of caramelized joy that make grown adults close their eyes in bliss.
The spice blend — cinnamon, with a whisper of salt — creates that nostalgic flavor profile that makes people say "this tastes like my grandmother's kitchen" even if their grandmother never baked a day in her life. Cinnamon is the obvious choice, but we're using just enough to complement rather than overwhelm the carrots' natural sweetness. Salt might seem counterintuitive in dessert, but it's the flavor amplifier that makes every other ingredient taste more like itself, like a really good therapist for your taste buds. Without it, your bars will taste flat and one-dimensional, like they're missing something essential that you can't quite name.
Everything's prepped? Good. Let's get into the real action...
The Method — Step by Step
- Preheat your oven to 350°F and position the rack in the center — this isn't the time for hot spots or uneven baking that leaves you with half-raw, half-burnt bars. Grab a 9x13-inch metal pan (glass takes longer to heat and can give you soggy bottoms) and line it with parchment paper, leaving wings on the sides for easy removal later. This next part? Pure magic: spray the parchment with baking spray even though it seems excessive — trust me, nothing ruins the dessert experience like bars that cement themselves to the paper like they're trying to become one with it. The sizzle when the batter hits the hot pan? Absolute perfection, but we're getting ahead of ourselves.
- In your largest bowl — and I mean the one you usually reserve for popcorn or mixing salads — whisk together the flour, sugar, baking powder, baking soda, cinnamon, and salt for a full thirty seconds. This isn't just busywork; we're ensuring the leavening agents distribute evenly so you don't end up with volcanic craters in some spots and dense brick in others. The mixture should look like sandy beach with cinnamon swirls, and when you run your whisk through it, there shouldn't be any suspicious white lumps that scream "I'm going to ruin your dessert." Take a moment here to appreciate how the cinnamon perfumes the air like autumn decided to move into your kitchen.
- Make a well in the center of your dry ingredients — think of it as a flour volcano waiting to erupt with deliciousness. Pour in the vegetable oil and crack in the four eggs, letting them sit there looking photogenic for a second while you prepare for the next step. Here's where most recipes get it wrong — they want you to mix everything at once, but we're going to be smarter than that. Use your whisk to gently beat the eggs into the oil first, creating an emulsion that looks like sunshine in liquid form, before you even think about incorporating the flour mixture.
- Now watch this part closely: switch to a wooden spoon or spatula and begin folding the wet and dry ingredients together with slow, deliberate strokes. Stop mixing the moment you no longer see dry flour patches — the batter will look lumpy and undermixed, which is exactly what you want because we're about to add more moisture. Overmixing develops gluten and gives you bars with the texture of rubber bands, and nobody wants to exercise their jaw muscles while eating dessert. The batter should look like thick cake soup with personality, not smooth like baby food.
- Time for the star attractions: fold in the grated carrots, making sure to break up any clumps that formed while they sat there looking orange and hopeful. The batter will immediately become more voluminous and colorful, like someone just added confetti to your mixing bowl. Next, gently incorporate the drained pineapple — and I mean really drain it, pressing out excess liquid unless you want bars that weep like they're watching a sad movie. If you're using walnuts and raisins, now's their moment to shine; fold them in with just a few strokes so they distribute without turning your batter into a rainbow swirl of overmixed sadness.
- Pour the batter into your prepared pan and spread it evenly with an offset spatula or the back of a spoon. The batter will be thick and might need some convincing to reach the corners — don't be shy about using your spatula to nudge it into place like you're tucking in a delicious blanket. Give the pan a few gentle taps on the counter to release any air bubbles that might create craters in your finished bars. The surface should look slightly bumpy and rustic, like a carrot field viewed from an airplane, not smooth like a mirror.
- Slide the pan into your preheated oven and set a timer for 25 minutes, but don't go anywhere just yet. After about 15 minutes, your kitchen will start smelling like a spice market had a baby with a bakery, and that's when you know the magic is happening. The edges will begin pulling away from the sides of the pan, and the top will transform from shiny and wet to matte and slightly springy. When the timer goes off, perform the toothpick test: insert it near the center (but not in a carrot or pineapple chunk) and it should come out with just a few moist crumbs, not wet batter.
- Remove the pan from the oven and place it on a wire rack to cool completely — and I mean completely, not the "it's mostly cool except for this one hot spot" that impatient bakers try to get away with. The residual heat continues cooking the bars, and cutting them warm will result in a crumbly mess that makes you question everything you know about dessert. While they cool, the top will settle into a perfectly flat surface that cries out for frosting, and the edges will caramelize further, creating those coveted corner pieces that people will literally fight over. Resist the urge to frost them while warm unless you want your cream cheese frosting to melt into a sad, translucent film.
That's it — you did it. But hold on, I've got a few more tricks that'll take this to another level...
Insider Tricks for Flawless Results
The Temperature Rule Nobody Follows
Here's the thing that separates amateur bakers from dessert legends: your ingredients need to be at room temperature, not straight from the fridge like most people assume. Cold eggs don't incorporate properly into the oil, leaving you with a curdled-looking batter that bakes into uneven, lumpy bars. Leave your eggs on the counter for at least 30 minutes before baking, or speed up the process by placing them in a bowl of warm (not hot) water for five minutes. The oil should feel neutral to the touch, not cold and thick like it's been stored in an ice cave. This one simple step ensures everything emulsifies into a smooth, cohesive batter that bakes evenly and creates that tender crumb we're chasing. A friend tried skipping this step once — let's just say it didn't end well, and her bars had the texture of a failed science experiment.
Why Your Nose Knows Best
Professional bakers don't rely on timers alone — they use their noses as built-in quality control devices. When these bars are perfectly done, your kitchen will smell like cinnamon and caramel had a beautiful baby, with subtle nutty undertones if you added walnuts. If you catch even a whiff of burning or sharp, acrid smells, you've gone too far and need to rescue those bars immediately. The aroma should make you want to abandon whatever you're doing and hover near the oven like a dessert-seeking missile. This sensory checkpoint happens about two minutes before visual doneness, giving you the perfect window to start testing with a toothpick. Trust me, once you start baking with your nose, you'll wonder how you ever relied on blind faith and a timer that can't smell your dessert.
The 5-Minute Rest That Changes Everything
After your bars finish baking, let them rest in the pan for exactly five minutes before attempting to remove them using the parchment wings. This brief pause allows the structure to set slightly, preventing the catastrophic breakage that happens when impatience meets warm dessert. During this time, the edges will shrink back just enough to create a slight gap around the perimeter, signaling that they're ready for their dramatic exit. Run a knife around any stuck edges, then use the parchment overhang to lift the entire slab onto your cutting board in one confident motion. This technique transforms what could be a crumbly disaster into clean, professional-looking bars that make people assume you went to culinary school instead of just following a really good recipe.
Creative Twists and Variations
This recipe is a playground. Here are some of my favorite ways to switch things up:
Tropical Carrot Paradise
Replace half the crushed pineapple with an equal amount of crushed mango for bars that taste like carrot cake went on vacation to Hawaii. Add 1/2 cup of toasted coconut flakes along with the walnuts, and swap the cinnamon for a teaspoon of cardamom plus a pinch of nutmeg. The mango adds deeper, more complex sweetness while the coconut provides tropical aromatics that'll make you want to serve these with tiny paper umbrellas. This version pairs beautifully with a coconut-lime cream cheese frosting that'll have people asking if you secretly trained at a Caribbean resort.
Savory-Sweet Sophistication
For a grown-up version that works as well with coffee as dessert, reduce the sugar to 1 1/2 cups and add 2 tablespoons of finely minced crystallized ginger. The ginger adds heat and complexity while the reduced sugar lets the carrots' natural sweetness shine through. Replace the walnuts with toasted pecans and add a tablespoon of orange zest to brighten everything. This variation tastes like carrot cake that went to finishing school — refined, elegant, and sophisticated enough for your book club or dinner party.
Chocolate-Carrot Fusion
Add 1/2 cup of mini chocolate chips to the batter for bars that taste like someone couldn't decide between carrot cake and chocolate cake, so they made both. The chocolate melts into little pockets of richness that complement the spices beautifully. Use dark chocolate (60-70% cacao) for the best balance — milk chocolate makes everything too sweet, while white chocolate gets lost in the spice party. This version is especially popular with kids who think they don't like carrot cake until they discover it comes with chocolate.
Gluten-Free Without Compromise
Substitute the all-purpose flour with a 1:1 gluten-free baking blend, but add an extra egg for structure since gluten-free flours need more binding power. The bars will be slightly more tender than the original, but nobody will notice unless you're doing a side-by-side comparison. Make sure your blend contains xanthan gum, or add 1/2 teaspoon if it's not included — this prevents the bars from crumbling like a politician's promises. This version has fooled even the most devoted gluten lovers at my dinner parties.
Breakfast Bar Transformation
Reduce the sugar to 1 1/4 cups, replace the oil with melted coconut oil, and add 1/4 cup of ground flaxseed along with 2 tablespoons of chia seeds. These bars become a legitimate breakfast option that you can eat without feeling like you're having dessert for the most important meal of the day. The flax and chia add omega-3s and fiber, turning your morning treat into something that might actually be good for you. Spread them with almond butter instead of frosting for a breakfast that'll keep you full until lunch without the sugar crash.
Spice Market Adventure
Replace the cinnamon with a blend of 1/2 teaspoon each of ground ginger, cardamom, and allspice, plus a pinch of black pepper for warmth. Add 1 tablespoon of rose water along with the eggs for Middle Eastern-inspired bars that taste like they came from a Moroccan souk. Swap the walnuts for pistachios and add 1/4 cup of chopped dried apricots instead of raisins. This version pairs beautifully with a honey-orange cream cheese frosting that'll transport you to spice-scented markets where merchants sell these by the dozen.
Storing and Bringing It Back to Life
Fridge Storage
These bars keep beautifully in the refrigerator for up to five days, making them perfect for meal prep or dessert emergencies. Store them in an airtight container with parchment paper between layers to prevent the frosting from sticking and creating those tragic bald spots that make your dessert look like it's going through a rough patch. The cold actually improves the texture, allowing the spices to meld and deepen while the frosting firms up to the perfect consistency. If you're storing unfrosted bars, wait until they cool completely, then wrap them tightly in plastic wrap before placing in the container — this prevents them from absorbing fridge odors that might make them taste like last week's leftover curry. Bring them back to room temperature for 30 minutes before serving, or enjoy them cold for a firmer, more fudgy experience that tastes like carrot cake ice cream without the brain freeze.
Freezer Friendly
These bars freeze like champions, maintaining their texture and flavor for up to three months when properly stored. Cut them into individual portions first — trying to slice frozen bars is like attempting surgery with a spoon, and you'll end up with crumbly casualties. Wrap each bar tightly in plastic wrap, then place them in a freezer bag with the air squeezed out like you're preparing them for space travel. For best results, freeze them unfrosted and add fresh cream cheese frosting after thawing, but frosted bars freeze fine too — just expect the frosting to be slightly less fluffy upon revival. Label the bag with the date because "I'll remember" is the biggest lie we tell ourselves, right after "I'll just have one piece."
Best Reheating Method
While these bars are delicious cold, sometimes you want that fresh-from-the-oven experience without actually baking again. The microwave works in a pinch — 10-15 seconds for a single bar — but it can make the frosting melt into a puddle of disappointment. My preferred method is placing a bar on a piece of foil in a 300°F oven for 5-7 minutes, which warms everything through without turning your frosting into soup. Add a tiny splash of water to the foil before sealing it into a packet — it steams back to perfection, reviving the texture so successfully that guests will think you just pulled a fresh batch from the oven. This technique works especially well for frozen bars, taking them from icy to incredible in under 10 minutes.