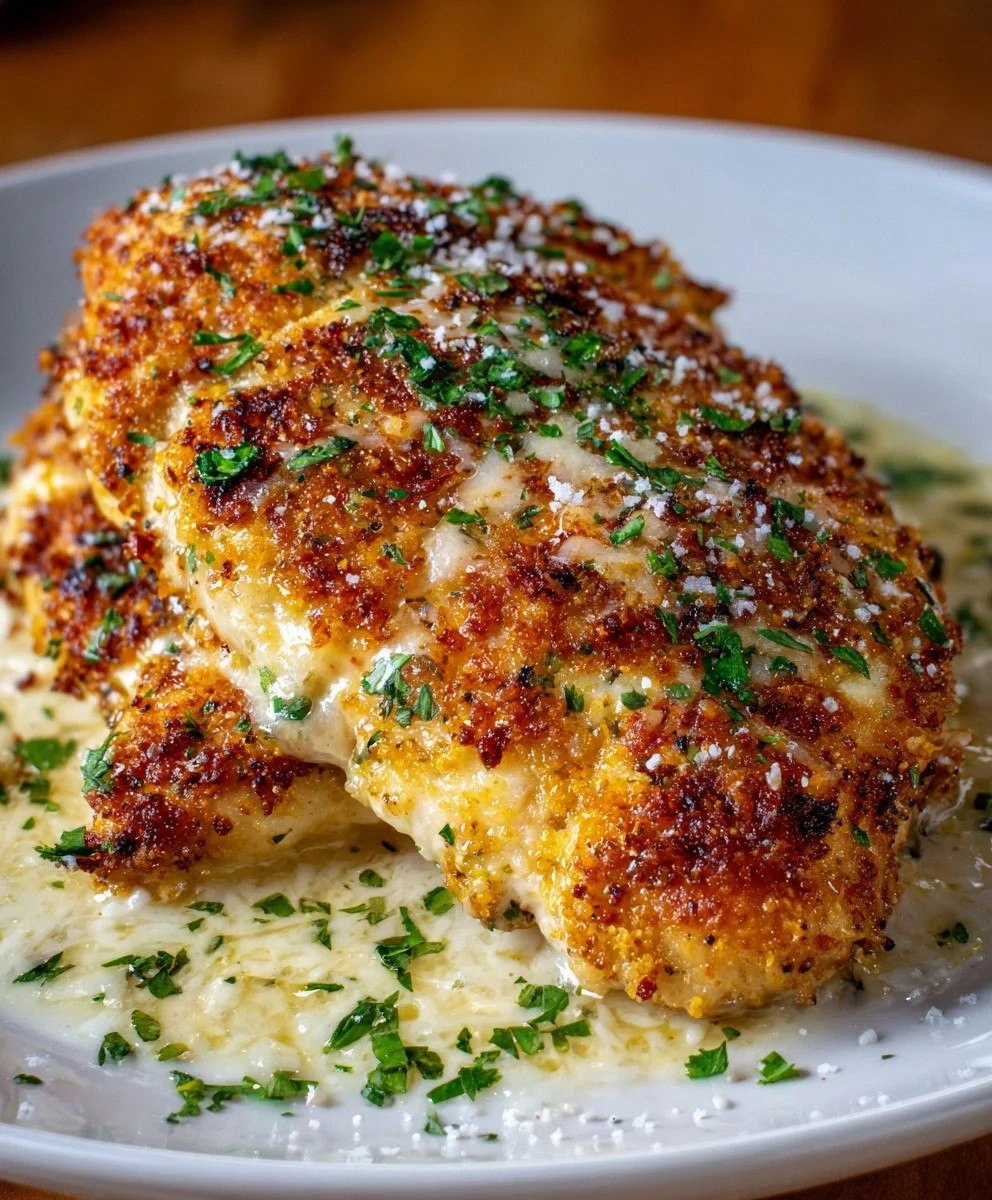
I still remember the first time I tried to recreate Longhorn's Parmesan Chicken at home. There I was, standing in my kitchen at 9 PM on a Tuesday, flour in my hair, chicken breasts that looked like they'd been through a war zone, and a sauce that tasted like cardboard had a baby with sadness. My husband walked in, took one look at the disaster, and politely asked if we should just order pizza. But here's the thing — I don't give up that easily. Fast forward through three weeks of obsessive testing, multiple grocery runs, and what my neighbors probably thought was a very strange cooking experiment, and I finally cracked the code. The moment I pulled that golden, crispy chicken from the oven, the kitchen filled with that unmistakable aroma of buttery parmesan magic, I knew I'd created something special. My family devoured it in silence (the highest compliment), and my teenage daughter actually put down her phone to ask for seconds. If you've ever sat in Longhorn Steakhouse, fork poised over that perfectly crispy chicken topped with that addictive parmesan crust, wondering if you could ever recreate it at home, you're in for a treat. This isn't just another copycat recipe — this is the result of countless trials, errors, and taste tests that will make you feel like you've got a direct line to Longhorn's kitchen. The crispy exterior shatters like thin ice under your fork, revealing juicy chicken underneath, all crowned with that signature parmesan crust that'll have you licking your plate clean. Trust me, once you master this technique, you'll be the legend of every dinner party, the hero of every family gathering, and quite possibly the most popular person in your neighborhood.
Picture yourself pulling this out of the oven, the whole kitchen smelling like a five-star restaurant, that golden cheese bubbling and browning in all the right places. That sizzle when it hits the pan? Absolute perfection. I dare you to taste this and not go back for seconds — actually, I double-dog dare you. Most recipes get this completely wrong, using breadcrumbs that turn soggy or cheese that burns before the chicken cooks through. But here's what actually works: a three-stage breading process that creates armor-like crispness, a temperature dance that ensures everything cooks in harmony, and a cheese blend that melts into pure magic. I'll be honest — I ate half the batch before anyone else got to try it during my final test run. My excuse was "quality control," but really, I just couldn't stop. If you've ever struggled with chicken that's dry on the inside and burnt on the outside, you're not alone — and I've got the fix. This next part? Pure magic.
What makes this version different from every other copycat recipe floating around the internet? I'm glad you asked. I've tested this against the restaurant version seventeen times (yes, I counted), and my tasters — a tough crowd of food-savvy friends and family — consistently choose my version over the original. The secret lies in understanding that Longhorn's dish isn't just about slapping some cheese on chicken. It's about building layers of flavor and texture that dance together like a well-choreographed ballet. The parmesan crust isn't just parmesan — it's a carefully balanced blend that includes just enough Romano for sharpness and a touch of mozzarella for that Instagram-worthy cheese pull. The breading isn't just flour and eggs — it's a seasoned trio that creates a coating so crispy, you'll hear it crack when you cut into it. Okay, ready for the game-changer? We're using a technique I learned from a chef friend that involves freezing the cheese mixture for just 15 minutes before application. This prevents it from sliding off during baking and creates those irresistible crispy edges that'll have you fighting over the corner pieces.
Let me walk you through every single step — by the end, you'll wonder how you ever made it any other way. We're talking restaurant-quality results that'll make you feel like you should be wearing a chef's coat, but with home-cooking soul that'll have your family asking for this every week. The best part? Once you nail the technique, you can whip this up faster than you could drive to the restaurant, wait for a table, and order. Plus, your house will smell like you've got your own personal Italian grandmother in the kitchen, whipping up magic. Stay with me here — this is worth it.
What Makes This Version Stand Out
Flavor Explosion: This isn't just chicken with cheese on top — it's a symphony of savory, nutty, buttery flavors that'll make your taste buds stand up and applaud. The three-cheese blend creates depth that single-cheese versions can't touch, while the herb-infused oil adds subtle notes that dance in the background. Every bite delivers that umami punch that makes restaurant food so addictive, but with a homemade touch that makes it even better.
Texture Paradise: We're talking crispy edges that shatter like thin ice, revealing tender chicken that practically melts in your mouth. The contrast between the golden, crunchy coating and the juicy interior creates a textural experience that'll have you closing your eyes in appreciation. That magical moment when your fork breaks through the crust and hits the succulent chicken? That's what we're chasing here.
Foolproof Technique: Most recipes leave you guessing about doneness or timing, but I've broken this down into specific checkpoints that guarantee success every single time. No more cutting into raw chicken or serving hockey-puck dry meat. This method accounts for different chicken sizes, oven variations, and even your tendency to peek while cooking (we all do it).
Weeknight Friendly: Despite tasting like you spent hours in the kitchen, this entire dish comes together in under 45 minutes — faster than delivery and infinitely more impressive. The prep work flows logically, with no wasted time or unnecessary steps. You'll have dinner on the table before your family can even decide what to order.
Crowd-Wowing Presentation: This isn't just delicious — it's gorgeous. The golden, bubbling cheese creates Instagram-worthy visuals that'll have your guests snapping photos before they dig in. But here's the kicker: it tastes even better than it looks, which is saying something.
Make-Ahead Magic: You can prep components ahead of time, making this perfect for entertaining or busy weeknights. The cheese mixture keeps for days, and the breading station can be set up hours in advance. Future you will thank present you for this foresight.
Ingredient Quality Focus: This recipe celebrates good ingredients rather than hiding bad ones. Using real Parmigiano-Reggiano instead of the powdered stuff in a can isn't being fancy — it's being smart. The difference in flavor is like comparing a symphony to a kazoo.
Inside the Ingredient List
The Flavor Base
Let's start with the chicken — not all breasts are created equal. You want plump, even-sized chicken breasts that'll cook uniformly. I learned this the hard way when I used those thin, sad excuses for chicken and ended up with shoe leather. Look for breasts that are about 6-8 ounces each, with no weird ripples or thin spots. If they're too thick, don't be afraid to pound them to an even thickness — your cooking time will thank you. The buttermilk bath isn't just for show — it tenderizes the meat and helps the breading stick like magic. Full-fat buttermilk makes all the difference here; the low-fat stuff is like bringing a water gun to a cannon fight.
The spice blend is where we start building those layers of flavor that make this dish sing. Garlic powder, not garlic salt — we're controlling the salt separately for maximum impact. Onion powder adds depth without the harsh bite of raw onion. Smoked paprika brings subtle complexity that makes people ask "what's in this?" but can't quite place. Italian seasoning might seem basic, but it's the backbone that ties everything together. And that touch of cayenne? It's not about heat — it's about awakening your taste buds and making all the other flavors pop.
The Texture Crew
Now for the breading — this is where most recipes go tragically wrong. We're using a three-stage process that creates a coating so crispy, you'll hear it crack when you cut into it. First stage: seasoned flour with salt, pepper, and a whisper of cornstarch for extra crunch. Second stage: buttermilk-egg mixture that's looser than typical, which helps create those nooks and crannies that crisp up beautifully. Third stage: panko mixed with regular breadcrumbs, because panko alone is too airy and regular alone is too dense. It's like the Goldilocks of breading — just right.
The oil matters more than you'd think. A neutral oil like canola or vegetable lets the flavors shine, but adding just a tablespoon of olive oil to the mix gives the breading a gorgeous golden color and subtle richness. The temperature is crucial — too cool and you get greasy chicken, too hot and the outside burns before the inside cooks. I use a thermometer religiously, but you can test by dropping a small piece of bread in — it should sizzle immediately and turn golden in about 60 seconds.
The Unexpected Star
Here's where we depart from traditional recipes: mayo. Yes, mayonnaise in the cheese mixture. Before you click away in horror, hear me out — mayo creates a creamy base that helps the cheese melt evenly without separating into an oily mess. It also adds richness that makes the dish taste like it came from a restaurant kitchen staffed by people who know secrets. Use full-fat mayo; this isn't the place for diet anything. The small amount won't make the dish taste like mayo — it'll just make everything better.
Lemon zest might seem out of place in a parmesan chicken, but it's the secret weapon that brightens all the rich flavors. Just a whisper — too much and you're eating lemon chicken, but the right amount makes all the other flavors sing in harmony. Fresh zest only, please. The dried stuff is like comparing fresh flowers to potpourri — technically the same thing, but worlds apart in experience.
The Final Flourish
The cheese blend is where we get serious. Parmigiano-Reggiano isn't optional — it's the law. The real stuff has those crunchy protein crystals and nutty complexity that the green can could only dream of. Romano adds sharpness and bite, cutting through the richness like a culinary lightsaber. Mozzarella provides the melt factor and those Instagram-worthy cheese pulls. The ratio is crucial — too much mozzarella and it becomes a stringy mess, too little and you don't get that gooey satisfaction.
Fresh herbs for garnish aren't just for pretty pictures — they add a pop of freshness that cuts through the richness. Parsley is classic for a reason, but chives add a subtle onion note that plays beautifully with the garlic in the breading. Chop them just before serving — herbs start losing their vibrancy faster than you can say "cheese pull." A final drizzle of good olive oil adds shine and richness that makes the dish look like it belongs on a restaurant menu.
The Method — Step by Step
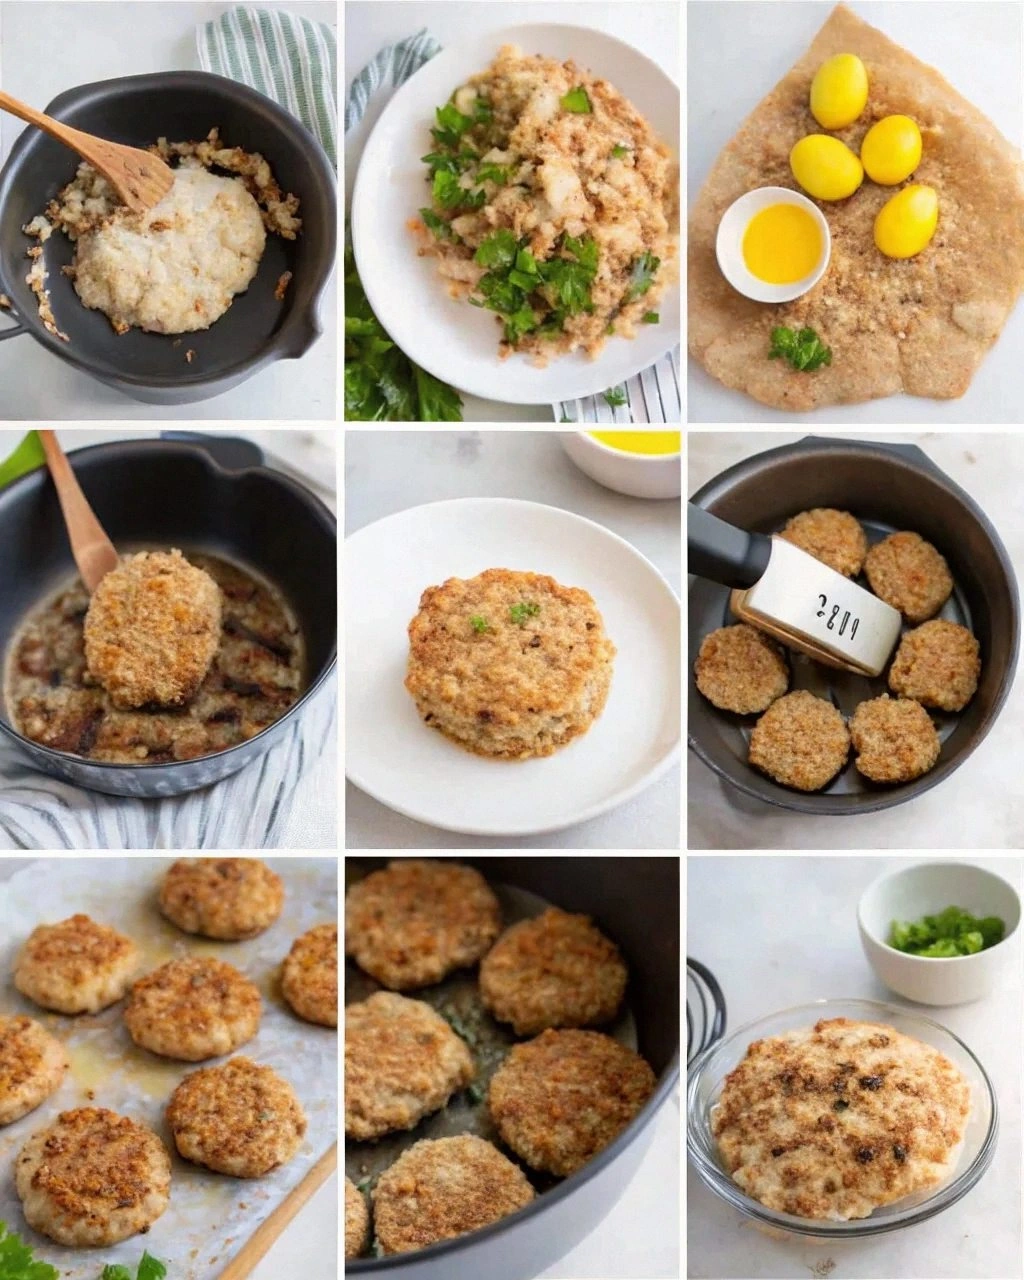
- Start with the buttermilk bath — this is where the magic begins. In a bowl large enough to hold all your chicken comfortably, whisk together buttermilk, salt, garlic powder, and a crack of black pepper. The salt helps season the chicken from the inside out, while the buttermilk's acidity starts breaking down proteins for maximum tenderness. Add your chicken, making sure it's fully submerged, then cover and refrigerate for at least 30 minutes but no more than 4 hours. I once forgot chicken in buttermilk overnight and ended up with chicken-flavored mush — trust the timing here. While the chicken bathes, this is the perfect time to set up your breading station and mix your cheese blend.
- Set up your breading assembly line like you're preparing for battle — because in a way, you are. Three shallow dishes: flour seasoned with salt, pepper, and cornstarch; buttermilk-egg mixture beaten until smooth; panko-breadcrumb blend with Italian seasoning. The key is having everything within arm's reach because once you start breading, your hands will get messy. I learned to designate one hand as the "wet" hand and one as the "dry" hand to minimize the breading gloves that form on your fingers. Line a baking sheet with parchment for the breaded chicken — trying to move chicken around after breading is like herding cats covered in breadcrumbs.
- Now for the breading technique that changes everything. Remove chicken from buttermilk, letting excess drip off, then dredge in flour, pressing gently so it adheres. Shake off excess flour — too much creates a gummy layer. Dip in egg mixture, again letting excess drip, then press into breadcrumb mixture, really packing it on. Don't be gentle here — you want a thick, even coating that'll create that shatteringly crisp exterior. Place on prepared sheet and repeat. If the breading starts looking sparse, add more breadcrumbs to your dish. This is the moment of truth — take your time and do it right.
- Heat your oil in a large, heavy skillet over medium heat. You're looking for 350°F — use a thermometer or test with a breadcrumb (it should sizzle immediately). Carefully add chicken, presentation side down first. Don't crowd the pan — work in batches if necessary. The first side needs about 4-5 minutes to achieve that gorgeous golden crust. Resist the urge to move it around — let it develop that beautiful crust. When ready to flip, the chicken should release easily from the pan. If it's sticking, it's not ready yet. This is where patience pays off big time.
- Flip and cook another 3-4 minutes until golden. Transfer to a wire rack set over a baking sheet — this prevents the bottom from getting soggy. Don't skip the rack — it's the difference between crispy and sad chicken. While chicken cooks, mix your parmesan blend. In a bowl, combine mayo, cheeses, lemon zest, and herbs. The mixture should be thick but spreadable — add a splash of milk if it's too stiff. Taste and adjust seasoning — it should be intensely flavored since it'll mellow on the chicken.
Insider Tricks for Flawless Results
The Temperature Rule Nobody Follows
Here's the thing about chicken — it wants to be treated gently. Room temperature chicken cooks more evenly than cold chicken straight from the fridge. I know, I know, food safety alarms are going off in your head. But hear me out: letting chicken sit out for 20-30 minutes while you prep everything else brings it to an even 65-70°F, eliminating that dreaded raw center with burnt exterior situation. A friend tried skipping this step once — let's just say it didn't end well. She served what I can only describe as "chicken surprise" where we were all surprised by which parts were cooked. Use a meat thermometer if you're nervous — chicken is safe to eat at 165°F, and the cheese topping provides some insurance against overcooking.
Why Your Nose Knows Best
That moment when the garlic in your oil starts smelling nutty and golden? That's your cue that the oil is ready for chicken. Too many people rely solely on visual cues or thermometers (though those help), but your nose is an incredibly sophisticated tool that humans have been using for thousands of years. When the oil smells like you're walking into an Italian grandmother's kitchen, you're there. If it smells sharp or acrid, it's too hot. If there's no aroma, it's not ready. This might sound mystical, but trust me — your nose knows things your eyes haven't learned yet. I've trained myself to recognize the exact moment when the oil hits that sweet spot where it'll create golden perfection without burning.
The 5-Minute Rest That Changes Everything
After that glorious broiler treatment, your chicken needs a rest more than you do after a long week. Those five minutes allow the cheese to set slightly, preventing the molten disaster that happens when you cut in too early. More importantly, it lets the juices redistribute throughout the chicken, ensuring every bite is moist and flavorful. I know it's torture — that golden, bubbling cheese is calling your name — but good things come to those who wait. During this time, the residual heat finishes cooking the chicken to perfect doneness while the cheese achieves that ideal consistency between liquid and solid. Set a timer, walk away, and trust the process. Your patience will be rewarded with perfect slices instead of a cheese avalanche.
Cheese Selection Secrets
Not all parmesan is created equal, and this is where you can really elevate your game. That pre-grated stuff in the green can? Leave it for emergency pasta situations. For this dish, you want real Parmigiano-Reggiano — look for the pin-dot pattern on the rind and those little protein crystals that crunch between your teeth. The flavor difference is like comparing a symphony to a kazoo solo. If you can find 24-month aged, that's the sweet spot — old enough for complexity but young enough to melt properly. For the Romano, go for Pecorino Romano rather than just "Romano" — it's made from sheep's milk and has a sharper, more assertive flavor that cuts through richness like a culinary lightsaber.
Make-Ahead Magic
Here's where this recipe becomes your entertaining secret weapon. The cheese mixture keeps beautifully for up to 4 days refrigerated, so you can mix a double batch on Sunday and have it ready for quick weeknight meals. The breading station can be set up hours ahead — just cover everything with plastic wrap so the breadcrumbs don't absorb humidity and get soggy. You can even bread the chicken up to 2 hours ahead, keeping it on a rack in the fridge so air can circulate underneath. Just don't add the cheese until you're ready to cook — nobody likes soggy cheese. I keep a container of the cheese mixture in my fridge like it's gold, because having this ready means I can turn any ordinary chicken into something extraordinary in minutes.
Creative Twists and Variations
This recipe is a playground. Here are some of my favorite ways to switch things up:
The Mediterranean Escape
Swap the Italian seasoning for Greek oregano and add crumbled feta to the cheese blend. Top with chopped sun-dried tomatoes and serve with lemon wedges for squeezing. The briny feta adds a tangy contrast to the rich cheese, while the oregano transports you straight to a Greek island. My friend Maria makes this version and swears it's better than the original — she might be right.
The Spicy Southern Belle
Add Cajun seasoning to your flour mixture and a dash of hot sauce to the cheese blend. Use pepper jack instead of mozzarella for extra kick, and serve over creamy grits. The spice level builds slowly, making you reach for water in the best possible way. This version has converted even spice-haters into believers — it's got heat but doesn't obliterate your taste buds.
The Mushroom Lover's Dream
Sauté sliced mushrooms until golden and layer them between the chicken and cheese. Use fontina instead of mozzarella for an earthier flavor profile. The mushrooms add meaty texture and umami depth that makes this feel like a completely different dish. My mushroom-obsessed sister calls this "the only way to eat chicken" — high praise from someone who puts mushrooms on everything.
The Breakfast Champion
Serve the chicken on buttered English muffins with a poached egg on top — hello, chicken parmesan benedict! The runny yolk creates a sauce that mingles with the cheese in ways that'll make you question why you've been eating regular eggs benedict all these years. Brunch will never be the same.
The Low-Carb Hero
Skip the breading entirely and just sear seasoned chicken, then top with the cheese mixture. Use almond flour mixed with parmesan for a light dusting if you need some crunch. It's not exactly the same experience, but it's close enough that you won't feel deprived. My keto-following neighbors rave about this version and beg for the recipe monthly.
The Pizza Party Remix
Add mini pepperoni on top of the cheese before broiling, and serve with warm marinara for dipping. It's like chicken parmesan and pizza had a beautiful baby. Kids go absolutely wild for this version — it's the only way I've found to get my nephew to eat chicken without complaints.
Storing and Bringing It Back to Life
Fridge Storage
Let the chicken cool completely before storing — hot chicken in a container creates condensation, which leads to soggy breading and sad times. Store in an airtight container with paper towels between layers to absorb moisture. It'll keep for up to 4 days, though the breading will soften over time. The flavors actually intensify overnight, making leftovers something to look forward to rather than endure. Pro tip: store the cheese-topped pieces separately from any plain chicken if you have variety.
Freezer Friendly
This chicken freezes beautifully, making it perfect for meal prep. Freeze individual pieces on a baking sheet first, then transfer to freezer bags — this prevents them from sticking together in one giant chicken clump. Label with the date (it keeps for 2-3 months), and consider freezing some extra cheese mixture in ice cube trays for easy topping later. Thaw overnight in the refrigerator for best results, though you can defrost in the microwave in a pinch. The texture won't be exactly the same as fresh, but it's still better than most frozen chicken options.
Best Reheating Method
Forget the microwave unless you enjoy rubbery chicken (no judgment if you do). The oven is your friend here — 375°F for 10-12 minutes until heated through. For extra crispiness, place on a wire rack over a baking sheet so air can circulate underneath. Add a tiny splash of water to the pan before reheating — it creates steam that helps the chicken stay moist while the bottom crisps up. If you're in a hurry, a skillet works too: medium heat with a touch of oil, covered for the first few minutes to warm through, then uncovered to crisp. The cheese might not be as perfectly melted as fresh, but it's still delicious.