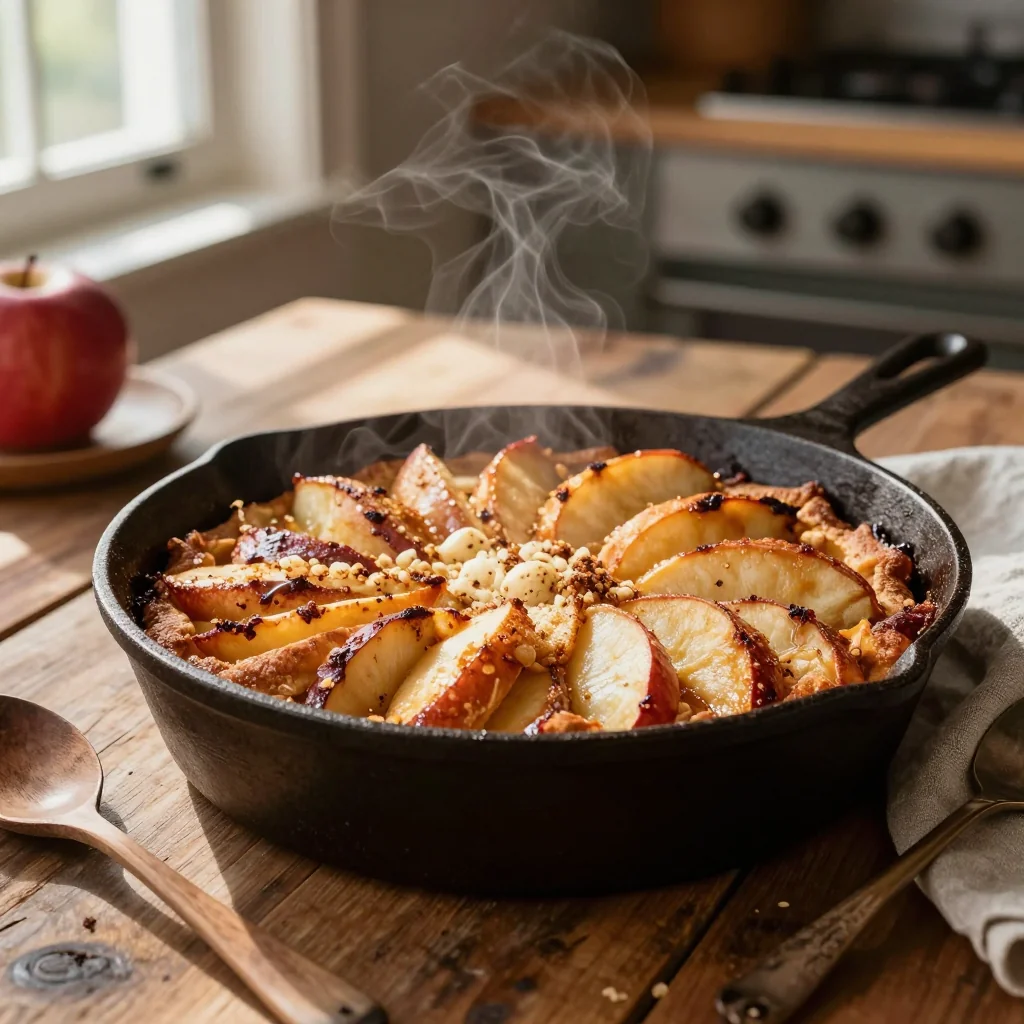
A warm, buttery crust hugging sweet, cinnamon‑spiced apples—comfort in every bite.
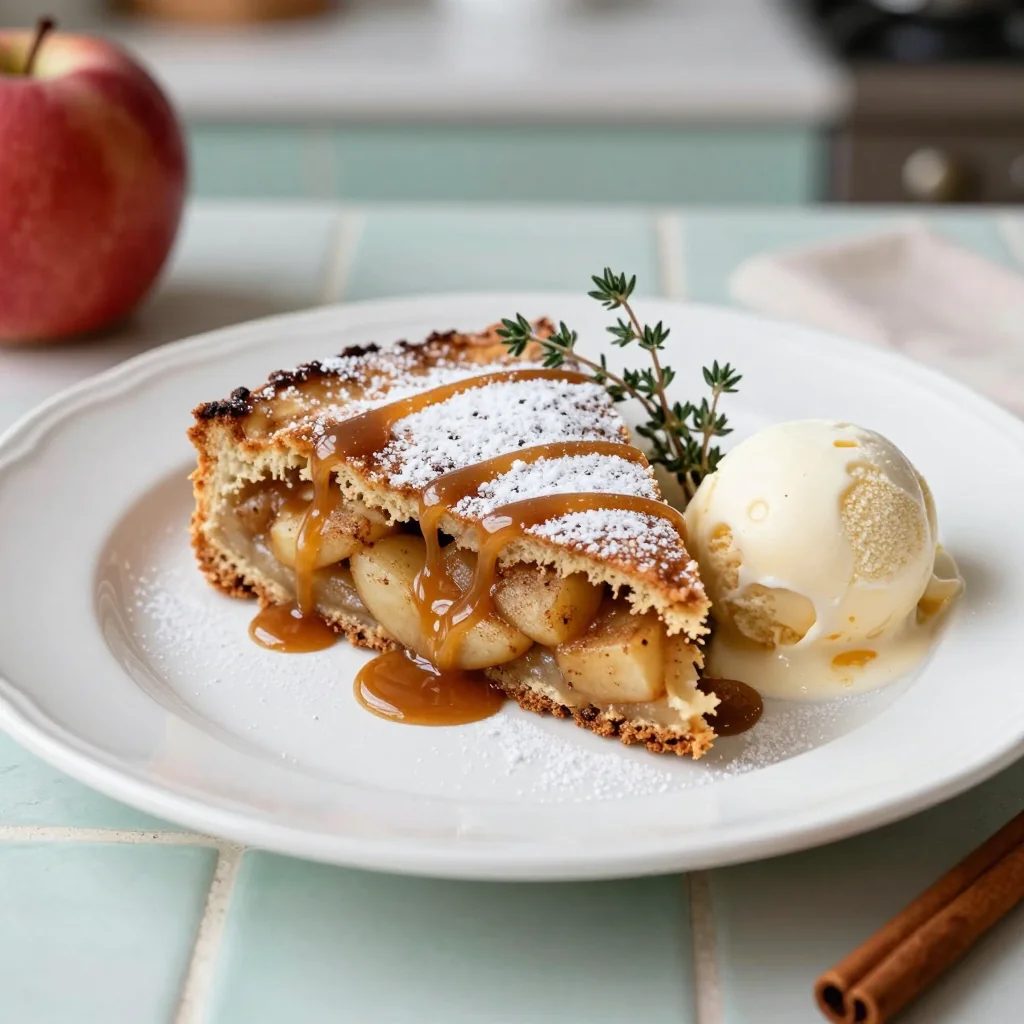
When I was ten, my grandmother’s kitchen smelled like autumn evenings: crisp apples, sweet cinnamon, and a buttery crust that seemed to melt in the air. She would pull a steaming apple cobbler from the oven, let the aroma curl around the room, and we’d gather around the table, each of us waiting for that first golden forkful. That memory sparked my lifelong love for rustic desserts that feel like a warm hug.
Apple cobbler has its roots in early American frontier cooking, where settlers turned simple pantry staples—flour, butter, and fruit—into hearty meals that could feed a family after a long day in the fields. Over the centuries, the dish evolved, embracing regional twists and the occasional dash of exotic spice. My version adds a generous pinch of cinnamon, creating a fragrant bridge between sweet and spice that makes the cobbler unforgettable.
In this article you’ll discover a step‑by‑step method that guarantees a perfectly crisp topping and a luscious, juicy filling every time. I’ll share the science behind why the crust rises, how to select the best apples, and tricks to keep the crumble light even when you double the recipe.
So roll up your sleeves, preheat the oven, and let’s bring a piece of my childhood into your own kitchen. Your taste buds are in for a treat!
🌟 Why This Recipe Will Win Your Heart
Apple Cobbler with Cinnamon isn’t just another dessert; it’s a celebration of texture, flavor, and nostalgia all baked into one pan.
- ✨ Perfect Balance of Sweet and Spice: The cinnamon infuses the apples with warmth without overpowering their natural sweetness, creating a harmonious flavor profile.
- ✨ Foolproof Crumb Topping: Using a blend of butter, flour, and a touch of brown sugar, the topping becomes crisp on the edges yet tender in the center.
- ✨ Flexible Serving Options: Serve it warm with vanilla ice cream, a dollop of whipped cream, or even a drizzle of caramel for an elevated experience.
- ✨ Seasonal All‑Year Appeal: While apples are at their peak in fall, frozen apples work beautifully, making this dish suitable any time of year.
- ✨ Minimal Equipment Required: One baking dish, a mixing bowl, and a whisk are all you need—perfect for small kitchens.
- ✨ Crowd‑Pleaser: Its comforting aroma and familiar flavors make it a hit at family gatherings, potlucks, and holiday tables.
🥗 Ingredients
📝 Complete Ingredient List
For the Fruit Filling:
For the Biscuit Topping:
For the Optional Streusel (adds crunch):
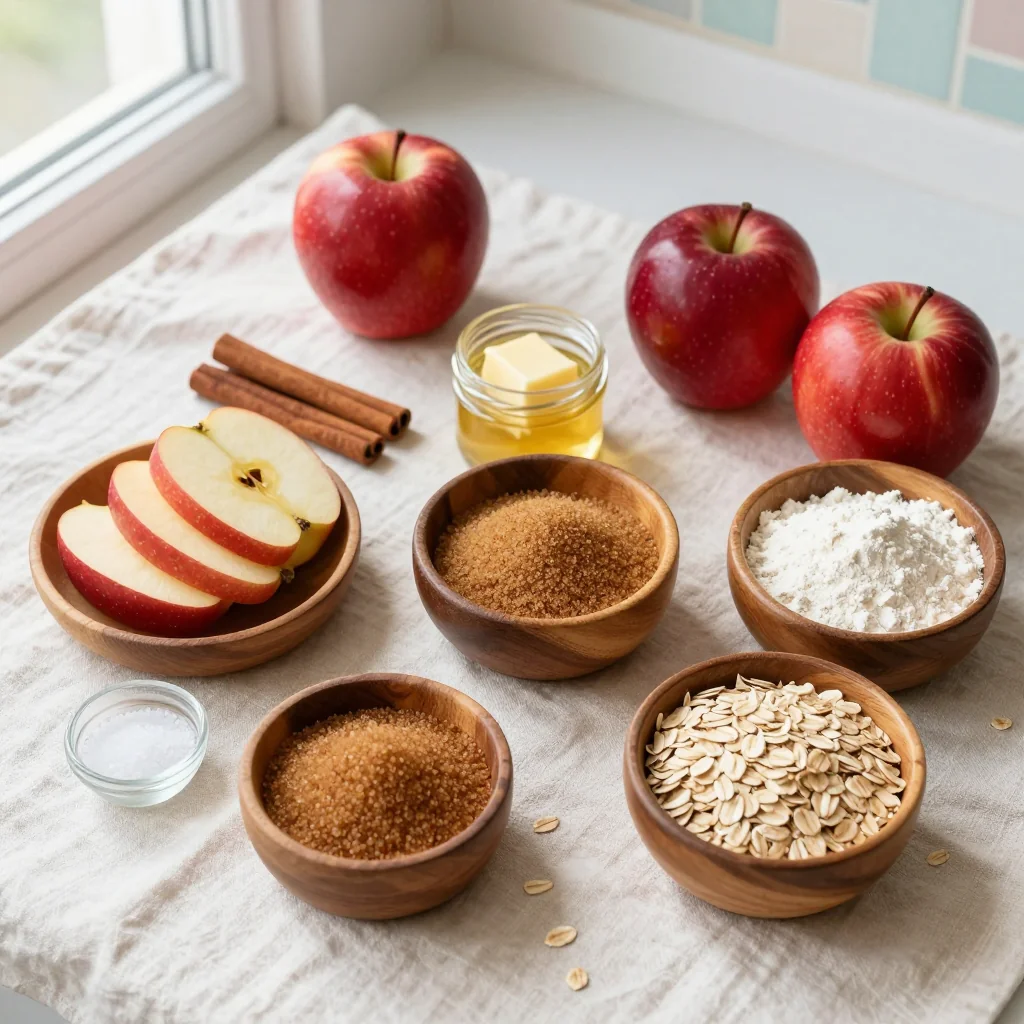
🔍 Focus on Key Ingredients
Apples (Granny Smith or Honeycrisp)
These varieties hold their shape during baking, providing a pleasant bite while releasing just enough juice to mingle with the cinnamon. Choose apples that are firm to the touch; a slight tartness balances the sweet crumble. If you buy pre‑sliced apples, rinse them briefly in cold water to prevent browning.
Cinnamon
Ceylon cinnamon offers a delicate, sweet aroma, whereas Cassia provides a bolder, spicier punch. For this cobbler, I prefer Cassia because its robust flavor stands up to the caramelization of the apples. Freshly ground cinnamon releases essential oils that enhance the overall scent of the dish.
Unsalted Butter
Butter is the heart of the topping, creating a tender crumb that fluffs as it bakes. Using unsalted butter lets you control the salt level precisely, ensuring the crust isn’t overly salty. Melt it gently to avoid browning, which could introduce a bitter note.
🔄 Quick Substitutions
| If you don’t have... | Use instead... |
|---|---|
| Brown sugar | White sugar + a pinch of molasses |
| All‑purpose flour | Whole‑wheat pastry flour |
| Walnuts | Pecans or almonds |
👨🍳 Step‑by‑Step Instructions
Follow these detailed steps to achieve a cobbler that’s golden, fragrant, and perfectly balanced.
📋 Phase 1: Preparation & Mise en Place
Gather your tools, preheat the oven, and prep the fruit.
Preheat the Oven
Set your oven to 190°C (375°F). Allow it to fully preheat while you work on the filling; this ensures a consistent rise and a crisp crust.
Prepare the Apples
Peel, core, and slice the apples into ¼‑inch pieces. Toss them in a large bowl with the granulated sugar, cinnamon, nutmeg, and lemon juice. Let the mixture sit for 10 minutes; this draws out natural juices and softens the fruit slightly.
🔥 Phase 2: Assembly & Baking
Create the crumb topping and combine everything in the baking dish.
Mix the Biscuit Topping
In a medium bowl, whisk together flour, brown sugar, baking powder, and salt. Pour the melted butter over the dry ingredients and stir until the mixture forms coarse crumbs. If you’re adding the optional streusel, fold in oats and walnuts now.
Layer the Filling
Spread the apple mixture evenly in a greased 9‑inch (23 cm) square baking dish. Drizzle any excess juice from the bowl over the top; this will caramelize during baking.
Apply the Topping
Scatter the biscuit crumbs over the apples, covering them uniformly but leaving small gaps for steam to escape. The gaps allow the apples to bubble through, creating a beautiful contrast.
Bake the Cobbler
Place the dish in the preheated oven and bake for 45 minutes, or until the topping turns a deep golden brown and the apple juices are bubbling around the edges. Rotate the pan halfway through for even browning.
✨ Phase 3: Finishing Touches & Serving
Let the cobbler rest, then serve while still warm.
Check for Doneness
Insert a thin knife into the center; it should come out clean, and the topping should be firm to the touch. If the top browns too quickly, loosely cover with foil for the last 10 minutes.
Cool Slightly
Allow the cobbler to rest for 5–10 minutes. This lets the juices thicken, making each slice neat and less likely to fall apart.
Serve
Spoon generous portions onto plates. Top with a scoop of vanilla ice cream, a drizzle of caramel sauce, or a dollop of freshly whipped cream for extra indulgence.
💡 Expert Tips & Tricks
🛒 Choosing the Right Apples
Opt for a mix of tart and sweet apples for depth of flavor. Granny Smith offers firmness and acidity, while a few slices of Fuji add natural sweetness. Look for apples that are firm, with no soft spots or bruises. If using frozen apples, thaw them first and pat dry to avoid excess moisture.
🔪 Preparation Techniques
Slice apples uniformly—about ¼‑inch thick—to ensure even cooking. Toss them gently with sugar and spices to avoid bruising, which can release too much juice and make the topping soggy. Use a silicone spatula for folding the butter into the flour; it prevents over‑mixing.
🌡️ Mastering the Bake
The oven’s temperature is crucial. A hotter oven (190°C) creates a crisp crust, while a lower temperature (175°C) yields a softer, more cake‑like top. If you prefer a chewier crust, bake at 200°C for the first 20 minutes, then lower to 180°C for the remaining time.
🍽️ Presentation & Service
Serve the cobbler directly from the baking dish for a rustic look, or transfer slices onto a warmed plate. Garnish with a light dusting of powdered sugar or a sprinkle of fresh cinnamon. Pair with a chilled glass of Riesling or a spiced chai for a comforting contrast.
🏆 Pro Tips
The difference between a good cobbler and a restaurant‑level masterpiece lies in precision, technique, and a few secret tricks.
- 🎯 Use Cold Butter for the Topping: Cutting cold butter into the flour creates pockets of steam that puff up the crumbs, giving them an airy texture. The colder the butter, the more dramatic the lift.
- 🎯 Add a Splash of Vanilla Extract: Mixing ½ teaspoon of vanilla into the apple filling deepens the flavor profile, creating a subtle aromatic backdrop that complements the cinnamon.
- 🎯 Sprinkle Sea Salt Just Before Baking: A pinch of flaky sea salt on the topping right before it goes into the oven amplifies the sweetness and balances the richness of the butter.
- 🎯 Use a Lightly Greased Cast‑Iron Skillet: Cast iron distributes heat evenly, resulting in a uniformly browned crust and a beautifully caramelized apple base.
- 🎯 Finish with a Quick Broil: In the last 2 minutes, switch to broil to achieve a caramelized, almost caramel‑like top without over‑baking the interior.
- 🎯 Rest Before Cutting: Letting the cobbler sit for 10 minutes after baking allows the juices to set, making clean slices and preventing a soggy bottom.
"A great cobbler is a harmony of fruit and crust, each supporting the other like a well‑orchestrated duet." — Thomas Keller
🔄 Variations & Adaptations
Apple Cobbler is a versatile canvas; feel free to experiment with flavors, textures, and dietary needs.
🥬 Vegetarian / Vegan Version
Swap the butter for a plant‑based margarine and use coconut sugar instead of brown sugar. Replace the egg‑based topping with a mixture of oat flour, almond milk, and melted coconut oil. The result is a dairy‑free cobbler that still delivers a buttery crumb.
- Vegan butter (1 cup) in place of unsalted butter.
- Coconut sugar (½ cup) instead of brown sugar for a caramel note.
🌶️ Flavor Variations
Play with spices and complementary fruits to create new taste experiences.
Spicy Version
Add a pinch of cayenne pepper or a dash of chili powder to the cinnamon mixture for a warm heat that contrasts the sweet apples.
Mediterranean Version
Incorporate sliced figs and a sprinkle of crushed pistachios. Use honey instead of sugar and a splash of orange liqueur for a bright, citrusy finish.
Asian Inspired Version
Swap cinnamon for five‑spice powder, add a drizzle of soy‑ginger glaze, and garnish with toasted sesame seeds. Serve with a side of lightly sweetened matcha ice cream.
⚠️ Dietary Adaptations
Gluten‑Free
Use a 1:1 gluten‑free flour blend for the topping. Ensure the blend contains xanthan gum to mimic the elasticity of wheat flour.
Lactose‑Free
Replace butter with lactose‑free margarine or coconut oil. Choose a dairy‑free milk for any optional glaze.
Low‑Calorie
Reduce sugar by half, use applesauce instead of butter in the topping, and serve with a dollop of Greek yogurt instead of ice cream.
👶 Family / Kids Version
Make the topping sweeter by adding a tablespoon of maple syrup. Serve with a scoop of vanilla frozen yogurt and let kids sprinkle colorful sprinkles on top for a fun, interactive dessert.
📦 Storage & Reheating
🧊 Conservation
Refrigerator
- Duration: 3–4 days
- Container: Airtight glass or plastic container
- Tip: Cover the top with parchment paper before sealing to prevent moisture buildup.
Freezer
- Duration: Up to 2 months
- Method: Cool completely, then wrap tightly in foil and place in a freezer‑safe bag.
- Defrost: Transfer to the refrigerator overnight before reheating.
💡 For best texture, reheat from frozen rather than thawed to avoid soggy crust.
♨️ Reheating
🔥 Oven (Recommended)
- Preheat to 175°C (350°F).
- Cover with aluminum foil to retain moisture.
- Heat for 15 minutes.
- Remove foil and continue for 5‑7 minutes to crisp the topping.
⚡ Microwave (Quick)
- Place a slice on a microwave‑safe plate.
- Cover with a microwave‑safe lid or paper towel.
- Heat on medium power for 45 seconds, then check and add 15‑second intervals as needed.
🍳 Stovetop
Heat a non‑stick skillet over medium heat, add a thin slice, cover, and cook for 3‑4 minutes until warmed through, allowing the bottom to crisp.
🍷 Perfect Pairings
🥗 Side Dishes
- Simple Arugula Salad: A peppery arugula salad with a light lemon vinaigrette balances the sweetness of the cobbler.
- Caramelized Pears: Pears sautéed in butter and a splash of balsamic add an elegant fruit complement.
- Vanilla Bean Yogurt: Thick Greek yogurt flavored with vanilla provides a creamy, tangy contrast.
🍷 Wine & Beverage Pairings
- Riesling (Off‑Dry): Its bright acidity cuts through the richness while echoing the apple notes.
- Pinot Noir: Light‑bodied red wine with subtle cherry flavors pairs beautifully with the cinnamon spice.
- Non‑Alcoholic: Sparkling apple cider or a cinnamon‑spiced chai tea enhances the dessert’s flavors without alcohol.
🍰 Complementary Courses
Start with a light, citrusy starter such as a lemon‑herb quinoa salad, move to the cobbler as the main dessert, and finish with a palate‑cleansing sorbet—perhaps a green apple or ginger‑lime flavor—to keep the meal refreshing.
❓ Frequently Asked Questions
Q: Can I use other fruits instead of apples?
A: Absolutely! Pears, peaches, or a mix of berries work well. Adjust the sugar level based on the fruit’s natural sweetness, and consider adding a splash of lemon juice to keep the filling from turning brown.
Q: How do I prevent the topping from becoming too soggy?
A: Ensure the apples are well‑drained after tossing with sugar and spices. Using a high‑heat oven and a pre‑heated baking dish also helps create a barrier that keeps the crust crisp.
Q: Is it okay to freeze the assembled, uncooked cobbler?
A: Yes. Assemble the cobbler, cover tightly with foil, and freeze. When ready to bake, add 10‑15 minutes to the cooking time and bake directly from frozen at the same temperature.
Q: My topping didn’t rise—what went wrong?
A: The most common cause is over‑mixing the topping, which develops gluten. Use cold butter and mix just until the crumbs form. Adding a pinch of baking powder helps create lift.
Q: Can I make this recipe gluten‑free?
A: Yes. Substitute the all‑purpose flour with a 1:1 gluten‑free flour blend that contains xanthan gum. The texture may be slightly more crumbly but still delicious.
Q: How far in advance can I prepare the cobbler?
A: You can assemble the cobbler up to 24 hours ahead and store it covered in the refrigerator. Bake when you’re ready; the flavors will have had time to meld, often improving the final result.
🎉 To Your Oven!
This Apple Cobbler with Cinnamon brings together the comforting nostalgia of a family kitchen with the confidence of a well‑tested recipe. From the fragrant, cinnamon‑kissed apples to the buttery, golden crumb, every bite tells a story of balance and love. Whether you serve it at a holiday gathering or as a simple weeknight treat, it’s sure to become a staple in your dessert repertoire.
Give it a try, snap a photo, and share your experience in the comments below. Your feedback helps me refine the recipe and inspires other home cooks. Don’t forget to rate the dish and let us know what variations you explored!
Have you tried this recipe?
Leave a comment and rating below! Share your photos on Instagram with #AppleCobblerMagic for a chance to be featured.
Apple Cobbler with Cinnamon
A comforting, cinnamon‑spiced apple cobbler with a buttery crumb topping.
📝 Ingredients
Fruit Filling
Biscuit Topping
👨🍳 Instructions
- 1 Preheat oven to 190°C (375°F).
- 2 Toss sliced apples with sugar, cinnamon, nutmeg, and lemon juice; let rest 10 minutes.
- 3 Whisk flour, brown sugar, baking powder, and salt; stir in melted butter until crumbly.
- 4 Spread apple mixture in a greased 9‑inch square dish.
- 5 Sprinkle biscuit crumbs evenly over the apples.
- 6 Bake for 45 minutes, rotating halfway, until topping is golden and apples bubble.
- 7 Check doneness with a knife; cover with foil if top browns too fast.
- 8 Cool 5–10 minutes before serving.
- 9 Serve warm with ice cream, whipped cream, or caramel drizzle.
- 10 Enjoy and share the joy!
🥗 Nutrition Facts (per serving)
*Values are estimates based on standard ingredient brands.

📚 You Might Also Like
Blueberry Crumble
Classic Peach Pie
Rhubarb Streusel


💬 Comments & Reviews
LLeave a Comment
No comments yet. Be the first to share your thoughts!