Picture this: you’re halfway through a marathon Netflix binge, the clock reads 2 a.m., and a sudden, insistent craving for something sweet, salty, and utterly comforting slams into you like a rogue wave. I was in that exact spot last week, staring at a half‑empty jar of peanut butter and a lonely bottle of honey, wondering if I could conjure a snack that would both satisfy my midnight munchies and impress my roommate who swears she “only eats clean.” I grabbed a spoon, gave the peanut butter a dramatic swirl, and then, in a moment of reckless brilliance, I tossed the two together. The result? A sticky, nutty, golden mixture that smelled like a hug from a grandma who also happens to be a professional baker. That first bite was an epiphany—smooth, sweet, and with a subtle salty whisper that made my taste buds do a happy dance.
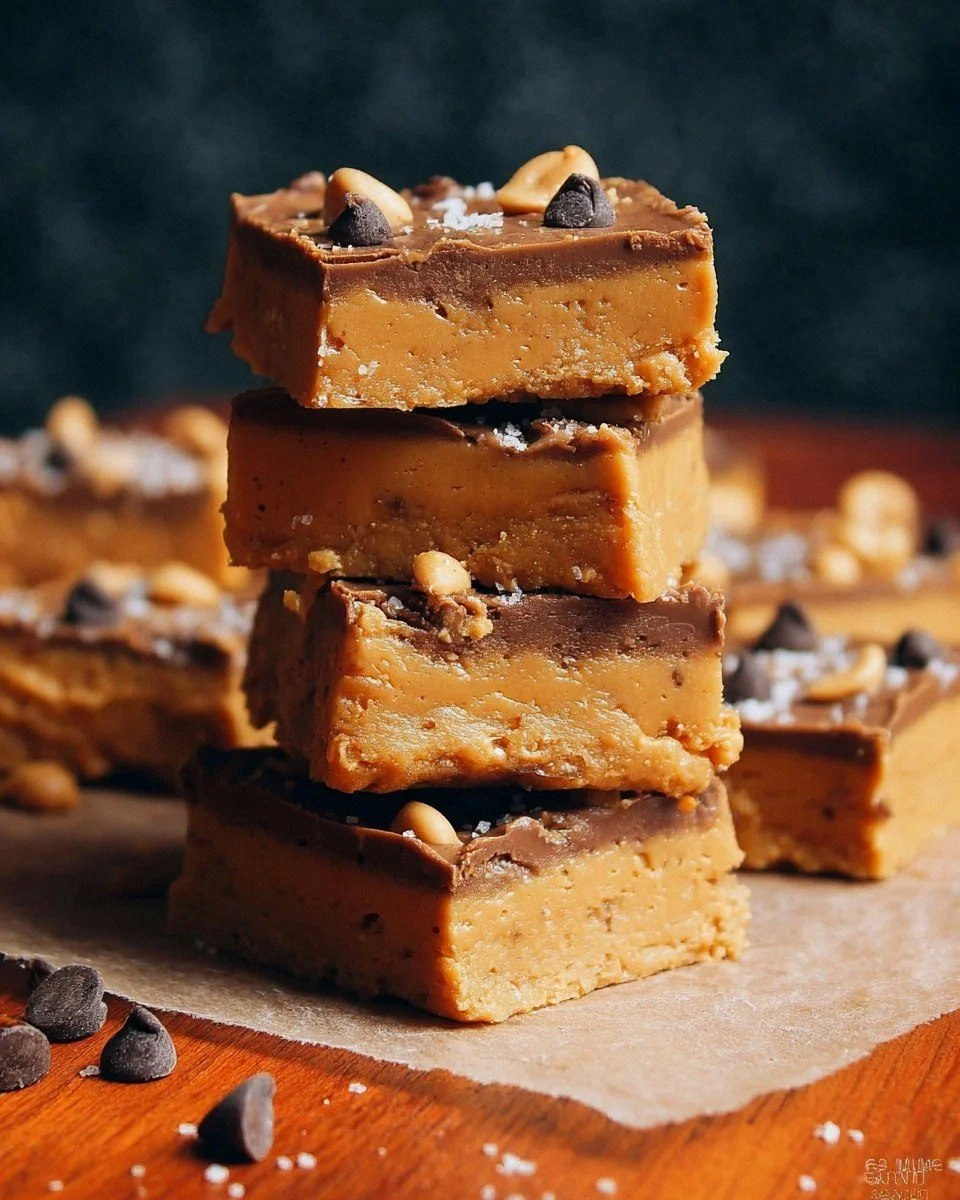
Now, let’s talk senses. The kitchen filled with the warm, caramel‑like aroma of honey mingling with the earthy, roasted perfume of peanut butter. The sound? A gentle hiss as the mixture hit the hot pan, followed by the satisfying thump of oats being tossed in. My fingertips felt the sticky, tacky texture of the batter as I pressed it into a pan, and the visual? A glossy, amber‑brown canvas waiting for its crowning chocolate chips. When the bars finally emerged from the oven, their edges were crisped to a golden perfection while the centers remained soft and chewy, like the perfect balance between a firm handshake and a gentle pat on the back.
Most peanut butter bar recipes out there either over‑complicate the process with unnecessary steps or skimp on flavor, leaving you with something bland and crumbly. This version stands out because it embraces simplicity without sacrificing depth. I’ve swapped out the usual butter for creamy peanut butter, introduced honey (or maple syrup for a vegan twist) for natural sweetness, and folded in rolled oats for heart‑healthy texture. The secret weapon? A splash of vanilla that elevates the whole thing, and a pinch of salt that makes every bite sing. And yes, there’s a surprise ingredient that most people overlook, but I’ll reveal that a little later—trust me, it’s a game‑changer.
Okay, ready for the game‑changer? Let me walk you through every single step — by the end, you’ll wonder how you ever made it any other way. I dare you to taste this and not go back for seconds. Let’s dive in.
What Makes This Version Stand Out
- Flavor Explosion: The combination of creamy peanut butter and honey creates a sweet‑savory harmony that coats your palate like velvet, while the chocolate chips add a decadent finish that melts into every bite.
- Texture Symphony: Rolled oats give a satisfying chew, the baked edges become crisp and buttery, and the interior stays soft and fudgy—think of it as a concert where every instrument plays in perfect sync.
- Simplicity at Its Core: No fancy equipment, no obscure ingredients—just a handful of pantry staples and a 30‑minute window, making it ideal for busy weeknights or lazy weekends.
- Ingredient Quality: Using 100 % natural, creamy peanut butter and pure honey (or maple syrup) ensures a clean, authentic taste that processed substitutes can’t match.
- Crowd‑Pleaser Factor: Whether you’re feeding kids, friends, or that one picky adult who claims “nothing’s sweet enough,” these bars win hearts every single time.
- Make‑Ahead Magic: The bars keep beautifully for up to a week in the fridge and freeze like a charm, so you can batch‑cook and have a ready‑to‑grab snack whenever the cravings strike.
- Versatile Base: The recipe is a blank canvas—swap chocolate for white chocolate, add dried fruit, or drizzle with caramel for endless variations.
- Health‑Conscious Edge: With oats providing fiber, peanut butter delivering protein, and honey offering natural sugars, these bars strike a balance between indulgence and nutrition.
Alright, let's break down exactly what goes into this masterpiece...
Inside the Ingredient List
The Flavor Base
1 cup creamy peanut butter: This is the heart of the bar, providing richness, protein, and that unmistakable nutty aroma. Choose a natural, unsweetened version for the purest flavor, and avoid the oil‑separated kind unless you give it a quick stir. Skipping this ingredient means losing the buttery mouthfeel that makes each bite melt in your mouth.
The Sweetening Duo
1 cup honey or maple syrup: Honey adds floral notes and a glossy sheen, while maple syrup offers a caramel‑like depth. Both act as natural binders, ensuring the oats stick together without a single egg. If you’re vegan, reach for maple syrup; if you crave a more robust sweetness, honey is your go‑to. Forgetting this sweetener results in dry, crumbly bars that won’t hold together.
The Texture Crew
2 cups rolled oats: Rolled oats give the bars body and a hearty chew without being too dense. Opt for thick‑cut oats for extra bite, or quick‑cook oats if you prefer a softer interior. Skipping oats turns the bars into a sticky paste, losing that satisfying bite.
The Unexpected Star
1/2 cup chocolate chips: These melt just enough to create pockets of gooey chocolate, contrasting the nutty base. Dark chocolate adds a slight bitterness that balances the honey’s sweetness, while milk chocolate makes it sweeter. If you’re dairy‑free, use dairy‑free chips; the bars still shine.
The Final Flourish
1 teaspoon vanilla extract: Vanilla amplifies the sweet notes and rounds out the flavor profile, turning a good bar into a great one. A splash of pure vanilla is worth its weight in gold. Missing it leaves the bars flat, like a song without a chorus.
Pinch of Salt
A pinch salt: Salt is the unsung hero that awakens the peanut butter’s depth and balances the honey’s sweetness. Even a tiny amount makes a massive difference—think of it as the conductor of an orchestra, guiding every flavor to harmony. Too much, and you’ll overpower the sweet; too little, and the bars will taste one‑dimensional.
Everything's prepped? Good. Let's get into the real action...
The Method — Step by Step
Preheat your oven to 350°F (175°C). While the oven warms up, line a 9×13‑inch baking pan with parchment paper, allowing some overhang for easy removal later. This step is crucial because a well‑lined pan prevents sticking and ensures clean, uniform bars. I always double‑check the temperature with an oven thermometer—trust me, a few degrees off can change the texture dramatically.
In a medium saucepan, combine the creamy peanut butter and honey (or maple syrup). Place the pan over low heat, stirring continuously with a wooden spoon. You’ll hear a gentle bubbling as the mixture loosens; that’s the sound of flavor bonding. Keep the heat low to avoid scorching; a burnt peanut butter taste is a nightmare you don’t want to wake up to.
Once the mixture is smooth and glossy, remove it from heat and stir in the vanilla extract and a pinch of salt. The vanilla should perfume the batter instantly, creating a fragrant cloud that makes your kitchen smell like a boutique bakery. This is the moment of truth—if you can’t smell the vanilla, add a few more drops; you’ll thank yourself later.
In a large mixing bowl, pour the rolled oats. Create a well in the center and pour the warm peanut‑honey‑vanilla mixture over the oats. Using a silicone spatula, fold the oats into the liquid until every oat is lightly coated. You’ll notice the mixture thickening—this is the binding phase that ensures the bars hold together after baking.
Fold in the chocolate chips, reserving a handful to sprinkle on top later. The chips should stay mostly whole; you don’t want them melting completely, just getting a kiss of warmth. If you’re using dark chocolate, the contrast will be more pronounced; with milk chocolate, the bars become sweeter.
Transfer the batter to the prepared pan, spreading it evenly with the back of a spoon or a spatula. Press firmly but gently; you want a compact surface that will slice cleanly later. The top should be smooth, with the reserved chocolate chips scattered like tiny jewels.
Slide the pan into the preheated oven and bake for 20‑25 minutes. Around the 20‑minute mark, peek through the oven door—edges should be golden brown and the center should look set but still slightly soft. If you press the center lightly, it should spring back slowly; that’s the perfect doneness.
Remove the pan from the oven and let the bars cool in the pan for at least 10 minutes. This rest period allows the structure to firm up, making it easier to lift the parchment and slice. While you wait, picture yourself pulling a perfectly cut square out of the pan, the chocolate glistening, the aroma filling the room—pure bliss.
After cooling, lift the parchment paper and place the slab on a cutting board. Using a sharp, non‑serrated knife, cut the bars into squares or rectangles—your choice. For clean cuts, wipe the blade with a warm, damp cloth between slices. Serve immediately or store in an airtight container.
That's it — you did it. But hold on, I've got a few more tricks that'll take this to another level...
Insider Tricks for Flawless Results
The Temperature Rule Nobody Follows
Never bake these bars at a temperature higher than 350°F. Higher heat creates a crust that’s too hard and a center that stays gummy. I once cranked the oven to 400°F hoping for a quicker bake, and the result was a burnt perimeter with a raw middle—total disaster. Keep it steady, and you’ll get that golden‑edge, soft‑center harmony every time.
Why Your Nose Knows Best
Rely on aroma as a cue for doneness. Around 20 minutes, the kitchen will be filled with a sweet, toasted scent that tells you the oats are perfectly toasted. If the smell is faint, give it another 2‑3 minutes. Trusting your nose prevents over‑baking, which can dry out the bars.
The 5‑Minute Rest That Changes Everything
After removing the pan from the oven, let the bars rest undisturbed for exactly five minutes before cutting. This short pause lets the internal steam redistribute, resulting in a bar that holds together without crumbling. Skipping this step is the reason many people end up with crumbly pieces that fall apart on the plate.
Chocolate Placement Precision
Reserve about a quarter of the chocolate chips for the top. Sprinkle them just before baking so they melt slightly and create a glossy finish. If you mix all the chips in, you lose that visual contrast and the delightful surprise of a chocolate burst in every bite.
Freezer‑Friendly Prep
If you plan to freeze the bars, wrap each portion individually in parchment and then place them in a zip‑top bag. When you’re ready to eat, let them thaw at room temperature for 10 minutes, then pop them in the microwave for 10‑15 seconds. The bars will be as fresh as when they first came out of the oven.
Creative Twists and Variations
This recipe is a playground. Here are some of my favorite ways to switch things up:
Nutty Crunch
Swap half of the rolled oats for finely chopped almonds or pecans. The added nuts bring an extra layer of crunch and a buttery flavor that pairs beautifully with the peanut butter base.
Berry Burst
Fold in a half‑cup of dried cranberries or freeze‑dried strawberries. The tartness of the berries cuts through the sweetness, creating a balanced bite that feels fresh.
Spicy Kick
Add a pinch of cayenne pepper or a drizzle of sriracha to the peanut‑honey mixture before baking. The heat sneaks in subtly, giving the bars a surprising zing that will wow anyone who loves a sweet‑spicy combo.
Coconut Dream
Replace a quarter of the oats with shredded coconut and sprinkle extra coconut on top before baking. The tropical aroma transports you to a beachside snack bar, and the texture becomes delightfully chewy.
Protein Power
Stir in a scoop of vanilla whey or plant‑based protein powder. This turns the bars into a post‑workout treat without compromising taste, perfect for gym enthusiasts.
Caramel Swirl
Drizzle a thin line of caramel sauce over the batter before baking, then use a knife to swirl it gently. The caramel ribbons create pockets of gooey sweetness that melt in your mouth.
Storing and Bringing It Back to Life
Fridge Storage
Place the bars in an airtight container and keep them in the refrigerator for up to 7 days. The cool environment preserves the texture, keeping the edges firm while the center stays chewy.
Freezer Friendly
Wrap individual bars in parchment, then store them in a zip‑top freezer bag. They’ll stay fresh for up to 3 months. When you’re ready to indulge, let them thaw for 10 minutes, then pop them in the microwave for a quick warm‑up.
Best Reheating Method
To revive that fresh‑out‑of‑the‑oven feel, place a bar on a microwave‑safe plate, add a tiny splash (about a teaspoon) of water beside it, and heat for 10‑15 seconds. The steam generated brings back that soft, gooey interior while the outside stays pleasantly crisp.