I was standing in my kitchen at 2 a.m., staring at a sad, flat store‑bought English muffin that tasted like cardboard and regret. My roommate had dared me to “make a muffin that could actually compete with a bakery,” and I was half‑asleep, half‑determined, and fully aware that my sourdough starter was bubbling like a tiny volcano. The scent of that starter—tangy, slightly sweet, a promise of something alive—hit my nose and instantly turned the whole disaster into a mission. I grabbed my favorite cast‑iron skillet, a handful of flour, and a stubborn resolve to turn that flat disappointment into a cloud‑soft, crunchy‑on‑the‑outside marvel.
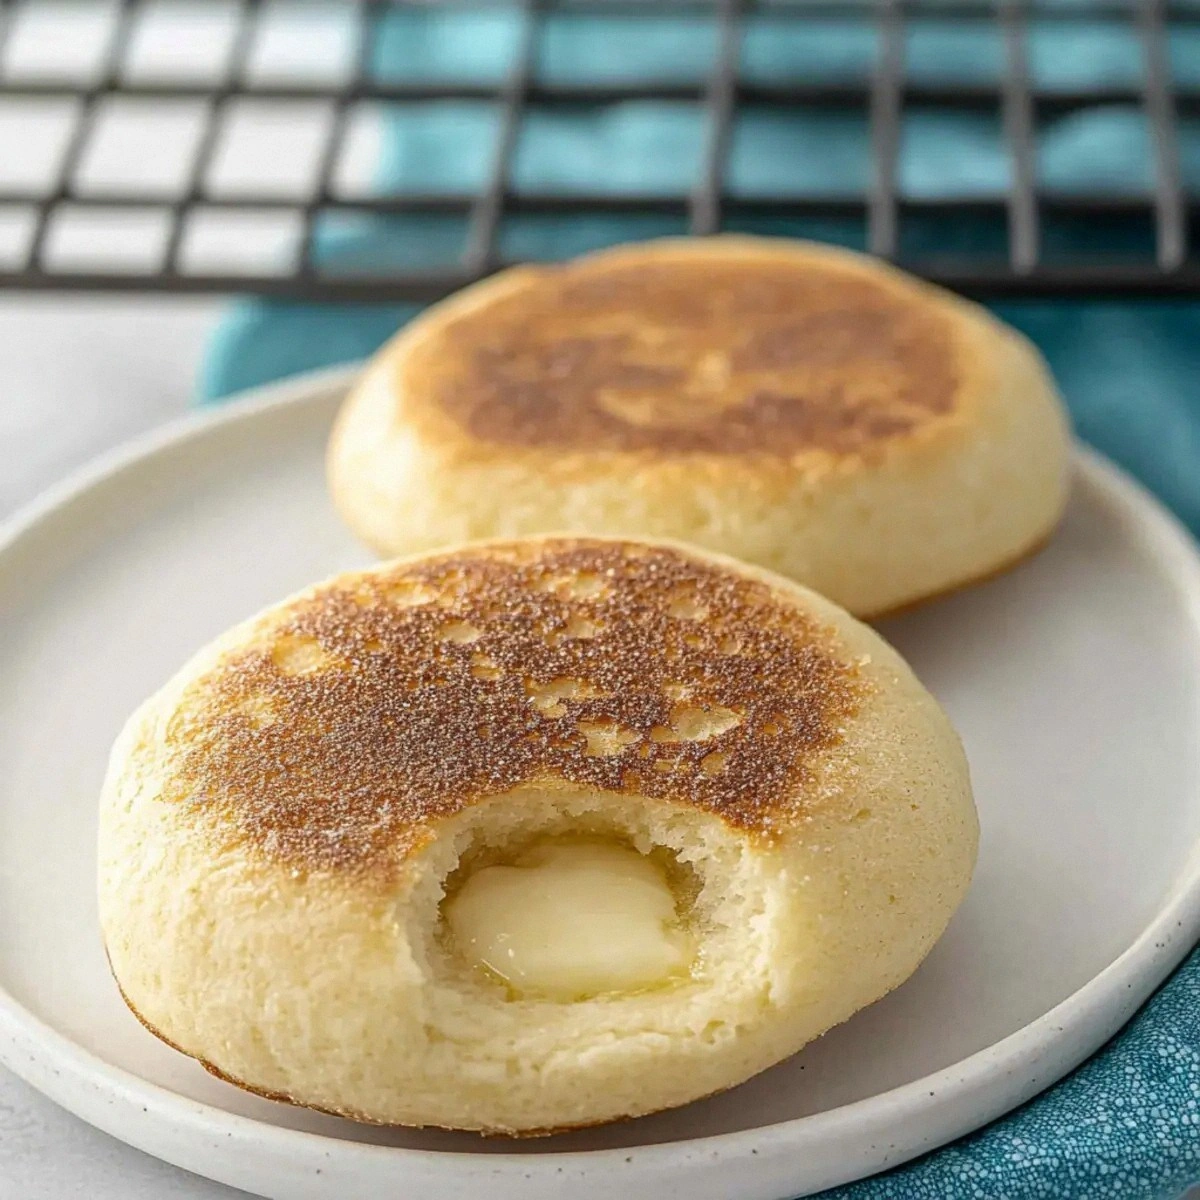
Picture this: the kitchen humming with the low whir of the fridge, the warm glow of the oven, and the faint crackle of butter melting in the pan. The air is thick with the buttery aroma of a fresh batch of dough, a hint of yeasty tang that makes your stomach do a little happy dance. You hear the soft pop of the starter as it awakens, the rhythmic thump of the spoon against the bowl, and the occasional sigh of the dough as it rises. When you finally pull the muffins out, their tops are speckled with golden cornmeal, the interiors are airy like a cloud, and the whole thing smells like a sunrise in a bakery. That moment, when you bite into the first crumb and the buttery, tangy flavor explodes, is pure, unadulterated joy.
Most recipes for English muffins either skip the sourdough entirely or treat it like an afterthought, resulting in a product that’s either too dense or too bland. This version, however, leans into the power of a mature starter, letting it do the heavy lifting while we focus on texture and flavor balance. The secret? A tiny dash of sugar to coax the starter into a gentle rise, a splash of warm water to keep the crumb tender, and a generous coating of cornmeal that gives each bite that satisfying crunch. I’m not just talking about “good” muffins; I’m talking about the best version you’ll ever make at home, the kind that makes you question why you ever bought the packaged kind in the first place.
And there’s a twist that most people overlook: the butter is folded in at a specific temperature, creating pockets of melt‑in‑your‑mouth richness that contrast beautifully with the tang of the sourdough. I dare you to taste this and not go back for seconds. Let me walk you through every single step — by the end, you’ll wonder how you ever made it any other way.
What Makes This Version Stand Out
- Tangy Depth: The fed sourdough starter adds a complex, slightly acidic flavor that store‑bought mixes simply can’t mimic. It’s like a symphony of taste where every note is perfectly tuned.
- Heavenly Texture: A light, airy crumb inside paired with a crisp, buttery crust that shatters like thin ice when you bite into it. The contrast is pure magic.
- Simple Ingredients: No fancy flours, no exotic additives—just pantry staples you already have, making it accessible for anyone.
- Unexpected Crunch: The cornmeal coating creates a nutty, crunchy exterior that’s both visually appealing and satisfyingly crunchy.
- Crowd‑Pleaser Factor: These muffins disappear faster than you can say “toast,” earning applause at brunches, snack attacks, and midnight cravings alike.
- Ingredient Quality: Using a mature starter and real butter elevates the flavor profile from “good” to “legendary.”
- Cooking Method: The skillet‑first technique creates those classic nooks and crannies while preserving a moist interior.
- Make‑Ahead Potential: Freeze them, reheat, and they’re still as delightful as fresh‑baked, meaning you can prep a batch for the whole week.
Alright, let's break down exactly what goes into this masterpiece...
Inside the Ingredient List
The Flavor Base
The fed sourdough starter is the heart of this recipe. At 100 % hydration, it’s an equal‑parts‑water‑and‑flour mixture that brings a natural leavening power and a subtle tang that no commercial yeast can replicate. If you skip it, you’ll end up with a bland, flat muffin that lacks that signature depth. A good starter should smell like fresh apple cider with a hint of nuttiness; if yours smells like vinegar, give it a few more feedings before you trust it. For a quick swap, you can use a 100 % hydration sourdough discard mixed with a pinch of instant yeast, but the magic diminishes.
The Texture Crew
All‑purpose flour provides the structure while keeping the crumb tender. You could experiment with a blend of bread flour for extra chew, but the classic AP flour yields that soft, pillow‑like interior we crave. Warm water (around 95 °F) hydrates the flour and activates the starter, creating a dough that’s pliable but not sticky. If the water is too hot, you’ll kill the yeast; too cold, and the rise will be sluggish. Granulated sugar feeds the starter a little extra, encouraging a gentle rise and adding a faint sweetness that balances the sourness.
The Unexpected Star
Unsalted butter is folded in after the first rise, creating layers of richness that melt into the crumb. This is why the interior feels like a buttery cloud. If you’re dairy‑free, coconut oil works, but expect a coconut aroma that will dominate the flavor profile. Egg adds structure and a golden hue to the crust; it also helps with the classic “nooks and crannies” that make English muffins perfect for holding butter.
The Final Flourish
Salt is the silent hero, enhancing every flavor and tightening the gluten network just enough to hold the muffins together. A pinch too much and you’ll taste the sea; a pinch too little and the flavor falls flat. Cornmeal is dusted on the outside, giving each muffin that signature speckled look and a delightful crunch. If you want a gluten‑free version, use fine cornmeal or millet flour, but the texture will shift slightly.
Everything's prepped? Good. Let's get into the real action...
The Method — Step by Step
In a large mixing bowl, combine 1 cup fed sourdough starter with 3/4 cup warm water. Stir until the starter dissolves and the mixture looks slightly frothy. This is the moment where the starter wakes up, and you’ll notice a faint, sweet aroma—think of fresh‑baked bread meeting a light citrus note. Let it sit for 5 minutes; this “autolyse” helps the flour hydrate later on.
Watch Out: If your starter is very active, you might see bubbles forming immediately—don’t be alarmed, that’s a good sign.Add 2 cups all‑purpose flour, 1 tbsp granulated sugar, and 1 tsp salt to the bowl. Mix with a wooden spoon until a shaggy dough forms; it should look slightly sticky but manageable. This is where the gluten starts to develop, creating the framework that will hold the muffin’s airy interior. Let the dough rest for 10 minutes; this short rest relaxes the gluten and makes the next knead easier.
After the rest, gently knead the dough for about 2 minutes—just enough to bring it together into a smooth ball. You’ll feel the dough become more elastic, and it will pull away from the sides of the bowl. If it feels too dry, sprinkle a teaspoon of water; if too wet, dust with a little extra flour. This step is quick, but crucial for that perfect crumb.
Kitchen Hack: Use a bench scraper to fold the dough over itself instead of traditional kneading; this preserves more air pockets for a lighter muffin.Cover the bowl with a damp towel and let the dough rise at room temperature for 1 hour, or until it has roughly doubled in size. You’ll know it’s ready when the surface looks puffy and you can see tiny bubbles forming. This is the “rise of the muffin,” and the scent will become more pronounced—think of a light sourdough perfume.
Meanwhile, melt 2 tbsp unsalted butter in a small saucepan over low heat. Once melted, let it cool just enough that it’s warm to the touch but not hot. When the dough has risen, gently fold the butter into the dough, being careful not to over‑mix. The butter will coat tiny pockets, creating that melt‑in‑your‑mouth texture we all crave.
Stir in 1 large egg until fully incorporated. The egg adds richness and helps develop the golden crust. The dough will become slightly shinier and a bit more cohesive. Let the dough rest for another 15 minutes; this short “bench” rest lets the gluten relax again, making shaping easier.
Line a baking sheet with parchment and sprinkle a thin layer of 1 tbsp cornmeal. Transfer the dough onto the sheet and pat it into a rectangle about ½ inch thick. Using a sharp round cutter (about 3‑inch diameter), cut out circles. Place the circles back on the sheet, dusting the tops with a little extra cornmeal. This is the iconic “nooks and crannies” stage—don’t press too hard, or you’ll lose the airy interior.
Heat a heavy skillet (cast‑iron works best) over medium‑low heat and lightly grease it with butter. When the pan is hot enough that a drop of water sizzles and evaporates, place the muffins in the pan, flat side down, and cover with a lid. Cook for 4‑5 minutes, until the bottoms are golden brown and the tops have set. That sizzle when it hits the pan? Absolute perfection.
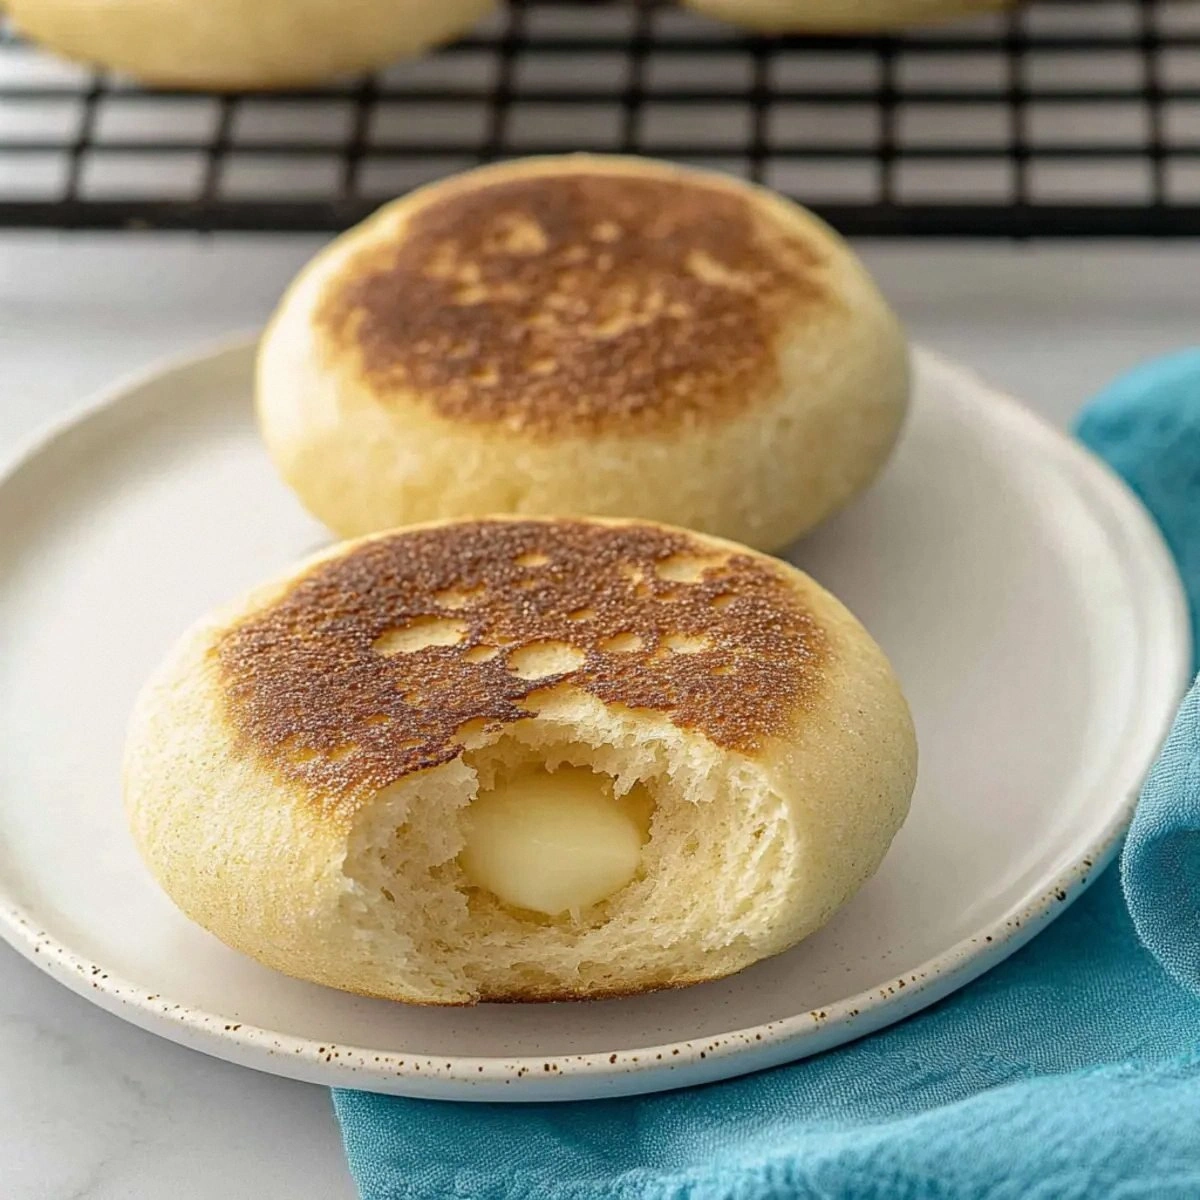
Watch Out: If the heat is too high, the exterior will burn before the interior cooks through. Adjust the flame as needed.Flip the muffins, re‑cover, and cook another 3‑4 minutes until the other side is equally golden and the muffins have puffed up. The edges should start pulling away from the pan, a clear sign they’re done. Remove them from the skillet and let them cool on a wire rack for at least 10 minutes before splitting. This cooling period lets the steam finish the interior, creating those perfect pockets.
Finally, split each muffin with a fork—yes, a fork, not a knife—to reveal the classic nooks and crannies. Serve warm with butter, jam, or your favorite savory topping. I’ll be honest — I ate half the batch before anyone else got to try it, and that’s a testament to how addictive they are. Picture yourself pulling this out of the oven, the whole kitchen smelling incredible, and knowing you just nailed a bakery‑level staple.
That's it — you did it. But hold on, I've got a few more tricks that'll take this to another level...
Insider Tricks for Flawless Results
The Temperature Rule Nobody Follows
Keep your dough at a consistent 78 °F during the rise. Anything cooler slows the starter, anything hotter can over‑activate it, leading to a gummy crumb. Use a simple oven with the light on or a proofing box to maintain that sweet spot. A friend once tried rising in a chilly garage and ended up with dense, flat muffins—let’s just say it didn’t end well.
Why Your Nose Knows Best
Instead of watching the clock, trust the aroma. When the dough smells lightly sour with a hint of buttery sweetness, it’s ready to be shaped. If you’re still unsure, gently press a finger into the dough; if it springs back slowly, you’re golden. This sensory checkpoint is more reliable than any timer.
The 5‑Minute Rest That Changes Everything
After you fold in the butter and egg, let the dough rest for exactly five minutes. This short pause lets the fats coat the gluten strands, preventing them from tightening too much during the final shape. The result? A softer crumb that stays fluffy even after reheating. I swear, this tiny rest turned my “good” muffins into “wow‑factor” muffins.
Cornmeal Coat Secrets
Toast the cornmeal lightly in a dry skillet before dusting the muffins. Toasted cornmeal adds a nutty depth that plain cornmeal can’t match. It also helps the crust stay crisp longer, even after the muffins have cooled. If you skip this step, you’ll still get crunch, but it won’t have that extra layer of flavor complexity.
The Flip‑And‑Cover Technique
Covering the skillet while cooking creates a mini‑oven effect, allowing the heat to circulate and the interior to steam gently. This is why the nooks and crannies form perfectly. Flip only once, and keep the lid on; flipping too often collapses the airy structure. I’ve tried flipping every minute once, and the muffins turned into dense pancakes—lesson learned.
Creative Twists and Variations
This recipe is a playground. Here are some of my favorite ways to switch things up:
Cheddar & Chive Explosion
Fold in ½ cup shredded sharp cheddar and 2 tbsp finely chopped chives right after the butter is incorporated. The cheese melts into the crumb, giving each bite a savory punch, while the chives add a fresh, oniony bite. Perfect for a brunch board.
Cinnamon‑Sugar Sweetness
Swap the cornmeal for a mixture of ½ tbsp cinnamon and 1 tbsp sugar. Dust the tops before cooking, and you’ll get a sweet‑spiced crust that pairs beautifully with butter and honey. Great for a lazy Sunday morning.
Whole‑Wheat Hearty
Replace half of the all‑purpose flour with whole‑wheat flour. The nutty flavor deepens, and you get a slightly denser texture that still holds the signature nooks. This version holds up well for sandwich‑style creations.
Sourdough Bagel Hybrid
Add 1 tsp malt syrup to the dough and increase the boiling time of the muffins by 30 seconds before skillet cooking. The result is a chewier exterior reminiscent of a bagel, while retaining the classic English muffin interior.
Herb‑Infused Delight
Stir in 1 tbsp dried oregano and a pinch of crushed red pepper flakes after the butter is folded in. The herbs infuse the crumb with a Mediterranean vibe, perfect for topping with avocado and feta.
Storing and Bringing It Back to Life
Fridge Storage
Place cooled muffins in an airtight container with a paper towel at the bottom to absorb excess moisture. They’ll stay fresh for up to 4 days. If you notice the crust softening, pop them under a hot skillet for 30 seconds to revive the crunch.
Freezer Friendly
Wrap each muffin individually in plastic wrap, then seal them in a zip‑top freezer bag. They freeze beautifully for up to 2 months. When you’re ready to eat, let them thaw at room temperature, then reheat in a toaster or a hot skillet with a splash of water to steam them back to life.
Best Reheating Method
Add a tiny splash of water (about a teaspoon) to the skillet before reheating. Cover the pan for 2‑3 minutes; the steam revives the interior while the pan restores the crisp crust. This trick works whether you’re reheating from fresh, refrigerated, or frozen.