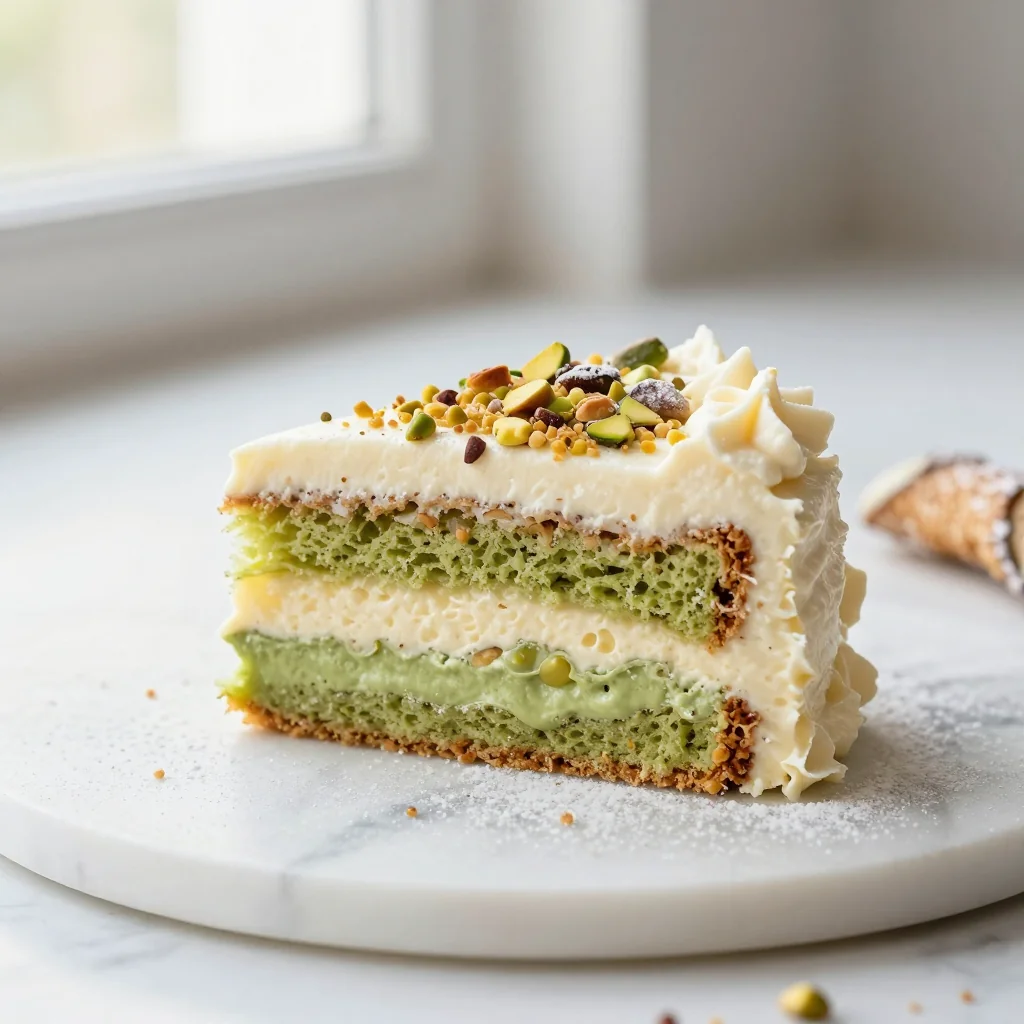
A vibrant, layered cake that marries the creamy richness of ricotta with the crunch of pistachios and a chocolate‑kissed poke.
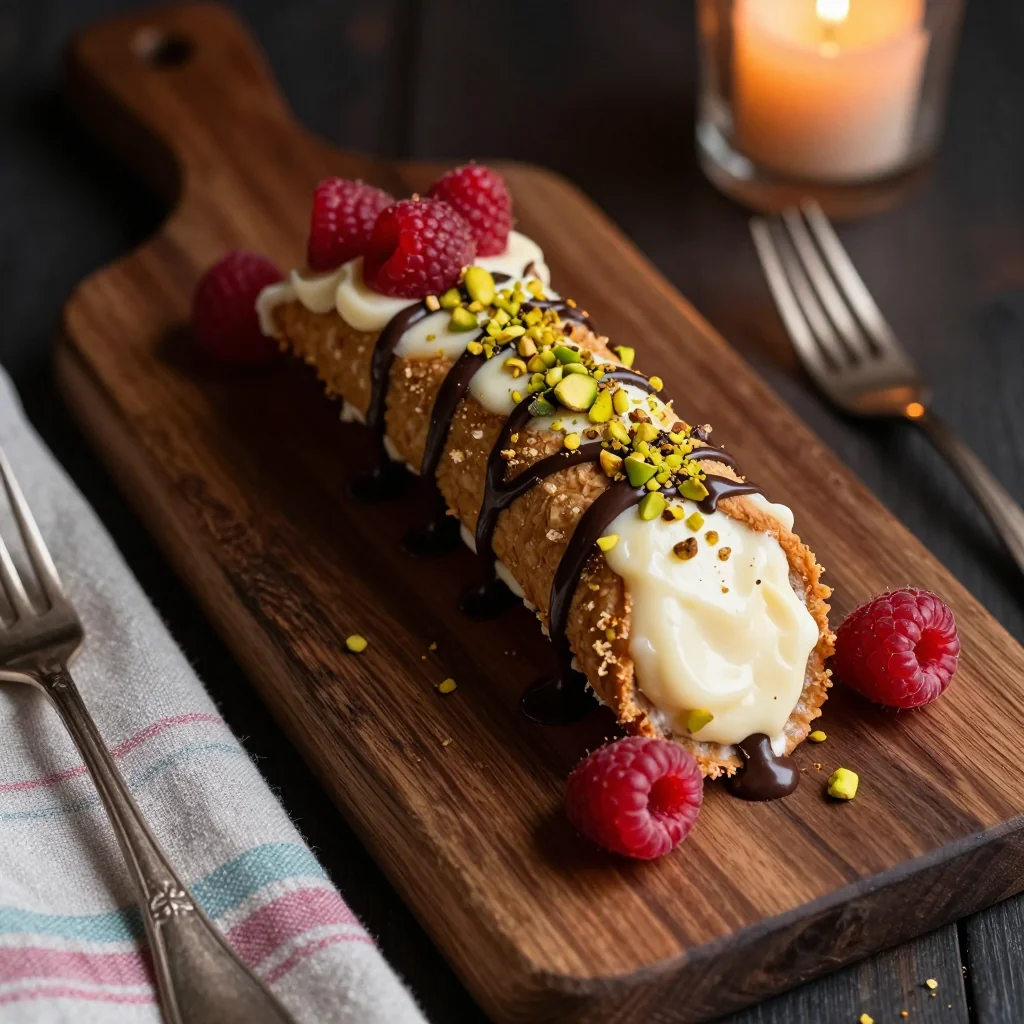
When I was a teenager, the first time I tasted a traditional Sicilian cannoli, the silky ricotta filling and the sweet orange‑zest perfume took me straight to a sun‑kissed piazza in Palermo. Years later, while experimenting with poke bowls and modern plating, I wondered: what if that same textural contrast could be turned into a cake? The idea sparked during a summer afternoon when I was juggling a birthday cake for a friend and a leftover batch of pistachio‑crusted cannoli shells. I sliced the shells, layered them with a light ricotta mousse, and drizzled dark chocolate over the top. The result was an unexpected explosion of crunch, cream, and chocolate that felt both nostalgic and avant‑garde.
This dessert belongs to the Italian tradition of celebrating the humble cannoli, but it also embraces the contemporary trend of “poke” presentations—where ingredients are artfully arranged to look like a vibrant, deconstructed dish. The cake is perfect for any season because its flavors are bright enough for summer gatherings yet rich enough for cozy winter celebrations.
In this article you’ll discover step‑by‑step how to build the cake layers, how to achieve a perfectly airy ricotta mousse, and how to assemble the final poke presentation. I’ll also share the science behind why the pistachio crunch stays crisp, the best way to melt chocolate without scorching, and a few pro tricks that will make your cake look bakery‑level even if you’re cooking at home.
Grab your mixing bowls, preheat the oven, and let’s embark on a culinary adventure that will make your guests say “wow” before the first bite.
🌟 Why This Recipe Will Win Your Heart
From texture to flavor, this cake hits every note that makes a dessert unforgettable.
- ✨ Multi‑Layered Texture: The cake combines a soft sponge, a fluffy ricotta mousse, crunchy pistachio shards, and a glossy chocolate drizzle, delivering a surprise in every forkful.
- ✨ Fresh Citrus Brightness: A hint of orange zest woven into the filling lifts the richness and adds a fragrant, palate‑cleansing note.
- ✨ Visual Impact: The poke‑style assembly looks like a modern art piece—perfect for Instagram feeds and dinner‑party showstoppers.
- ✨ Balanced Sweetness: By using powdered sugar sparingly in the mousse and letting the natural sweetness of pistachios shine, the dessert stays elegant rather than cloying.
- ✨ Adaptable to Dietary Needs: Simple swaps (e.g., almond flour for gluten‑free, coconut cream for dairy‑free) let you tailor the cake without compromising texture.
- ✨ Fun to Make Together: The recipe is broken into clear phases, making it ideal for family cooking sessions where kids can help with the pistachio topping.
🥗 Ingredients
📝 Complete Ingredient List
For the Cake Base:
- 200 g all‑purpose flour
- 150 g granulated sugar
- 4 large eggs
- 120 ml whole milk
- 80 g melted unsalted butter
- 1 tsp baking powder
- ¼ tsp salt
For the Ricotta Filling:
- 250 g ricotta cheese (full‑fat)
- 100 g powdered sugar
- 1 tsp vanilla extract
- 30 ml heavy cream
- 1 tbsp orange zest
For the Poke Topping:
- 150 g unsalted pistachios, coarsely chopped
- 100 g dark chocolate (70% cocoa), melted
- 50 g toasted coconut flakes
- 1 tbsp honey
- to taste fresh mint leaves for garnish
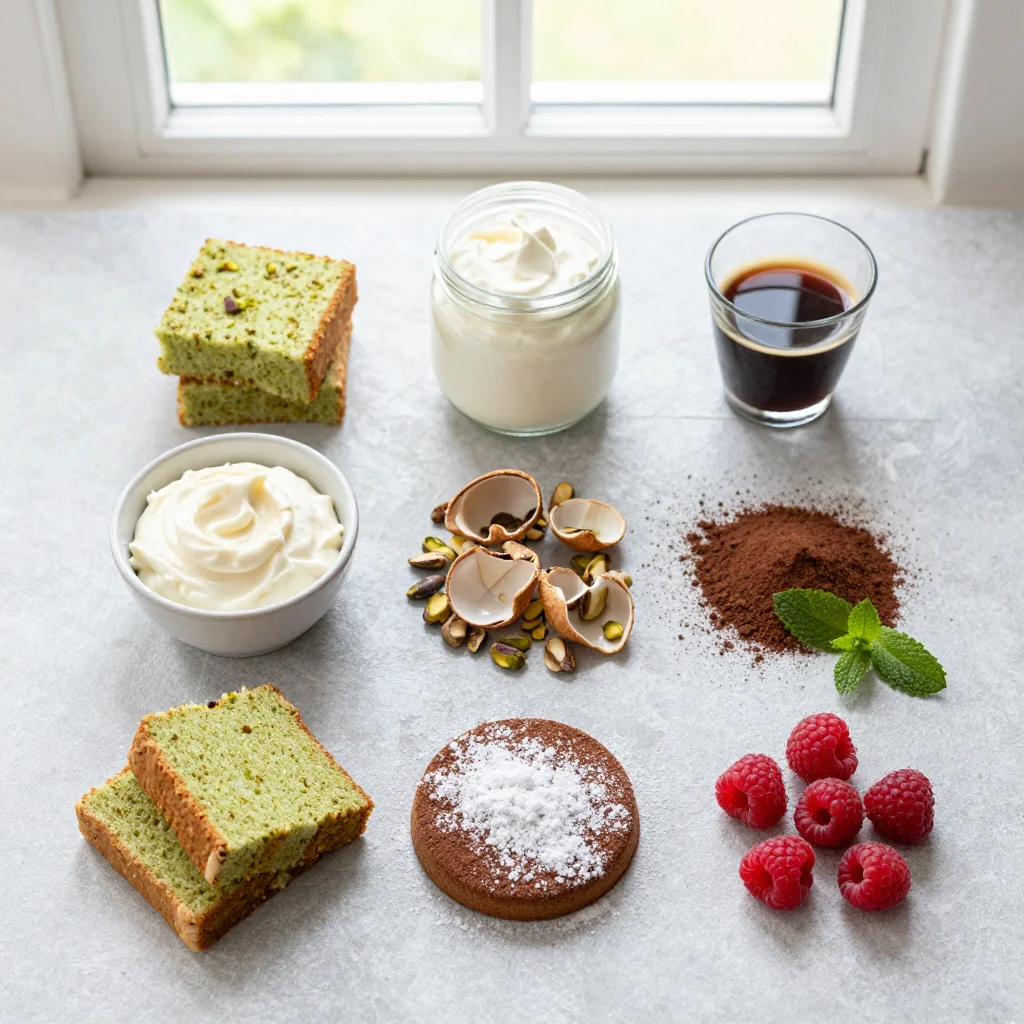
🔍 Focus on Key Ingredients
Ricotta Cheese
Ricotta provides a buttery, slightly grainy texture that sets this mousse apart from traditional whipped cream. Choose a full‑fat ricotta for richness; if you prefer a lighter version, drain the cheese through a cheesecloth for 30 minutes to remove excess whey. The natural milky flavor pairs beautifully with orange zest, creating a subtle citrus note that balances the chocolate drizzle.
Pistachios
Pistachios contribute a salty‑sweet crunch that mimics the classic cannoli shell. Their natural green hue also adds visual contrast against the white mousse and dark chocolate. Lightly toast them on medium heat for 3‑4 minutes, stirring constantly, to unlock a buttery aroma without burning.
Dark Chocolate
The chocolate drizzle adds depth and a glossy finish. Use a chocolate with at least 70% cocoa to avoid excess sweetness. Melt it gently over a bain‑marie or in short bursts in the microwave, stirring between intervals, to keep it smooth and glossy.
🔄 Quick Substitutions
| If you don’t have... | Use instead... |
|---|---|
| All‑purpose flour | Gluten‑free flour blend (1:1) |
| Ricotta cheese | Cream cheese mixed with Greek yogurt (2:1) |
| Dark chocolate | Unsweetened cocoa powder mixed with melted butter (1:1) |
👨🍳 Step‑by‑Step Instructions
Follow these phases to build a cake that looks as impressive as it tastes.
📋 Phase 1: Preparation & Mise en Place
Gather, measure, and prep all components before the oven heats.
Preheat the Oven and Prepare the Pan
Set your oven to 175°C (350°F). Grease a 23 cm (9‑inch) springform pan with butter and line the base with parchment paper. This ensures the cake releases cleanly after baking.
Mix the Cake Batter
In a large bowl whisk together flour, sugar, baking powder, and salt. In a separate bowl beat the eggs, then whisk in milk, melted butter, and vanilla extract. Combine wet and dry mixtures until just incorporated—over‑mixing will make the cake tough.
🔥 Phase 2: Baking & Assembly
Create the sponge, whip the mousse, and start the poke layout.
Bake the Sponge
Pour the batter into the prepared pan, smooth the top, and bake for 25‑30 minutes, or until a toothpick inserted in the center comes out clean. The cake should be lightly golden and spring back when touched.
Cool and Slice the Cake
Allow the cake to cool in the pan for 10 minutes, then release the springform and transfer the cake to a wire rack. Once completely cool, slice horizontally into three even layers using a serrated knife.
Prepare the Ricotta Mousse
In a mixing bowl, combine ricotta, powdered sugar, vanilla, orange zest, and heavy cream. Using an electric hand‑mix, whip on medium speed until the mixture becomes light, airy, and holds soft peaks—about 2‑3 minutes. This airy mousse will act as the “cream” layer in the poke cake.
✨ Phase 3: Finishing & Presentation
Add the chocolate poke, pistachio crunch, and final garnish.
Assemble the Layers
Place the bottom cake layer on a serving platter. Spread a generous layer of ricotta mousse over it, then sprinkle half of the toasted pistachios. Repeat with the second cake layer, mousse, and the remaining pistachios. Top with the final cake layer.
Create the Chocolate “Poke”
Using a spoon, drizzle melted dark chocolate over the top in a random, artistic pattern that mimics the look of a poke bowl. Let the chocolate set for 5 minutes; it will form a glossy veil.
Final Garnish
Scatter toasted coconut flakes over the chocolate, drizzle honey in thin ribbons, and place fresh mint leaves strategically for a pop of green. The final look should be colorful, textured, and inviting.
💡 Expert Tips & Tricks
🛒 Choosing the Right Ingredients
When selecting pistachios, look for kernels that are bright green and uniformly sized; avoid any that appear dull or have a grayish tint, as they may be past their prime. For ricotta, a fresh, slightly grainy texture indicates high moisture content, which translates to a smoother mousse. If you can, buy whole pistachios and chop them yourself—pre‑chopped nuts often contain added oil that can make the topping soggy.
🔪 Preparation Techniques
To achieve an even cake, sift the flour and baking powder together; this prevents lumps and ensures consistent rise. When slicing the cooled cake, use a long serrated knife and a gentle sawing motion—pressing down too hard will cause crumbs to fall out, making the assembly messier. For the mousse, fold the cream into the ricotta with a rubber spatula; this technique preserves air bubbles for a lighter texture.
🌡️ Mastering the Cooking Process
Maintain a stable oven temperature; an oven thermometer can help if your appliance tends to run hot. If the top of the cake begins to brown too quickly, loosely cover it with aluminum foil for the remaining baking time. The chocolate drizzle should be poured at about 45°C (113°F) to stay glossy yet thick enough to hold its shape on the cake surface.
🍽️ Presentation & Service
Serve the cake on a white marble slab or a matte black plate to let the colors pop. Use a sharp offset spatula to lift each slice cleanly. A light dusting of powdered sugar right before serving adds an elegant finishing touch without overpowering the other flavors.
🏆 Pro Tips
Professional chefs distinguish a memorable dessert by precision, balance, and visual storytelling.
- 🎯 Control Moisture in the Sponge: Add a tablespoon of sour cream to the batter; the acidity strengthens gluten while keeping the crumb tender, preventing the cake from drying out during the cooling phase.
- 🎯 Enhance Pistachio Aroma: Toast pistachios with a pinch of sea salt and a splash of olive oil; the salt amplifies the nutty aroma, and the oil helps the nuts stay crisp after they sit on the mousse.
- 🎯 Stabilize the Ricotta Mousse: Blend a small amount (about 5 g) of gelatin dissolved in warm water into the ricotta mixture; this prevents the mousse from weeping when the cake sits for a few hours before service.
- 🎯 Perfect Chocolate Drizzle: Add a teaspoon of coconut oil to the melted chocolate; this lowers surface tension, allowing the chocolate to flow in elegant ribbons rather than clumping.
- 🎯 Temperature Contrast: Chill the assembled cake for 15 minutes before adding the chocolate drizzle; the cold surface makes the chocolate set faster, preserving the crisp pistachio edges.
- 🎯 Plate Layout: Position the cake slightly off‑center on a large platter, then scatter a few extra pistachio shards and mint leaves around the base; this creates a dynamic composition that draws the eye inward.
“Desserts should be an experience, not just a taste. The balance of texture and color is what makes a cake unforgettable.” — Massimo Bottura
🔄 Variations & Adaptations
Feel free to personalize this recipe to match dietary preferences or flavor cravings.
🥬 Vegetarian / Vegan Version
Swap the ricotta for a blend of silken tofu (250 g) and coconut cream (60 ml) and replace the honey with agave syrup. Use a plant‑based butter for the cake base and ensure the chocolate is dairy‑free. The texture remains creamy while staying completely vegan.
- Silken tofu provides a neutral canvas that mimics ricotta’s softness.
- Coconut cream adds richness without dairy.
🌶️ Flavor Variations
Explore different cultural twists by adjusting the aromatics and toppings.
Spicy Mexican Twist
Incorporate ½ tsp of ground cayenne into the mousse and replace pistachios with toasted pepitas. Drizzle a thin layer of Mexican chocolate (spiced with cinnamon) instead of plain dark chocolate.
Mediterranean Version
Add a teaspoon of finely chopped rosemary to the cake batter and sprinkle crumbled feta over the top after the chocolate sets. A drizzle of honey‑infused olive oil adds a fragrant finish.
Asian Fusion
Swap orange zest for yuzu zest, and replace pistachios with toasted sesame seeds. Finish with a thin glaze of matcha‑infused white chocolate for a subtle earthy note.
⚠️ Dietary Adaptations
Gluten‑Free
Use a 1:1 gluten‑free flour blend and add 1 tsp xanthan gum to mimic the elasticity of wheat flour.
Lactose‑Free
Replace dairy butter with a high‑quality plant butter and use lactose‑free ricotta or a blend of almond ricotta and coconut cream.
Low‑Calorie
Reduce sugar by 30 % and substitute half the butter with unsweetened applesauce. Use 70 % dark chocolate instead of 80 % to keep the calorie count lower while maintaining intensity.
👶 Kid‑Friendly Version
For little palates, omit the orange zest and honey, and replace pistachios with finely chopped almonds or even colorful sprinkles. Serve smaller bite‑size squares on a fun plate and let kids drizzle a little extra chocolate themselves.
📦 Storage & Reheating
🧊 Conservation
Refrigerator:
- Duration: 3‑4 days
- Container: Airtight glass dome or plastic container
- Tip: Place a sheet of parchment between layers to prevent sogginess.
Freezer:
- Duration: 2 months
- Method: Wrap the entire cake tightly in cling film, then foil.
- Defrosting: Transfer to the fridge overnight, then let sit at room temperature for 30 minutes before serving.
💡 For best texture, re‑heat only the portion you’ll eat rather than the whole cake.
♨️ Reheating
🔥 Oven (Recommended):
- Preheat to 150°C (300°F).
- Cover the cake loosely with aluminum foil.
- Heat for 10‑12 minutes.
- Remove foil and heat an additional 3 minutes to restore the chocolate shine.
⚡ Microwave (Quick):
- Place a slice on a microwave‑safe plate.
- Cover with a microwave‑safe lid.
- Heat on medium power for 30‑45 seconds.
- Check and repeat in 10‑second bursts if needed.
🍳 Skillet:
Warm a slice over low heat in a non‑stick skillet for 1‑2 minutes, pressing gently with a spatula to revive the chocolate glaze.
🍷 Perfect Pairings
🥗 Accompaniments
- Mixed Berry Salad: Fresh strawberries, blueberries, and a drizzle of balsamic reduction complement the citrus notes.
- Light Lemon Sorbet: A palate‑cleansing sorbet offers a bright contrast to the rich chocolate.
- Honey‑Glazed Figs: Warm figs with a touch of honey echo the honey drizzle on the cake.
🍷 Wine & Beverage Pairings
- Vin Santo (Italian Dessert Wine): Its nutty sweetness mirrors the pistachio flavor.
- Late Harvest Riesling: The natural acidity balances the cake’s richness.
- Non‑Alcoholic: Sparkling elderflower water with a splash of orange juice.
🍰 To Complete the Meal
Start with a crisp arugula and pear salad dressed in lemon vinaigrette, follow with the Cannoli Poke Cake, and finish with a simple espresso or a glass of chilled Amaretto liqueur for a true Italian finale.
❓ Frequently Asked Questions
Q: Can I make the cake without an oven?
A: Yes. You can use a stovetop steam method by placing the batter in a heat‑proof cake tin, covering it tightly with foil, and setting it in a large pot with a couple of inches of simmering water. Steam for about 45 minutes, checking with a toothpick for doneness. The texture will be slightly denser but still delicious.
Q: How do I keep the pistachios from getting soggy?
A: Toast the pistachios just before assembly and sprinkle them over the mousse rather than mixing them in. The dry surface of the mousse helps retain the crunch. If you need to prepare ahead, store the toasted pistachios in an airtight container separate from the cake.
Q: My ricotta mousse turned watery—what went wrong?
A: Excess moisture in ricotta is the usual culprit. Drain the ricotta through cheesecloth for at least 30 minutes, or press it gently with a clean towel. Adding a small amount of gelatin (as mentioned in the pro tips) also stabilizes the mousse.
Q: Can I substitute the chocolate drizzle with a fruit glaze?
A: Absolutely. A raspberry coulis or a passion‑fruit glaze works beautifully. Warm the fruit puree, strain to remove seeds, and drizzle in the same artistic manner as the chocolate. Adjust sweetness with a little honey if needed.
Q: How do I adjust the recipe for a larger crowd?
A: The portion adjuster in the recipe card will automatically recalculate quantities. For manual scaling, multiply each ingredient by the desired number of servings divided by the base 8 servings. Keep the baking temperature the same, but increase baking time by 5‑10 minutes for larger pans.
Q: Is it possible to prepare the cake a day ahead?
A: Yes. Bake and cool the sponge layers, then store them wrapped in plastic. Prepare the mousse and keep it chilled. Assemble the cake the night before, cover tightly, and refrigerate. Add the chocolate drizzle and garnish just before serving to maintain visual appeal.
🎉 To Your Oven!
This Cannoli Poke Cake brings together the classic charm of Italian cannoli with the modern flair of a poke‑style presentation. The layers of airy ricotta mousse, moist sponge, and crunchy pistachios create a symphony of textures that will delight both eyes and palate. Whether you’re celebrating a birthday, hosting a dinner party, or simply treating yourself, this cake offers a memorable experience that feels both luxurious and approachable.
Give it a try, experiment with the suggested variations, and share your beautiful results. I love hearing how you make the recipe your own—feel free to leave a comment, ask questions, or rate the recipe. Your feedback fuels more delicious creations.
Have you tried this recipe?
Leave a comment and rating below! Share your photos on Instagram with #CannoliPokeCake for a chance to be featured.
Cannoli Poke Cake
A modern twist on a classic Italian dessert, layered with ricotta mousse and pistachio crunch.
📝 Ingredients
Cake Base
Ricotta Filling
Poke Topping
👨🍳 Instructions
- 1 Preheat oven to 175°C (350°F) and prepare a 23 cm springform pan.
- 2 Whisk dry ingredients, then combine with wet ingredients to form a smooth batter.
- 3 Bake for 25‑30 minutes, cool, then slice into three even layers.
- 4 Whip ricotta, powdered sugar, vanilla, orange zest, and cream until airy.
- 5 Assemble layers with mousse and pistachios, finishing with the top cake layer.
- 6 Drizzle melted dark chocolate over the top in a random pattern.
- 7 Sprinkle coconut flakes, drizzle honey, and garnish with mint leaves.
- 8 Chill for 20 minutes before slicing to set the chocolate.
- 9 Serve each slice with a side of berry salad or a glass of Vin Santo.
- 10 Enjoy and share your beautiful creation!
🥗 Nutrition (per serving)
*Values are estimates based on standard ingredient data.
📚 You Might Also Like
Lemon Ricotta Tart
Chocolate Pistachio Mousse
Orange Blossom Poke Bowl



💬 Comments & Reviews
Leave a Comment
No comments yet. Be the first to share your thoughts!