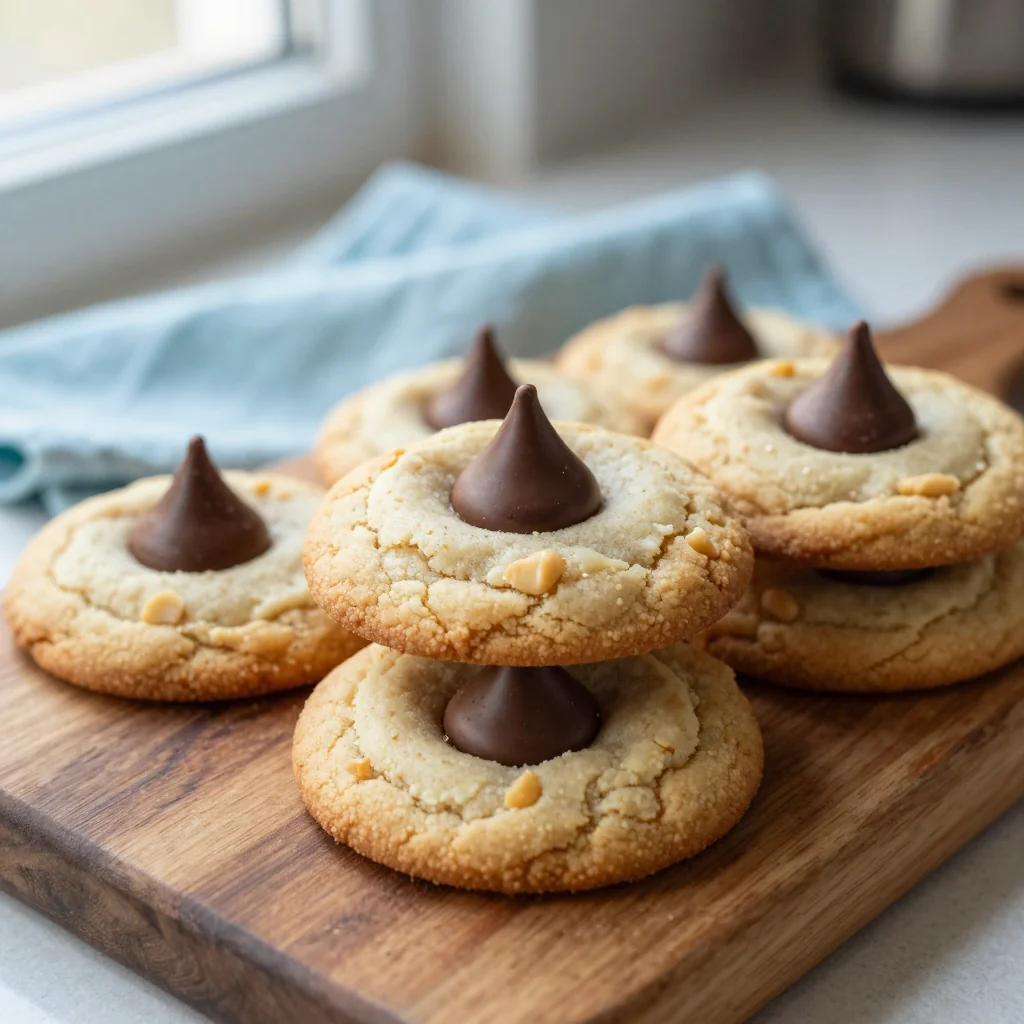
A buttery, peanut‑rich cookie crowned with a melty Hershey’s Kiss that melts in your mouth.
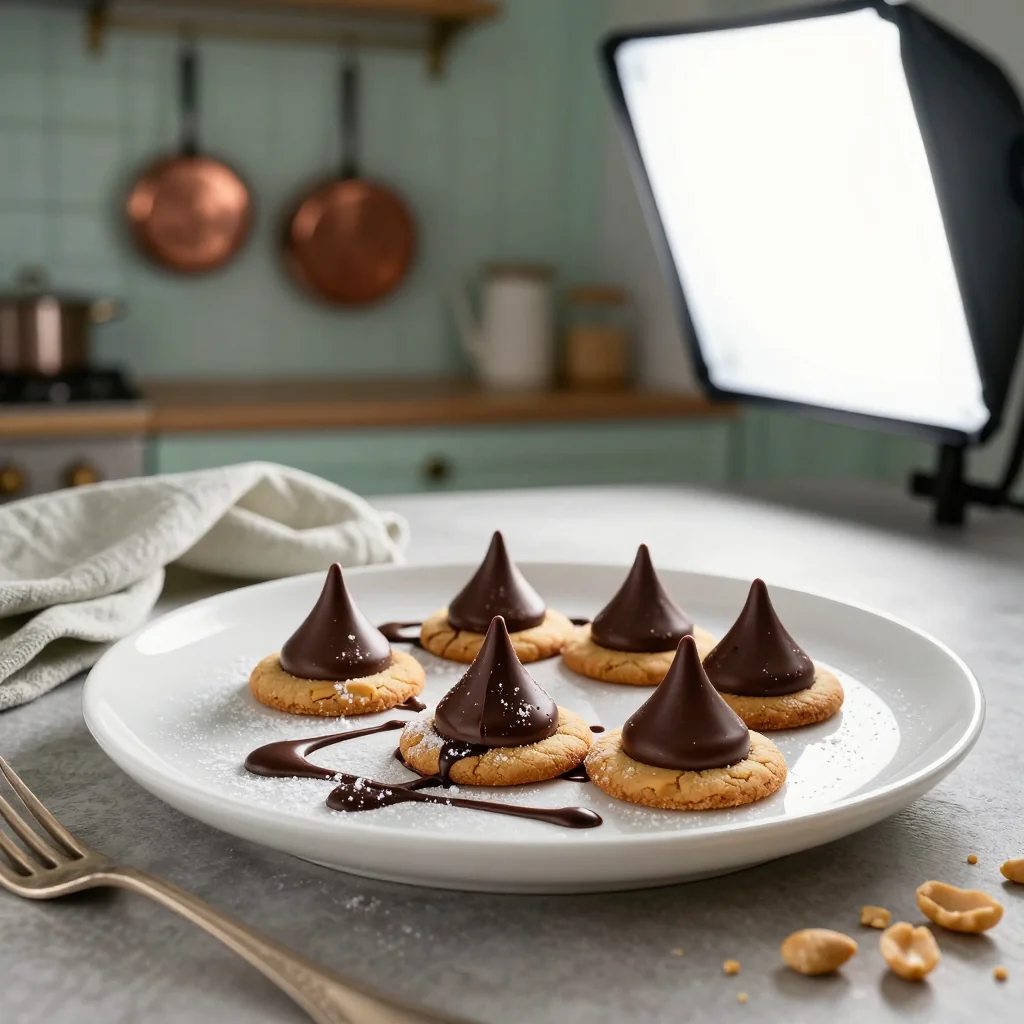
When I was ten, my grandmother’s kitchen smelled like a warm hug—sweet, nutty, and unmistakably home. She would pull out a tin of Hershey’s Kisses, melt them gently, and press them onto the tops of cookies that still smelled of fresh‑baked peanut butter. The moment the chocolate hit the warm dough, it would melt just enough to create a glossy, slightly crunchy crown that made every bite feel like a celebration.
This cookie has its roots in classic American bake‑sale traditions, where peanut butter and chocolate have long been a match made in heaven. The “blossom” concept originated from the iconic Peanut Butter Blossom cookie invented by the Nestlé company in the 1950s, but I’ve taken it a step further by swapping the traditional chocolate disc for a Hershey’s Kiss, adding a dash of sea‑salt, and tweaking the dough for a softer, chewier interior.
In this article you’ll learn how to achieve that perfect balance of creamy peanut butter, caramelized edges, and a glossy chocolate topping that doesn’t melt away too quickly. I’ll walk you through each step, from selecting the right butter to mastering the timing of the kiss placement, so you can replicate bakery‑quality cookies in your own kitchen.
Grab your mixing bowls, preheat the oven, and let’s create a batch of cookies that will become the star of any gathering—whether it’s a casual family movie night or a festive holiday cookie swap.
🌟 Why This Recipe Will Win Your Heart
These cookies combine nostalgia with a modern twist, delivering texture, flavor, and visual appeal all in one bite.
- ✨ Perfect Texture Harmony: The dough stays soft and chewy inside while the edges turn golden and slightly crisp, giving you a delightful contrast that keeps you reaching for another.
- ✨ Rich Peanut Butter Flavor: Using creamy peanut butter instead of just peanut butter powder intensifies the nutty depth, making each bite taste like a peanut‑butter lover’s dream.
- ✨ Irresistible Chocolate Crown: Hershey’s Kisses melt just enough to form a glossy, slightly firm top that adds a luxurious chocolate note without overwhelming the peanut butter.
- ✨ Simple Ingredient List: All ingredients are pantry‑friendly, meaning you likely have everything on hand, and the recipe doesn’t require any exotic equipment.
- ✨ Customizable Sweet‑and‑Salty Finish: A pinch of flaky sea salt on each kiss elevates the flavor profile, balancing the sweetness with a subtle crunch.
- ✨ Crowd‑Pleaser Every Time: Whether served at a birthday party, a school fundraiser, or a casual tea, these cookies consistently receive rave reviews for their comforting yet sophisticated taste.
🥗 Ingredients
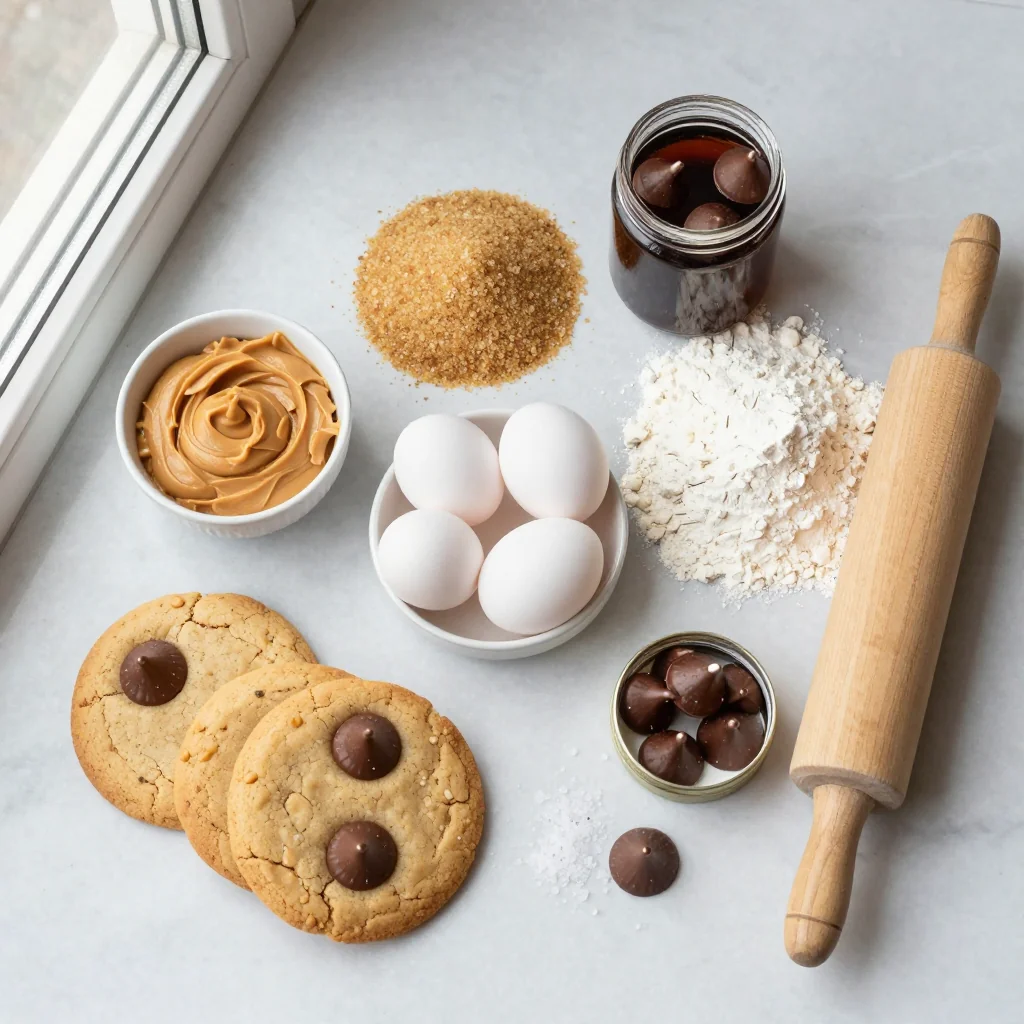
📝 Complete Ingredient List
For the Cookie Dough:
- 226 g unsalted butter, softened
- 200 g creamy peanut butter
- 200 g granulated sugar
- 220 g packed brown sugar
- 2 large eggs
- 2 tsp vanilla extract
For the Topping:
- 12 Hershey’s Kisses
- 60 g semisweet chocolate chips (optional)
- 15 ml melted butter (for brushing)
- 1 tsp flaky sea salt
🔍 Focus on Key Ingredients
Unsalted Butter
Butter provides the tender crumb that defines a good cookie. Using unsalted butter lets you control the salt level precisely, ensuring the final product isn’t overly salty. When softened, the butter emulsifies smoothly with the sugars, creating a light, airy texture after baking.
Creamy Peanut Butter
The peanut butter is the heart of this recipe. A creamy, natural version without added sugar or oil delivers a rich, nutty flavor that pairs perfectly with chocolate. Its natural oils also help keep the cookies moist, preventing them from becoming dry.
Hershey’s Kisses
Hershey’s Kisses melt quickly, forming a thin, glossy chocolate cap that sets just enough to stay in place while still being soft to bite. Their iconic shape also adds visual appeal—each cookie looks like a miniature celebration.
🔄 Quick Substitutions
| If you don’t have… | Use instead… |
|---|---|
| Unsalted butter | Salted butter (reduce added salt by ½ tsp) |
| Peanut butter | Almond butter or cashew butter (same amount) |
| Hershey’s Kisses | Mini chocolate chips or dark chocolate squares |
👨🍳 Step‑by‑Step Instructions
Follow these detailed steps to create cookies that are soft, chewy, and perfectly topped with a melty Hershey’s Kiss.
📋 Phase 1: Preparation & Mise en Place
Gather and measure all ingredients before you start mixing.
Soften Butter and Blend with Peanut Butter
Place the softened butter and creamy peanut butter into a large mixing bowl. Using a handheld electric mixer on medium speed, beat them together for about 2 minutes until the mixture is light, fluffy, and uniformly pale. You’ll notice the butter becoming aerated, which is crucial for a tender crumb.
Add Sugars and Beat Until Creamy
Gradually add the granulated sugar followed by the brown sugar while the mixer is running. Continue beating for another 3‑4 minutes. The mixture should become glossy and slightly thickened, indicating that the sugar has begun to dissolve into the fat.
Incorporate Eggs and Vanilla
Crack the two large eggs into the bowl, one at a time, allowing each to fully integrate before adding the next. Add the vanilla extract and beat on low speed just until the batter is smooth. Over‑mixing at this stage can cause the cookies to become tough.
🔥 Phase 2: Mixing Dry Ingredients & Forming Cookies
Combine the dry components and shape the cookies for baking.
Whisk Flour, Baking Soda, and Salt
In a separate bowl, whisk together the all‑purpose flour, baking soda, and a pinch of salt. This ensures an even distribution of the leavening agent, preventing pockets of soda that could cause uneven rise.
Combine Wet and Dry Mixtures
Gradually add the dry flour mixture to the wet peanut butter mixture, using the mixer on low speed. Scrape down the sides of the bowl periodically. The dough will be thick, slightly sticky, and should pull away from the sides without leaving large flour pockets.
Portion the Dough
Using a cookie scoop (about 2 tablespoons) or a tablespoon, portion the dough onto a parchment‑lined baking sheet. Space each mound about 2 inches apart, as the cookies will spread slightly during baking.
✨ Phase 3: Baking, Topping, and Finishing
Bake the cookies, add the chocolate crowns, and let them cool.
Bake the Cookies
Preheat your oven to 175°C (350°F). Bake the cookies for 10‑12 minutes, or until the edges are lightly golden but the centers still appear soft. Rotate the pan halfway through for even browning.
Place Hershey’s Kisses
Immediately after removing the cookies from the oven, press a Hershey’s Kiss into the center of each warm cookie. The residual heat will melt the bottom of the Kiss, creating a glossy seal.
Brush with Melted Butter and Sprinkle Sea Salt
Using a pastry brush, lightly brush each Kiss with a thin layer of melted butter. Then, sprinkle a pinch of flaky sea salt over the top. The butter adds shine, while the salt accentuates the chocolate‑nutty contrast.
Cool and Serve
Allow the cookies to cool completely on a wire rack. This will let the chocolate set fully and the cookie firm up enough to handle without breaking.
💡 Expert Tips & Tricks
🛒 Choosing the Right Ingredients
When shopping for butter, opt for a European‑style butter if you can find it; it contains a higher butterfat content, which translates into richer flavor and a softer crumb. For peanut butter, read the label carefully—choose a product that lists only peanuts (and perhaps a pinch of salt) without added sugars, palm oil, or hydrogenated oils. The cleaner the ingredient list, the more authentic the peanut taste will be. Finally, always check the expiration date on your Hershey’s Kisses; stale chocolate can introduce off‑flavors that detract from the overall experience.
🔪 Preparation Techniques
Before you begin, line your baking sheet with parchment paper or a silicone mat; this prevents sticking and makes cleanup a breeze. When scooping the dough, use a cookie scoop of uniform size to ensure even baking—uneven portions bake at different rates, leading to some cookies being over‑done while others stay undercooked. Also, lightly dust your hands with flour if the dough becomes too sticky while shaping; this helps keep the dough smooth without incorporating extra flour into the batter.
🌡️ Mastering the Bake
The oven’s temperature can vary by a few degrees, so it’s wise to use an oven thermometer for accuracy. Baking at 175°C (350°F) gives the cookies a golden edge while preserving a soft interior. If you prefer a chewier texture, reduce the bake time by a minute and let the cookies finish setting on the hot pan for a couple of minutes after removal. This residual heat continues the cooking process gently, preventing a hard crust.
🍽️ Presentation & Service
Arrange the cooled cookies on a decorative platter, alternating the chocolate crowns with a dusting of cocoa powder for a striking visual contrast. Pair them with a glass of chilled milk or a light, fruity white wine such as a Riesling to balance the richness. For a festive touch, drizzle a thin ribbon of caramel sauce over a few cookies just before serving.
🏆 Pro Tips
Professional bakers focus on precision, texture control, and flavor layering to elevate a simple cookie into a masterpiece.
- 🎯 Temperature‑Controlled Butter: Chill the butter to 10‑12°C (50‑55°F) before creaming. This temperature is cool enough to hold air pockets while still soft enough to blend smoothly, resulting in a lighter dough.
- 🎯 Double‑Stage Mixing: First cream butter and peanut butter together, then incorporate sugars. This two‑stage method prevents sugar crystals from interfering with the emulsion, giving a smoother crumb.
- 🎯 Accurate Portioning with a Scale: Weigh each dough ball to 45 g for uniform size. Consistency in weight ensures even spreading and identical baking times across the batch.
- 🎯 Controlled Melt of Chocolate: Place the Hershey’s Kisses on a hot plate for just 5 seconds before inserting them into the cookies. This quick melt creates a glossy surface without the chocolate seeping into the cookie body.
- 🎯 Salt Finish Timing: Sprinkle sea salt while the chocolate is still warm; the salt will adhere better and create a subtle crunch that contrasts the soft cookie.
- 🎯 Resting the Dough: Chill the formed dough balls for 15 minutes before baking. This step reduces spread, giving you thicker, chewier cookies with a more pronounced peanut flavor.
"Great cookies are built on balance—sweet, salty, soft, and crisp—all in one bite." — Thomas Keller
🔄 Variations & Adaptations
The core recipe is versatile, allowing you to tailor it to dietary needs, flavor preferences, or seasonal themes.
🥬 Vegetarian / Vegan Version
Swap the unsalted butter for a plant‑based butter or coconut oil, and replace the eggs with a flax‑egg mixture (1 tbsp ground flaxseed + 3 tbsp water per egg). Use a vegan peanut butter (no honey) and choose dairy‑free chocolate kisses or dark chocolate chips. The texture remains tender, and the flavor profile stays true to the original.
- Vegan butter: 226 g, chilled
- Flax‑egg: 2 tbsp ground flax + 6 tbsp water
🌶️ Flavor Variations
Feel free to experiment with complementary flavors that pair beautifully with peanut butter and chocolate.
Spicy Version:
Add ½ tsp cayenne pepper to the dry ingredients and a pinch of smoked paprika to the melted butter brush. The subtle heat awakens the chocolate without overwhelming the nutty base.
Mediterranean Version:
Incorporate ¼ cup finely chopped toasted pistachios into the dough and replace sea salt with a light sprinkle of za’atar after baking. The nutty pistachios add crunch, while za’atar introduces an aromatic herbaceous note.
Asian Fusion Version:
Mix 1 tbsp toasted sesame oil into the dough and finish each cookie with a drizzle of black sesame paste after cooling. The sesame adds a toasty depth that complements the peanut butter beautifully.
⚠️ Dietary Adaptations
Gluten‑Free:
Replace all‑purpose flour with a 1:1 gluten‑free flour blend (e.g., rice flour, tapioca starch, potato starch). Add ½ tsp xanthan gum to mimic the elasticity of gluten.
Lactose‑Free:
Use lactose‑free butter or a high‑fat coconut cream in place of dairy butter. Ensure the chocolate kisses are dairy‑free (dark chocolate varieties often are).
Low‑Calorie:
Reduce the granulated sugar to 100 g, replace half the butter with unsweetened applesauce, and use mini chocolate kisses to cut calories while maintaining visual appeal.
👶 Family / Kid‑Friendly Version
Kids love the visual appeal of the chocolate crowns. To make it more kid‑friendly, use mini Hershey’s Kisses and add a drizzle of white chocolate after cooling. Serve with a side of fresh strawberries for a colorful, balanced snack.
📦 Storage & Reheating
🧊 Conservation
In the Refrigerator:
- Duration: Up to 7 days
- Recommended container: Airtight glass jar or a zip‑lock bag with a slice of bread to retain moisture
- Tip: Place a piece of parchment between layers to prevent sticking.
In the Freezer:
- Duration: Up to 3 months
- Method: Freeze on a tray first, then transfer to a freezer‑safe bag to avoid freezer burn.
- Defrosting: Transfer to the refrigerator overnight, then let sit at room temperature for 15 minutes before serving.
💡 For optimal texture, re‑bake frozen cookies for 3‑4 minutes at 175°C (350°F) before serving.
♨️ Reheating
🔥 In the Oven (Recommended):
- Preheat to 150°C (300°F)
- Place cookies on a baking sheet, cover loosely with foil
- Heat for 5‑7 minutes
- Remove foil and heat an additional 2 minutes to restore crisp edges
⚡ In the Microwave (Quick):
- Place a single cookie on a microwave‑safe plate
- Cover with a microwave‑safe lid or another plate
- Heat on medium power for 15‑20 seconds
- Check and repeat in 5‑second bursts if needed
🍳 In a Skillet:
Warm a non‑stick skillet over low heat, add a tiny splash of butter, and place a cookie for 30‑45 seconds per side. This method revives the crisp edge while keeping the center soft.
🍷 Perfect Pairings
🥗 Side Dishes
- Fresh Fruit Salad: A mix of berries and citrus provides a bright contrast to the rich cookies.
- Light Green Salad: Arugula with a lemon vinaigrette cuts through the sweetness.
- Vanilla Yogurt Dip: A dollop of sweetened Greek yogurt with a drizzle of honey adds creaminess.
🍷 Wine & Beverage Matches
- Riesling (Off‑Dry): The subtle acidity balances the peanut butter’s richness.
- Port Wine: Its deep, fruity notes echo the chocolate and enhance the overall indulgence.
- Non‑Alcoholic Option: A cold glass of milk or a vanilla‑infused almond milk latte.
🍰 Complementary Courses
Start your meal with a light citrus sorbet to awaken the palate, follow the cookies with a silky chocolate mousse for a decadent finish, and serve a simple vanilla custard as a palate cleanser between courses.
❓ Frequently Asked Questions
Q: Can I use crunchy peanut butter instead of creamy?
Yes, you can, but the texture will be slightly grainier, and the dough may be a bit more crumbly. If you prefer a smoother bite, blend the crunchy peanut butter in a food processor for a few seconds before adding it to the butter. This will break down the larger peanut pieces while preserving the robust flavor.
Q: How do I prevent the cookies from spreading too much?
The key is to chill the dough balls for at least 15 minutes before baking. Cold dough spreads less in the oven. Additionally, using a higher protein flour (bread flour) can give the dough more structure, reducing spread. Finally, make sure your butter is not overly soft; it should be just softened, not melted.
Q: My cookies turned out too hard—what went wrong?
Over‑baking is the most common culprit. Remove the cookies when the edges are just turning golden and the centers still look slightly undercooked; they will continue to set on the hot pan. Also, excess flour or too much baking soda can create a dry texture. Double‑check your measurements and consider using a kitchen scale for accuracy.
Q: Can I substitute the Hershey’s Kisses with another chocolate?
Absolutely. Mini chocolate chips, dark chocolate squares, or even a thin disc of couverture chocolate work well. If you use larger pieces, press them gently into the center after baking to ensure they melt evenly. Keep in mind that dark chocolate will add a more bitter note, while milk chocolate will keep the flavor sweeter.
Q: How can I make these cookies gluten‑free?
Replace the all‑purpose flour with a 1:1 gluten‑free flour blend that contains a mix of rice flour, potato starch, and tapioca starch. Adding ½ tsp xanthan gum helps mimic the elasticity of gluten, preventing the cookies from crumbling. The rest of the recipe stays the same, and the texture remains pleasantly chewy.
Q: Is it possible to make the dough ahead of time?
Yes, you can prepare the dough up to the point of forming the balls, then wrap the dough tightly in plastic wrap and refrigerate for up to 24 hours. This even improves flavor development. When you’re ready to bake, simply scoop and bake as directed, adding a few extra minutes if the dough is very cold.
🎉 Let’s Get Baking!
These Peanut Butter Blossom Cookies with Hershey’s Kisses embody the perfect marriage of comfort and indulgence. The buttery, peanut‑rich base paired with a glossy chocolate crown creates a multi‑dimensional taste experience that’s both familiar and exciting. Whether you’re serving them at a family gathering, a holiday party, or simply treating yourself after a long day, they never fail to impress. The recipe’s flexibility means you can adapt it to dietary needs, experiment with flavor twists, or keep it classic—the choice is yours.
Give the recipe a try, snap a photo of your golden‑brown creations, and share your thoughts in the comments below. Your feedback helps me refine the recipe and inspires other bakers to join the fun. Don’t forget to rate the recipe and let the community know how it turned out for you!
Have you tried this recipe?
Leave a comment and rating below! Share your photos on Instagram with #PeanutButterBlossom for a chance to be featured.
Peanut Butter Blossom Cookies with Hershey Kisses
Buttery peanut‑butter cookies crowned with a melty Hershey’s Kiss.
📝 Ingredients
Cookie Dough
Topping
👨🍳 Instructions
- 1
Soften butter and blend with peanut butter until light and fluffy.
- 2
Add granulated and brown sugars; beat until glossy.
- 3
Incorporate eggs one at a time, then vanilla.
- 4
Whisk flour, baking soda, and salt; fold into wet mixture.
- 5
Portion dough onto a parchment‑lined sheet, 2 tbsp each.
- 6
Bake at 175°C (350°F) for 10‑12 min until edges turn golden.
- 7
Press a Hershey’s Kiss into each warm cookie.
- 8
Brush with melted butter and sprinkle sea salt.
- 9
Cool on a wire rack before serving.
- 10
Enjoy! Store leftovers as directed.
🥗 Nutrition per Serving
*Values are estimates based on standard ingredients.
📚 You Might Also Like
Classic Chocolate Chip Cookies
Oatmeal Raisin Cookies
Snickerdoodle Cookies


💬 Comments & Reviews
Leave a Comment
[Reader comments will appear here]