I was in the middle of a frantic Tuesday night when my roommate dared me to bake dinner rolls that would actually rise in under an hour. My first attempt was a flat, sad pancake‑like disc that could barely hold a dab of butter without collapsing. I swear I heard the oven sigh in disappointment. That disaster sparked a mission: create a roll so soft and buttery that even the most skeptical critic would beg for a second helping. If you’ve ever stood in front of a bag of store‑bought rolls feeling like you’ve settled for mediocrity, you’ll understand the fire that drove me to keep experimenting.
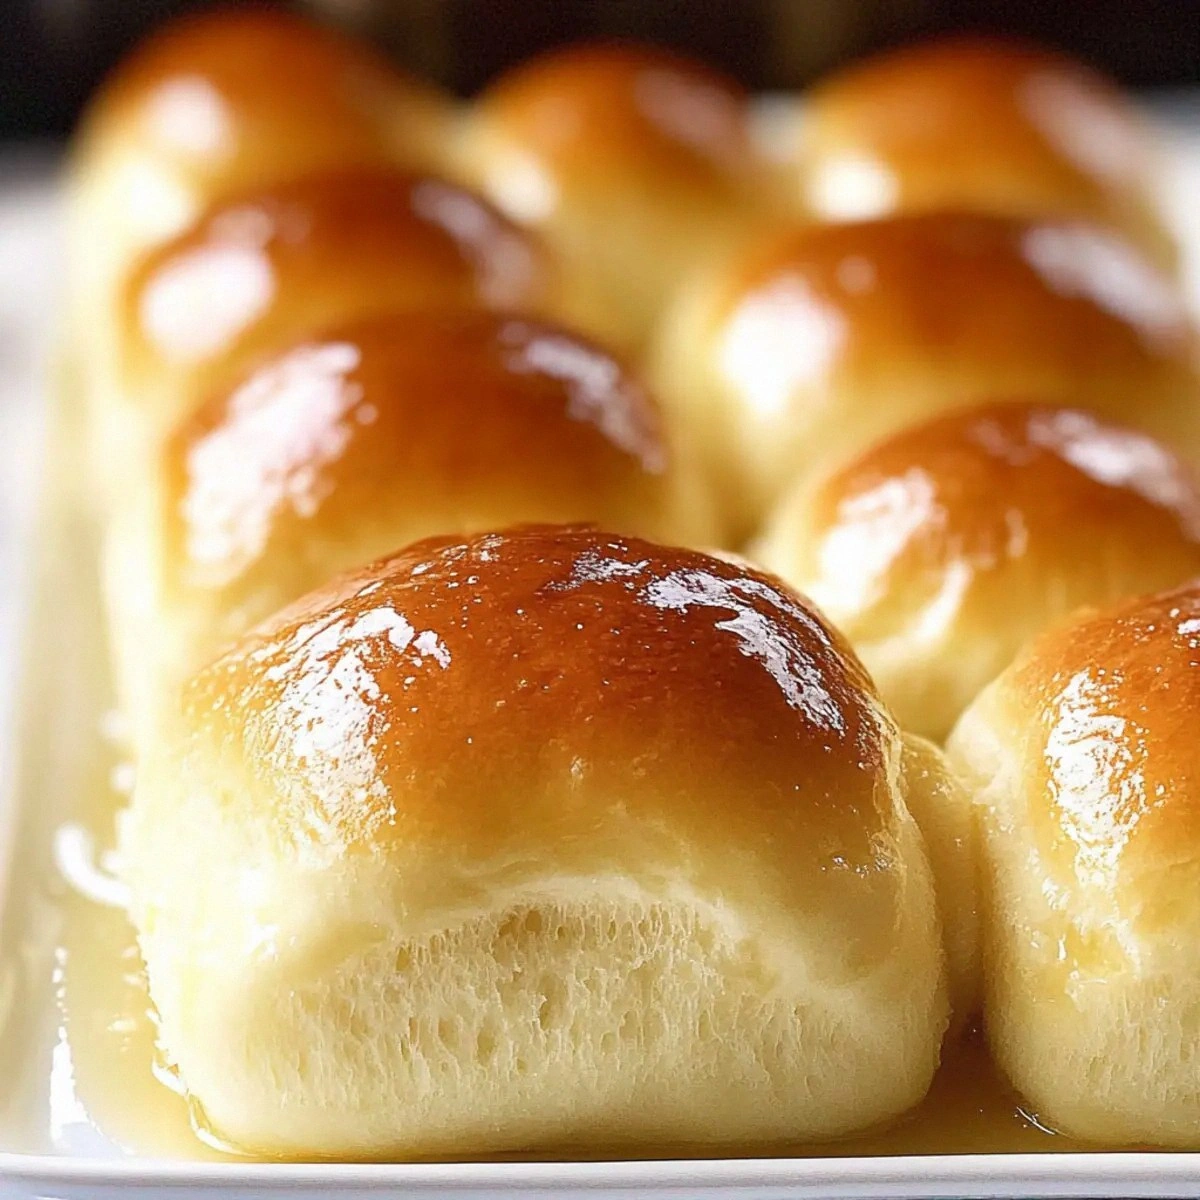
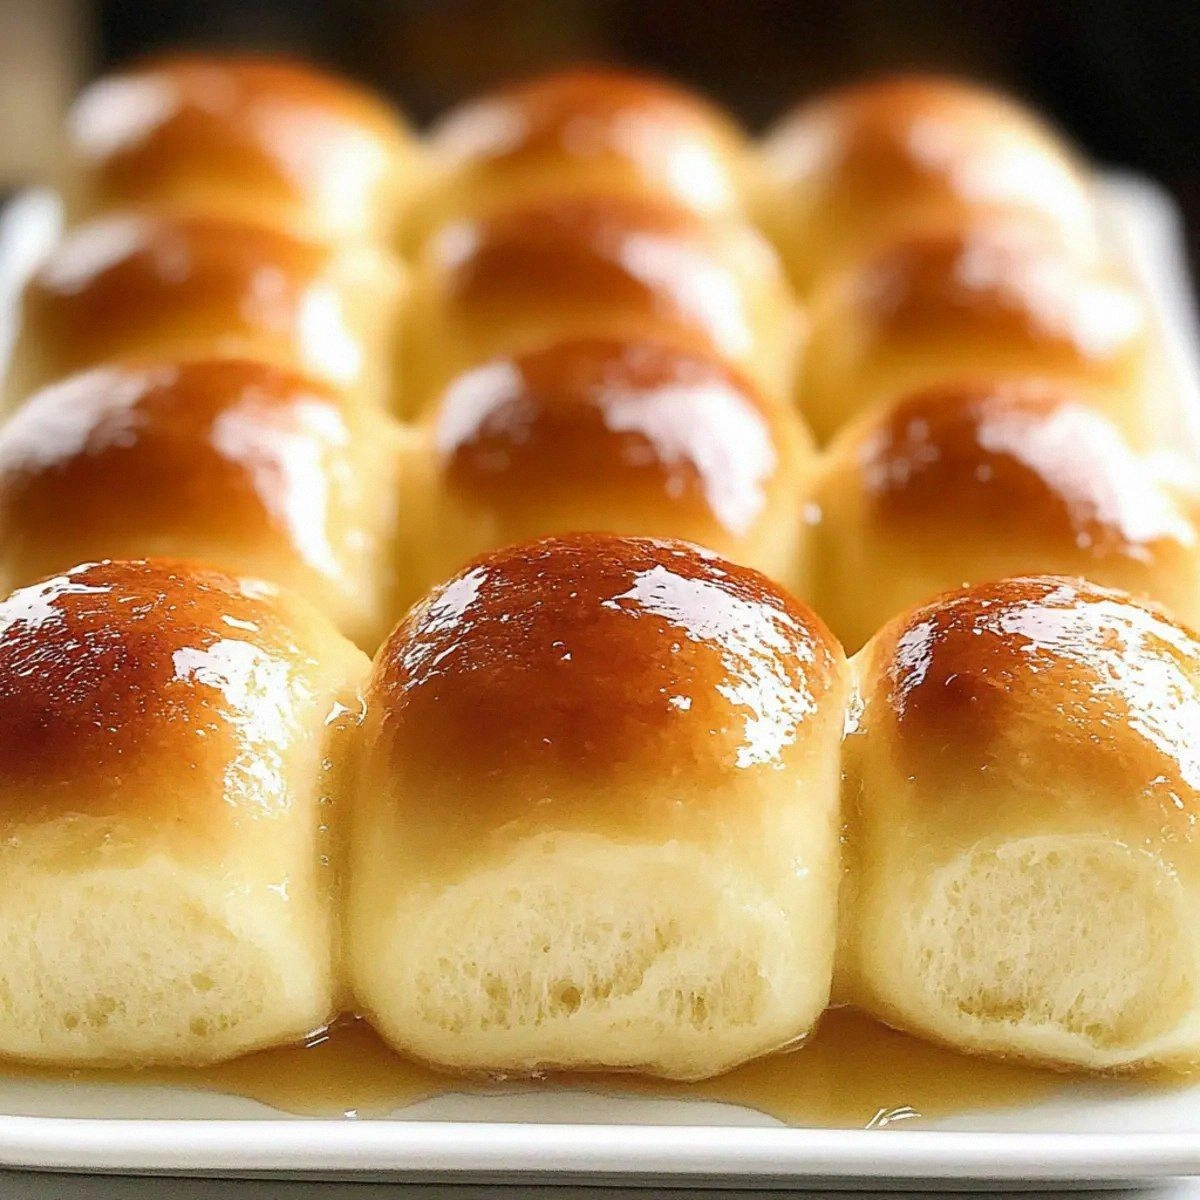
Picture this: the kitchen humming with the gentle whirr of the mixer, the sweet aroma of honey mingling with warm milk, and the faint crackle of butter melting into a golden pool. The dough, once a shaggy mess, transforms under your hands into a silky, elastic blanket that feels like a plush blanket for your fingertips. When it finally bakes, the rolls puff up like tiny clouds, their tops glistening with a buttery sheen that catches the light just right. The moment you slice into one, the steam rushes out, and the interior reveals a crumb so tender it practically melts on your tongue.
Most recipes either demand a long, labor‑intensive proof or sacrifice flavor for speed. This version, however, walks the tightrope between the two with the grace of a seasoned ballerina. The secret? A precise balance of warm liquids, a dash of honey for just the right hint of sweetness, and a generous splash of melted butter that locks in moisture. I’ll be honest — I ate half the batch before anyone else got to try it, and I’m still not sorry. I dare you to taste this and not go back for seconds.
Okay, ready for the game‑changer? I’m about to reveal a technique that most bakers overlook: a short, high‑heat blast at the end of baking that creates that coveted “crust‑to‑soft‑center” contrast. Trust me, this little hack turns ordinary rolls into the best version you’ll ever make at home. Let me walk you through every single step — by the end, you’ll wonder how you ever made it any other way.
What Makes This Version Stand Out
- Flavor: The honey‑butter blend creates a subtle sweetness that never overwhelms, letting the natural wheat taste shine through.
- Texture: A soft, pillowy crumb with a slightly crisp, buttery top—think cloud meets caramelized crust.
- Simplicity: Only eight ingredients, no fancy equipment, and a total hands‑off time of 45 minutes.
- Speed: From mixing to the first pull‑apart, the whole process wraps up in exactly one hour.
- Crowd Reaction: Even the most critical eaters admit they’ve never tasted anything this buttery in a roll.
- Ingredient Quality: Using warm milk and butter ensures the dough stays supple, while fine sea salt amplifies every nuance.
- Method: The “quick rise” technique leverages a warm, humid environment to coax the yeast into rapid action.
- Make‑Ahead Potential: Freeze the unbaked dough balls for up to a month; bake straight from freezer for fresh rolls anytime.
Inside the Ingredient List
The Flavor Base
Warm water (1 cup) is the catalyst that awakens the yeast, but it also sets the stage for a tender crumb. If the water is too hot, you’ll kill the yeast; too cold and the dough will crawl. Aim for a temperature that feels like a summer shower—around 105°F (40°C). For a dairy‑free version, replace the water with an equal amount of oat milk, but expect a slightly different flavor profile.
The Texture Crew
Melted butter (¼ cup) and warm milk (½ cup) are the dynamic duo that gives these rolls their luxurious mouthfeel. Butter adds richness, while milk contributes proteins that strengthen the gluten network, resulting in that coveted soft interior. If you’re lactose intolerant, swap the milk for almond milk and the butter for a plant‑based spread; the rolls will still rise beautifully, though the flavor will shift toward a nutty note.
The Unexpected Star
Honey (2 tablespoons) isn’t just a sweetener; it feeds the yeast, accelerating fermentation and creating a subtle caramel undertone. It also helps the crust brown evenly, giving the rolls that golden‑kissed finish. If you don’t have honey on hand, maple syrup works as a 1:1 substitute, but the flavor will lean more toward maple, which can be delightful for a fall twist.
The Final Flourish
All‑purpose flour (3.5‑4 cups) is the backbone of the dough. Using the lower end of the range yields a softer, more tender roll, while the higher end adds a bit of chew. For an extra‑light crumb, you can substitute 25% of the flour with cake flour; just be careful not to over‑mix, or you’ll develop too much gluten and lose that melt‑in‑your‑mouth quality.
Everything's prepped? Good. Let's get into the real action…
The Method — Step by Step
In a large mixing bowl, combine the warm water, warm milk, and honey. Stir until the honey dissolves completely; you’ll notice a glossy sheen that signals the liquid is ready for the yeast. This step is pure magic because the honey not only sweetens but also gives the yeast a quick energy boost.
Kitchen Hack: Sprinkle the yeast over the liquid mixture instead of mixing it in; the yeast will hydrate evenly without clumping.Add the active dry yeast (2 teaspoons) to the liquid and give it a gentle stir. Let the mixture sit for 5 minutes; you’ll see it become foamy, a sign that the yeast is alive and kicking. If no foam appears, the yeast may be dead—don’t panic, just start over with fresh yeast.
Pour in the melted butter (¼ cup) and fine sea salt (1 teaspoon). The butter should be warm but not scorching; this ensures it blends seamlessly without shocking the yeast. The salt not only seasons the dough but also regulates yeast activity, preventing an over‑rise that could lead to a collapsed roll.
Gradually add the flour, starting with 3 cups, mixing with a wooden spoon or a stand‑mixer's dough hook on low speed. As the dough begins to come together, sprinkle in the remaining flour until the dough pulls away from the sides of the bowl, forming a smooth, slightly tacky ball. This should take about 3‑4 minutes of mixing.
Watch Out: Adding too much flour will make the rolls dense; stop adding when the dough feels soft and a bit elastic.Turn the dough out onto a lightly floured surface and knead for 5‑6 minutes. You’re looking for that “windowpane” test: stretch a small piece of dough; if it becomes translucent without tearing, the gluten is well‑developed. This is the moment of truth—proper kneading guarantees that airy crumb we all crave.
Shape the dough into a smooth ball, place it in a lightly greased bowl, and cover with a clean kitchen towel. Let it rise in a warm spot (around 80°F/27°C) for 20‑25 minutes, or until it has doubled in size. The kitchen should smell faintly sweet, like a bakery at dawn.
Punch down the risen dough gently to release excess gas, then divide it into 12 equal pieces (about the size of a golf ball). Roll each piece into a tight ball, tucking the seams underneath. This uniform sizing ensures even baking and that perfect “pull‑apart” feel.
Arrange the balls on a parchment‑lined baking sheet, spacing them about 1 inch apart. Brush the tops generously with the extra tablespoon of melted butter; this step creates that glossy, buttery finish we all love. Let the rolls rest for a final 10‑12 minutes while the oven preheats to 425°F (220°C).
Kitchen Hack: Place a shallow pan of hot water on the lower rack of the oven; the steam helps the tops stay soft while still achieving a golden color.Bake for 12‑15 minutes, or until the tops are a deep golden brown and the rolls sound hollow when tapped on the bottom. Halfway through, rotate the sheet for an even crust. The scent that fills your kitchen at this point? Absolute perfection.
Remove the rolls from the oven and immediately brush them with the remaining melted butter. This final butter glaze locks in moisture, giving each roll that melt‑in‑your‑mouth softness. Let them cool on a wire rack for 5 minutes before serving—though I won’t deny that the first bite is worth the wait.
That's it — you did it. But hold on, I've got a few more tricks that'll take this to another level…
Insider Tricks for Flawless Results
The Temperature Rule Nobody Follows
Yeast is a fickle creature; it thrives between 95°F and 105°F. If your kitchen is cooler, create a proofing box by placing the covered bowl in a turned‑off microwave with a cup of hot water inside. The gentle heat and humidity coax the dough to rise faster without over‑activating the yeast. I once tried to proof in a fridge and ended up with a dense loaf—lesson learned.
Why Your Nose Knows Best
Instead of watching the clock, trust your senses. When the dough has doubled, it should feel light and spring back slightly when pressed. The aroma will shift from yeasty to sweet and buttery. If you’re unsure, perform the “finger dent” test: press a finger gently into the dough; if the indentation slowly fills back, you’re good to go.
The 5‑Minute Rest That Changes Everything
After shaping the rolls, give them a brief 5‑minute rest before the final rise. This short pause relaxes the gluten, allowing the rolls to expand more evenly in the oven. Skipping this step can lead to a tight crumb and a less tender bite. I tried cutting it out once for speed; the result was a roll that felt more like a biscuit than a dinner roll.
Butter Brush Boost
For an ultra‑shiny crust, melt the butter with a splash of olive oil before brushing. The oil raises the butter’s smoke point, preventing it from burning during that high‑heat burst at the end of baking. This tiny tweak gives you a glossy finish without a greasy aftertaste.
Freezer‑Friendly Prep
If you want to have rolls ready for a surprise guest, shape the dough balls, flash‑freeze them on a tray, then transfer to a zip‑lock bag. When you need them, bake straight from frozen, adding an extra 3‑4 minutes to the bake time. The rolls will rise beautifully in the oven’s heat, delivering fresh‑baked goodness on demand.
Creative Twists and Variations
This recipe is a playground. Here are some of my favorite ways to switch things up:
Garlic‑Herb Delight
Add 2 minced garlic cloves and a tablespoon of mixed fresh herbs (parsley, thyme, rosemary) to the butter before brushing. The fragrant crust pairs perfectly with pasta dishes or a hearty stew.
Cheesy Jalapeño Pop
Fold in ½ cup shredded cheddar and 1 finely diced jalapeño into the dough before the first rise. The result is a spicy‑cheesy surprise that’s a hit at game nights.
Sweet Cinnamon Swirl
Mix 2 teaspoons cinnamon with 2 tablespoons brown sugar, then roll a thin layer of this mixture onto the dough before shaping. These rolls become a breakfast‑friendly treat that still holds its place at the dinner table.
Whole‑Wheat Health Boost
Replace half of the all‑purpose flour with whole‑wheat flour and add a tablespoon of vital wheat gluten to maintain structure. You’ll get a nuttier flavor and a fiber boost without sacrificing softness.
Maple‑Bacon Bliss
Stir ¼ cup crisp‑cooked, crumbled bacon and 2 teaspoons pure maple syrup into the dough. The sweet‑savory combo makes these rolls a standout side for holiday feasts.
Storing and Bringing It Back to Life
Fridge Storage
Place cooled rolls in an airtight container or zip‑lock bag and store them in the refrigerator for up to 4 days. To refresh, microwave for 15 seconds and then finish under a hot broiler for 1 minute to re‑crisp the tops.
Freezer Friendly
Wrap each roll individually in parchment paper, then place them in a freezer‑safe bag. They’ll keep for up to 3 months. When you’re ready to serve, let them thaw at room temperature for 30 minutes, brush with a little butter, and bake at 350°F for 8‑10 minutes.
Best Reheating Method
Add a tiny splash of water (about a tablespoon) to the bottom of the oven‑safe dish, cover the rolls loosely with foil, and heat at 300°F for 5‑7 minutes. The steam created by the water revives the interior crumb, while the foil protects the buttery crust from drying out.