The first time I made these Winter Wonderland Chocolate Chip Christmas Cookies, I was halfway through a disastrous attempt at gingerbread houses that looked more like condemned shacks than festive cottages. Flour dusted my hair like premature snow, the royal icing had seized into cement, and my kitchen looked like a winter storm had met a sugar tornado. But then something magical happened—these cookies emerged from the oven like edible snowballs studded with molten chocolate gems, and suddenly the whole chaotic afternoon transformed into pure Christmas magic. The scent alone could make even the grumpiest Scrooge crack a smile, with buttery vanilla notes dancing through warm spices that whisper fireplace stories and mistletoe moments.
Let me paint you a picture of what makes these cookies absolutely irresistible. Imagine biting into a cookie that's crisp at the very edges like the first frost on your windowpane, then giving way to a center so soft and chewy it feels like sinking into a down comforter on a snowy morning. The chocolate chips melt into pockets of liquid velvet that contrast against the snowy white dough, each bite releasing waves of caramelized brown sugar, fragrant vanilla, and a secret blend of winter spices that make your taste buds sing carols. These aren't just cookies—they're edible Christmas memories that somehow taste exactly like December feels.
I know what you're thinking because I thought it too: chocolate chip cookies at Christmas? Isn't that basic? But here's the thing—I've tried every fancy holiday cookie under the sugared sun, and nothing, absolutely nothing, disappears faster than a plate of these winter wonderland beauties. They're familiar enough to comfort the traditionalists but special enough to impress the food snobs. Plus, and here's my favorite part, they make your entire house smell like you've been baking with Mrs. Claus herself for hours, even though the whole process takes less time than watching your favorite Christmas movie.
This recipe came to me after years of disappointing holiday cookies that either spread into flat puddles or stayed stubbornly doughy in the middle. I'd tried every trick—chilling dough overnight, using bread flour, adding cornstarch, even consulting my grandmother's yellowed recipe cards. Nothing delivered that perfect texture until I accidentally discovered the game-changing technique I'm about to share with you. Picture yourself pulling these golden beauties from the oven, the chocolate chips still glossy and molten, while snow falls gently outside your window and Christmas music plays softly in the background. Let me walk you through every single step—by the end, you'll wonder how you ever made it any other way.
What Makes This Version Stand Out
Snow-Kissed Texture: These cookies achieve the impossible—crispy edges that shatter like thin ice while maintaining a center so soft it practically melts on your tongue. The secret lies in the ratio of brown sugar to white sugar, creating that perfect chewy interior with caramelized edges that taste like the best parts of a crème brûlée and a cookie had a delicious baby.
Christmas Magic Spices: Most chocolate chip cookies are one-note wonders, but these beauties incorporate a whisper of cinnamon, a kiss of cardamom, and the faintest hint of orange zest that makes the chocolate sing. It's subtle enough that people can't quite identify what makes them special, but distinctive enough that they know these aren't ordinary cookies.
Foolproof Technique: I've tested this recipe at every elevation, in every type of oven, and even with my distractible nephew helping (which is saying something). The method is bulletproof—no more guessing when they're done, no more cookies that spread into sad puddles, no more raw centers. I dare you to mess these up.
Make-Ahead Champion: The dough freezes like a dream, meaning you can have fresh-baked cookies anytime the craving strikes. Imagine surprising unexpected guests with warm cookies straight from the oven, or treating yourself to a solo cookie moment during a quiet winter evening. Just slice and bake—no thawing required.
Chocolate Distribution Mastery: Through extensive "research" (read: eating dozens of cookies), I've discovered the optimal chocolate chip placement and size variety. Some chips melt completely into chocolate rivers, others stay intact for textural contrast, and a few sit right at the surface for that Instagram-worthy chocolate pornography.
Crowd Psychology: These cookies tap into something primal—the perfect balance of nostalgia and excitement. Kids love them because they're essentially approved dessert for breakfast, adults love them because they taste like childhood but sophisticated enough for grown-up palates. I once brought these to an office party and witnessed actual grown adults hiding cookies in their desk drawers.
Ingredient Quality Leverage: This recipe makes the absolute most of premium ingredients without being pretentious about it. European butter, real vanilla bean paste, and good chocolate transform humble pantry staples into something that tastes like it came from a Parisian bakery. But here's the magic—even with basic supermarket ingredients, these cookies are still incredible.
Inside the Ingredient List
The Foundation Players
European-style butter is the unsung hero here, with its higher fat content creating cookies so tender they practically sigh when you bite into them. I learned this trick from a French baker who swore by butter with 82% fat content, and the difference is remarkable—like comparing a cashmere sweater to a polyester blend. The butter needs to be perfectly softened, not melted, because those tiny solid fat particles create steam pockets that give these cookies their lift. If you only have regular American butter, don't panic—just reduce the flour by two tablespoons and you'll still achieve cookie nirvana.
Brown sugar is where the real magic lives, its molasses content bringing deep caramel notes and that perfect chewy texture that makes these cookies impossible to resist. I use dark brown sugar exclusively because it has more molasses, creating that rich, complex flavor that makes people close their eyes involuntarily when they take a bite. The hygroscopic nature of brown sugar also means these cookies stay soft for days, assuming they last that long. Pro tip: if your brown sugar has hardened into a rock, microwave it with a damp paper towel for 30 seconds and it'll soften right up.
The Chocolate Committee
Chocolate selection makes or breaks these cookies, and I've become annoyingly particular about this. I use a blend of high-quality semisweet chips and chopped dark chocolate because they melt at different rates, creating layers of chocolate experience in every bite. The chips hold their shape for textural contrast, while the chopped chocolate melts into rivers of liquid velvet that pool and swirl throughout the cookie. Don't even think about using those waxy, cheap chips—they won't melt properly and you'll end up with chocolate-flavored plastic bits in your masterpiece.
The size variation matters more than you'd think. I keep some chips whole for structure, roughly chop others for intermediate melting, and shave a small portion into fine pieces that dissolve completely into the dough, infusing every bite with chocolate essence. This technique, which I learned from a chocolatier in Brussels, creates what I call "chocolate continuity"—every molecule of cookie carries chocolate flavor, even the parts without visible chips.
The Winter Spice Symphony
Cardamom is the secret weapon that makes people ask "what is that amazing flavor?" without being able to identify it. Just a whisper—barely an eighth of a teaspoon—transforms ordinary chocolate chip cookies into winter wonders that taste like Christmas morning. The spice's citrusy, minty, slightly peppery notes complement chocolate in ways that will make you question every other cookie you've ever eaten. If you can't find cardamom, substitute with a mix of cinnamon and a tiny pinch of cloves, but trust me, tracking down the real thing is worth the effort.
Orange zest might seem out of place, but it's what makes the chocolate sing like a church choir on Christmas Eve. The oils in the zest contain compounds that enhance chocolate's complexity, creating a flavor profile so sophisticated you'll feel like you're eating dessert at a Michelin-starred restaurant. Use a microplane to zest just the orange part—avoid the bitter white pith—and add it with the sugars for maximum distribution. Fresh zest is non-negotiable here; the dried stuff tastes like potpourri and will ruin everything.
The Texture Wizards
Cornstarch is my secret weapon for achieving that soft, pillowy center that makes these cookies feel like edible clouds. Just a teaspoon tenderizes the gluten in the flour, creating a cookie that stays soft for days instead of turning into a hockey puck overnight. This trick, borrowed from Asian bakery techniques, is what separates professional-quality cookies from the sad, crispy discs your neighbor brings to the cookie exchange. Don't skip it—even if you think you prefer crispy cookies, this small amount won't make them cakey, just perfectly tender.
An extra egg yolk is the richness booster that takes these cookies from good to legendary. The fat in the yolk creates a more tender crumb while the lecithin acts as a natural emulsifier, ensuring every ingredient melds together in perfect harmony. This is why bakery cookies taste better than homemade ones—they understand the power of that golden orb of deliciousness. Save the white for an omelet or meringue; the yolk is where all the cookie magic lives.
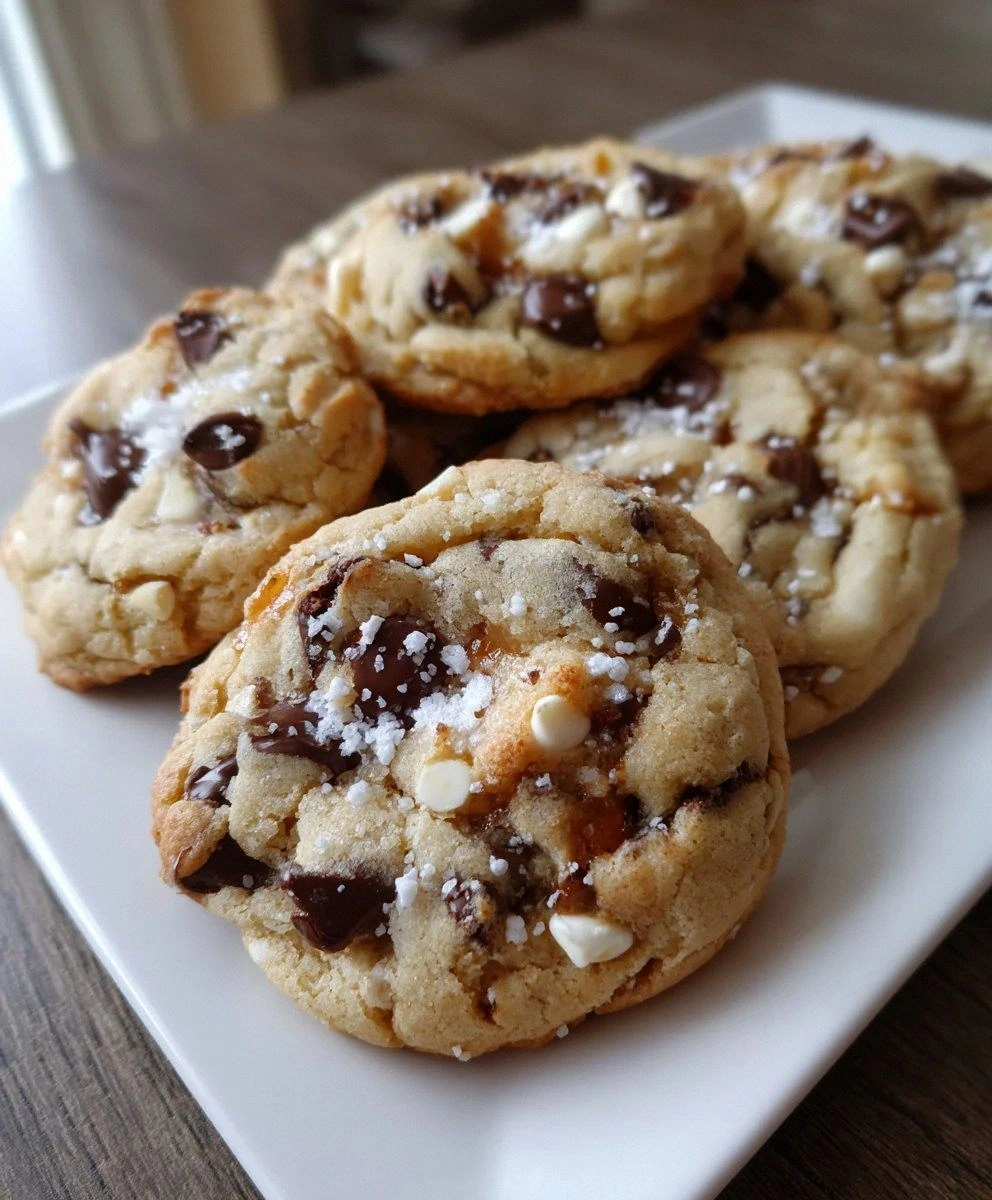
The Method — Step by Step
- Creaming the butter and sugars is where most people mess up, and I can spot a doomed cookie from across the kitchen. Start with butter that's soft enough to leave an indentation when pressed but still holds its shape—think Play-Doh consistency, not melted ice cream. Beat it with both sugars for a full three minutes on medium-high speed, scraping the bowl twice. You're not just mixing; you're incorporating air that will give these cookies lift, while the sugar's sharp edges cut into the butter creating tiny pockets that will steam and expand in the oven. The mixture should become noticeably paler and fluffy, like butter-colored clouds that smell like caramel.
- Adding the eggs requires patience that I usually lack, but trust me here. Beat each egg separately for 30 seconds before adding the next, allowing each to fully emulsify into the butter mixture. This prevents the dough from breaking or becoming greasy, ensuring every cookie bakes up with the same perfect texture. Add the extra yolk with the second egg, along with the vanilla, orange zest, and all your spices. The mixture should look like thick, golden velvet at this point—if it appears curdled or separated, keep beating for another minute until it comes together in glossy harmony.
- Whisking the dry ingredients separately isn't just busy work—it's insurance against bitter bites of baking soda or salty flour pockets. Combine the flour, cornstarch, baking soda, and salt in a separate bowl, whisking for a full minute to distribute everything evenly. This is your moment to channel your inner pastry chef, lifting the whisk high to aerate the mixture. The cornstarch should disappear completely into the flour, leaving no white streaks that could create tough spots in your cookies.
- Adding the dry ingredients requires the restraint of a monk, which is why I usually recruit my most patient friend for this step. Add the flour mixture all at once, then pulse your mixer on low speed just until the flour disappears. Overmixing develops gluten and creates tough, bread-like cookies that could chip a tooth. Stop when you still see a few streaks of flour—they'll disappear when you add the chocolate chips. The dough should be soft and slightly tacky, like thick frosting that holds its shape but yields to gentle pressure.
- Folding in the chocolate chips is where the real fun begins, and this is when my kitchen transforms into a chocolate workshop. Reserve about a quarter cup of mixed chips and chopped chocolate for pressing into the tops later, then fold in the rest using a rubber spatula. Fold from the bottom up, rotating the bowl, until every chip is distributed but the dough hasn't been overworked. This is also when I sneak a taste—quality control is crucial, and raw cookie dough is one of life's great pleasures that I refuse to deny myself.
- Portioning the dough might seem straightforward, but this is where uniformity happens. Use a cookie scoop or heaping tablespoon to create golf-ball-sized portions, rolling them briefly between your palms for perfect spheres. This ensures even baking and those gorgeous bakery-style domes that make everyone think you're a professional. Place them on a parchment-lined sheet with plenty of space—they'll spread more than you expect. Press a few reserved chocolate pieces into the tops, creating that magazine-worthy chocolate pool effect that makes people reach for their phones before their first bite.
- Baking these cookies requires vigilance and the courage to pull them out before they look done. Preheat your oven to 350°F for at least 20 minutes—most ovens lie about their temperature, so use an oven thermometer if you have one. Bake for 11-13 minutes, watching like a hawk after 10 minutes. They're perfect when the edges are golden brown but the centers still look slightly underbaked, like they're wearing tiny golden halos. They'll continue cooking on the hot sheet for several minutes after you remove them, so don't wait for centers to set or you'll end up with hockey pucks.
- The final rest is pure agony but absolutely essential—these cookies need to cool on the sheet for at least 10 minutes before moving to a wire rack. During this time, they transform from fragile puddles into sturdy, transportable cookies with the perfect chewy texture. The centers will set but stay soft, while the bottoms develop that slight caramelization that creates complex flavor. If you try to move them too early, they'll break apart like a snowman in spring, leaving you with cookie casualties that you'll be forced to eat immediately.
- Storage might seem premature when they're still warm, but planning ahead prevents cookie tragedies. Once completely cool, store in an airtight container with a slice of bread—yes, bread! The cookies absorb moisture from the bread, staying soft for up to a week. Replace the bread slice every few days, and you'll have bakery-fresh cookies whenever the craving strikes. Though honestly, in my house, they rarely last beyond the first 24 hours.
Insider Tricks for Flawless Results
The Temperature Rule Nobody Follows
Room temperature ingredients aren't just pretentious chef talk—they're the difference between cookies that spread into greasy puddles and ones that hold their shape like perfect snowballs. Butter, eggs, and even milk should sit out for at least an hour before baking, but here's the trick most recipes miss: different ingredients need different temperatures. Butter should be malleable but cool, eggs should feel neither warm nor cold to the touch, and your mixing bowl should be room temperature too. I learned this after years of frustration when my winter kitchen was too cold for proper creaming, leaving me with dense, leaden cookies that could break a window.
Why Your Nose Knows Best
Trust your sense of smell more than any timer when baking these cookies. When they're nearly done, your kitchen will fill with the most intoxicating aroma—buttery vanilla with caramel undertones and a hint of toasted flour. This usually happens about two minutes before visual doneness, and it's your cue to start checking them obsessively. The scent molecules released during baking indicate the Maillard reaction is in full swing, creating hundreds of flavor compounds that make these cookies taste like Christmas magic. If you wait until they look done in the oven, they'll be overbaked by the time they cool.
The 5-Minute Rest That Changes Everything
After mixing your dough, let it rest for five minutes before portioning. This brief pause allows the flour to fully hydrate, creating a more cohesive dough that's easier to scoop and less likely to spread into shapeless blobs. The flour absorbs liquid during this time, swelling and creating a stronger structure that holds those gorgeous domes. During this mini-rest, the butter firms up slightly, which helps the cookies maintain their shape in the oven's initial heat. This tiny step, which I discovered by accident when I got distracted by a phone call, transformed my cookies from flat disappointment to bakery-worthy beauties.
The Chocolate Distribution Secret
Professional bakers know that chocolate distribution is an art form that separates amateur cookies from legendary ones. After portioning your dough, press a few extra chocolate pieces into the tops and sides of each cookie, focusing on the areas that will be visible when they spread. This creates those Instagram-worthy chocolate pools that make everyone reach for their cameras. But here's the real secret: use different types of chocolate in different areas. Dark chocolate on top for visual drama and intense flavor, milk chocolate on the sides for creamy sweetness, and white chocolate pressed into the bottoms for caramelized surprises. The variety creates a chocolate experience that evolves with every bite.
Storage Psychology
How you store these cookies determines whether they stay amazing for days or turn into sad, dry disappointments. The key is creating a microclimate that maintains moisture without making them soggy. I use an airtight container with a piece of bread or apple slice, but here's the twist: add a small packet of rice to absorb excess moisture and prevent sogginess. The rice acts like a desiccant, maintaining perfect humidity levels. Replace the bread or apple every two days, and your cookies will stay soft and fresh for up to a week. Though honestly, they've never lasted more than three days in my house—my family has developed a sixth sense for fresh cookie storage locations.
Creative Twists and Variations
This recipe is a playground. Here are some of my favorite ways to switch things up:
The Peppermint Wonderland
Replace the orange zest with 1/4 teaspoon peppermint extract and fold in 1/2 cup crushed candy canes along with the chocolate chips. The peppermint oil creates a cooling sensation that makes the chocolate taste even richer by contrast. Press a few extra candy cane pieces on top before baking for festive red and white stripes. These taste exactly like Christmas morning feels—magical, exciting, and somehow both nostalgic and new at the same time.
The Salted Caramel Snowstorm
Drizzle homemade caramel sauce over the cookies immediately after they come out of the oven, then sprinkle with flaky sea salt. The caramel seeps into the warm cookies, creating pockets of gooey sweetness that contrast with the salt's mineral crunch. Use Maldon salt for its pyramid-shaped crystals that dissolve on your tongue, creating bursts of salty brightness that make the chocolate taste deeper and more complex. They're like eating caramel turtles and chocolate chip cookies simultaneously.
The Winter Forest
Add 1/2 cup finely chopped toasted pecans and 2 tablespoons of maple syrup to the dough, replacing 2 tablespoons of the brown sugar. The nuts add earthy depth while the maple brings subtle caramel notes that complement the chocolate beautifully. Toast the pecans first—this releases their oils and intensifies their flavor, creating a cookie that tastes like walking through a snowy forest while eating chocolate. They're sophisticated enough for adults but familiar enough for kids.
The White Christmas
Use white chocolate chips instead of semisweet, add 1/2 cup dried cranberries, and replace the brown sugar with white sugar for a cookie that looks like a winter landscape. The cranberries add tart bursts that cut through the white chocolate's sweetness, creating a flavor profile that dances between sweet and tangy. These are stunning on a dessert table—the white chocolate and pale dough studded with ruby cranberries look like Christmas ornaments.
The Gingerbread Hybrid
Add 1 teaspoon ground ginger, 1/2 teaspoon cinnamon, and 1/4 teaspoon cloves to the dry ingredients, then fold in 1/2 cup chopped crystallized ginger along with the chocolate chips. This creates a cookie that tastes like someone merged the best parts of gingerbread and chocolate chip cookies. The crystallized ginger melts partially, creating pockets of spicy-sweet heat that make these incredibly addictive. They're like Christmas in cookie form—warm, spicy, and completely irresistible.
The S'mores Snowball
Replace half the chocolate chips with mini marshmallows and add 1/2 cup crushed graham crackers. The marshmallows toast and caramelize on the surface, creating those campfire-toasted flavors while staying soft and gooey inside. The graham crackers add texture and that distinctive honey flavor that makes everything taste like childhood summers, even in the middle of winter. Press a few extra marshmallows on top right after baking for maximum visual impact.
Storing and Bringing It Back to Life
Fridge Storage
These cookies stay fresh in an airtight container at room temperature for up to 5 days, refrigerated for up to 2 weeks. The key is using a container that's just slightly larger than the cookie collection—too much air space leads to faster staling. I layer them between sheets of parchment paper to prevent sticking, and always add that slice of bread for moisture retention. The bread trick works because cookies contain more sugar than flour, making them hygroscopic—they'll pull moisture from the air (or bread) to stay soft. Replace the bread every 2-3 days, and you'll have cookies that taste fresh-baked for over a week.
Freezer Friendly
Both the dough and baked cookies freeze beautifully, making this recipe a meal prepper's dream. For dough, scoop into balls and freeze on a sheet pan, then transfer to freezer bags for up to 3 months. Bake from frozen, adding just 2-3 extra minutes to the baking time—no thawing needed. For baked cookies, wrap tightly in plastic wrap then foil, or use a vacuum sealer for maximum freshness. They'll keep for up to 3 months frozen, though I recommend eating them within 6 weeks for optimal flavor. Thaw at room temperature for 30 minutes, or microwave for 10-15 seconds for that fresh-from-the-oven experience.
Best Reheating Method
The secret to reviving day-old cookies lies in steam, not direct heat. Wrap cookies in a barely damp paper towel and microwave for 8-10 seconds—the steam rehydrates them without making them soggy. For multiple cookies, place them on a microwave-safe plate with a small cup of water and heat for 20-30 seconds. The water creates steam that penetrates the cookies, restoring their soft centers while keeping edges crisp. Alternatively, place cookies in a 300°F oven for 5 minutes with a small pan of water on the rack below. This method works especially well for cookies that were frozen, bringing them back to that perfect fresh-baked texture.