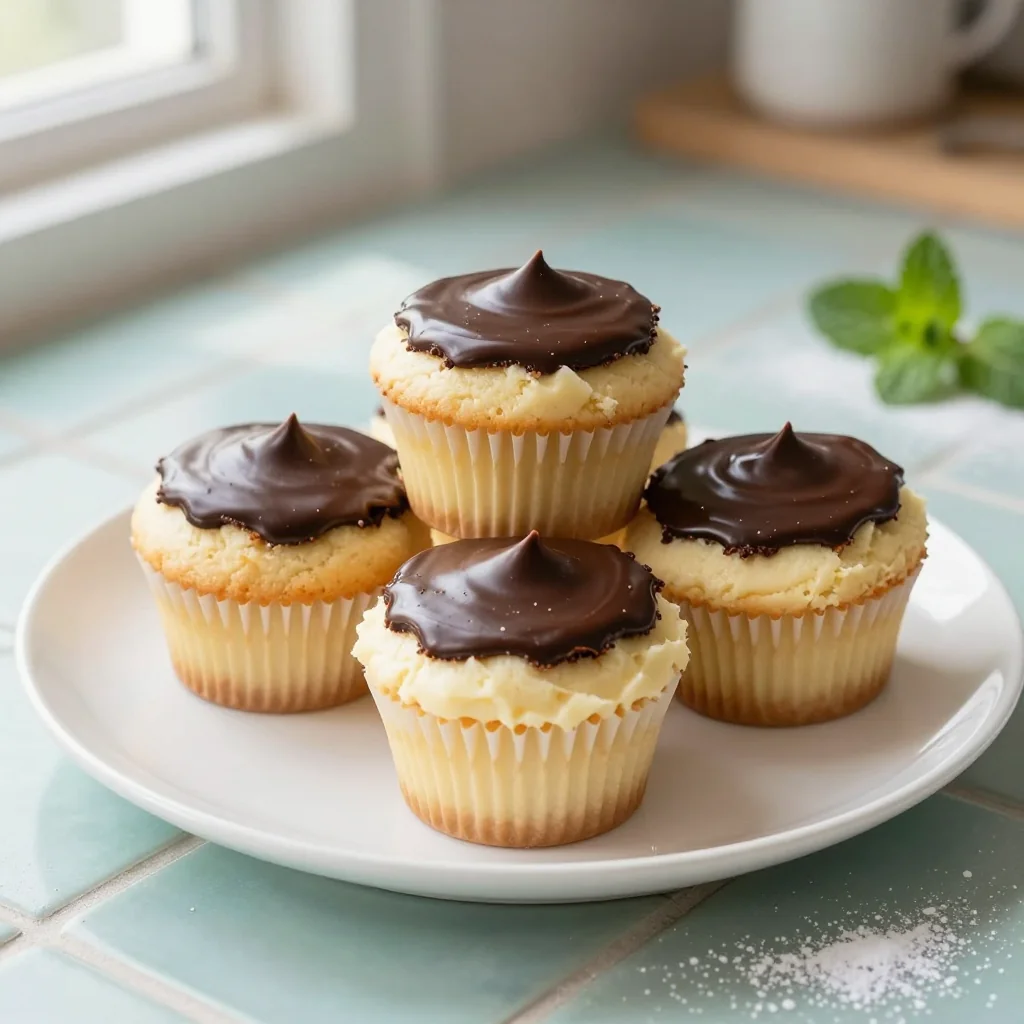
A whimsical twist on the classic Boston cream pie, these cupcakes combine fluffy vanilla cake, silky custard, and a glossy chocolate ganache for a show‑stopping dessert.
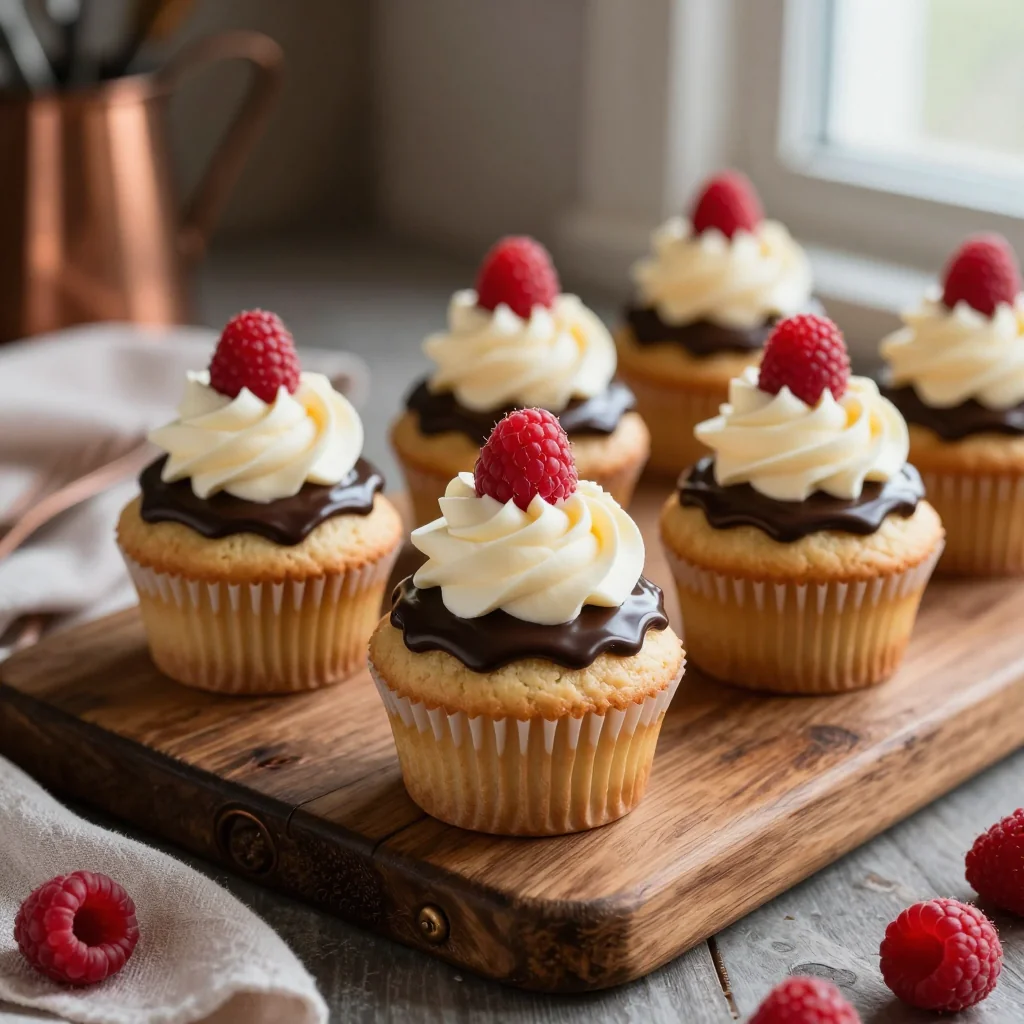
There’s something magical about the first bite of a Boston cream pie – the contrast of light, airy cake, velvety custard, and that unmistakable chocolate glaze. I first encountered this classic at a bustling New England bakery during a rainy autumn afternoon, and the memory of the sweet, comforting flavors has stayed with me ever since. The aroma of fresh‑baked vanilla cupcakes, the silky smoothness of pastry cream, and the glossy sheen of chocolate ganache together create an unforgettable symphony for the senses.
The Boston Cream Pie, despite its name, is technically a cake, and its origins trace back to the early 19th century when American bakers began experimenting with custard fillings. Over the decades, it evolved into a beloved staple of American desserts, celebrated each year on National Boston Cream Pie Day. By reimagining it as individual cupcakes, we preserve the nostalgic charm while adding a playful, portion‑controlled twist that’s perfect for parties, brunches, or a cozy night in.
In this article, I’ll walk you through every detail – from selecting the finest ingredients to mastering the custard’s silky texture and achieving a perfectly glossy ganache. You’ll learn the secrets behind a tender crumb, how to avoid common pitfalls with custard curdling, and tricks for a glossy ganache that sets without becoming gritty.
Ready to bring a touch of classic New England elegance to your kitchen? Let’s dive in and create cupcakes that will make every guest feel like they’ve stepped into a pastry shop on a sunny Boston street.
🌟 Why This Recipe Will Captivate You
Boston Cream Pie Cupcakes blend tradition with convenience, delivering a sophisticated dessert that’s surprisingly easy to master.
- ✨ Perfect Balance of Textures: The airy vanilla cupcake provides a light base, the custard adds a luxurious, creamy center, and the ganache crowns the bite with a glossy, slightly bitter finish. Each element is calibrated to complement the others without overwhelming the palate.
- ✨ Crowd‑Pleaser Appeal: Familiar flavors make this dessert instantly recognizable, while the individual cupcake format encourages sharing, making it ideal for gatherings, birthdays, or a refined tea‑time treat.
- ✨ Adjustable Sweetness: By controlling the sugar in the custard and ganache separately, you can tailor the sweetness to your taste, ensuring a harmonious balance that isn’t cloyingly sweet.
- ✨ Visual Impact: The glossy ganache creates a mirror‑like surface that catches the light, while the custard’s subtle puffiness peeks through, turning each cupcake into a miniature work of art.
- ✨ Versatile Base: The vanilla cupcake batter can be swapped for chocolate, lemon, or even pumpkin, allowing you to experiment with flavor profiles while retaining the same custard and ganache techniques.
- ✨ Shelf‑Stable for Parties: Once assembled, the cupcakes stay fresh for up to three days refrigerated, with the ganache maintaining its sheen and the custard staying silky, making them perfect for advance preparation.
🥗 Ingredients
📝 Complete Ingredient List
For the Vanilla Cupcake Base:
For the Pastry Cream Filling:
For the Chocolate Ganache:
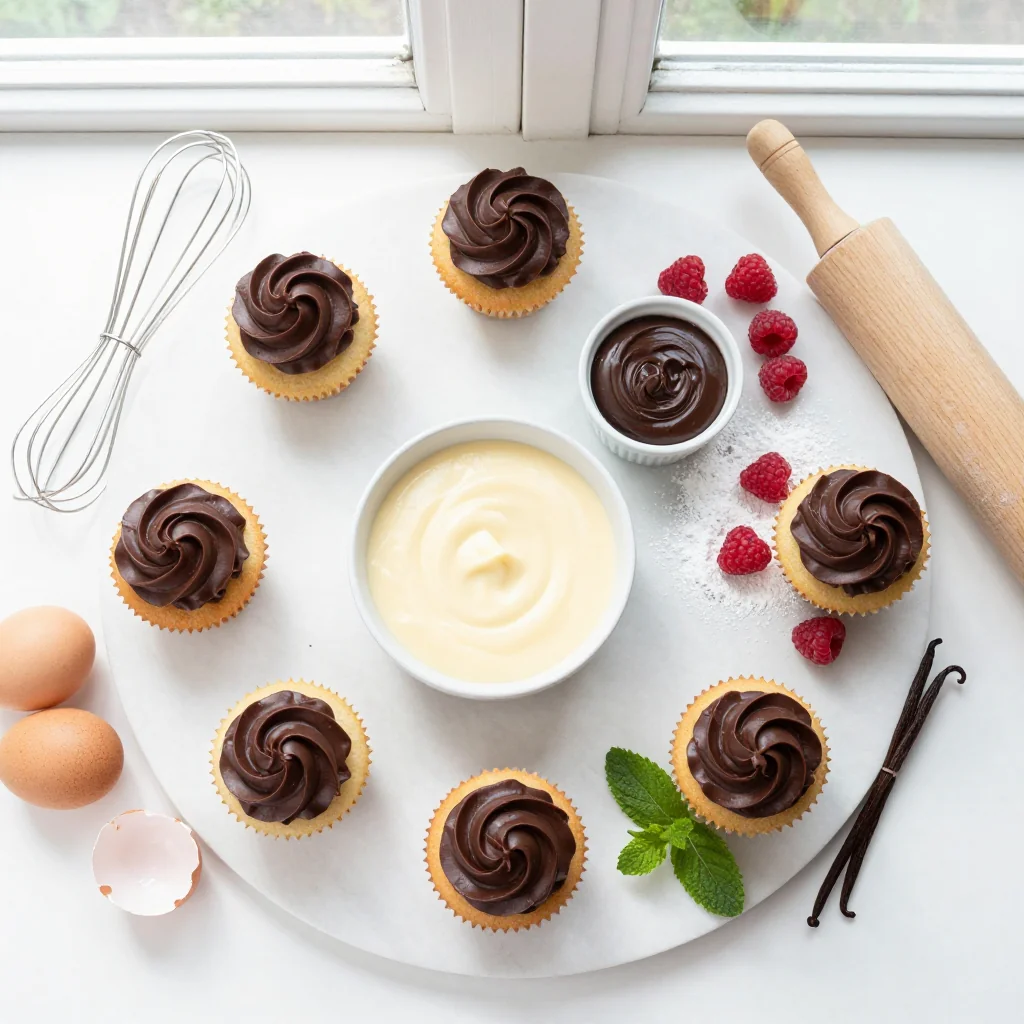
🔍 Focus on Key Ingredients
Vanilla Extract
Pure vanilla extract provides the aromatic backbone of the cupcake base and the custard. Opt for a high‑quality extract with a deep, mellow aroma rather than imitation vanilla; the difference is especially noticeable in the custard’s silky mouthfeel. Look for a label that lists vanilla beans as the first ingredient and avoid products with excessive alcohol or artificial flavorings.
Dark Chocolate (70% Cocoa)
The ganache’s richness hinges on the quality of the chocolate. Choose a chocolate that contains at least 70% cocoa solids, minimal additives, and a glossy finish when melted. The higher cocoa content balances the sweetness of the custard and ensures a firm set at room temperature, giving the cupcakes a professional sheen.
Egg Yolks
Egg yolks are the emulsifying agents that give the pastry cream its smooth, custardy texture. Fresh, large yolks provide the necessary fat and protein to thicken without curdling. If possible, use pasture‑raised eggs for a richer flavor and deeper golden hue.
🔄 Quick Substitutions
| If you don’t have... | Use instead... |
|---|---|
| All‑purpose flour | Pastry flour (for a lighter crumb) |
| Heavy cream | Half‑and‑half (will be slightly less rich) |
| Dark chocolate 70% | Milk chocolate + 1 tsp cocoa powder (adjust sweetness) |
👨🍳 Step‑by‑Step Instructions
Follow these detailed steps to create flawless cupcakes that look as good as they taste. Prepare your workspace, preheat your oven, and let the aromas guide you.
📋 Phase 1: Preparation & Mise en Place
Gather all tools and ingredients before you begin. This ensures a smooth workflow and prevents any last‑minute scrambling.
Preheat the Oven and Prepare Pan
Set your oven to 175°C (350°F). Line a 12‑cup muffin tin with paper liners, or lightly grease the tin if you prefer a foil‑free finish. The consistent temperature ensures even rise and a tender crumb throughout each cupcake.
Mix Dry Ingredients
In a medium bowl, whisk together the flour, baking powder, and salt. This aerates the flour, breaking up any clumps and ensuring the leavening agents are evenly distributed, which is crucial for a uniform rise.
Combine Wet Ingredients
In a separate large bowl, beat the melted butter with the sugar until light and fluffy, about 2 minutes. Add the eggs one at a time, beating well after each addition, then stir in the vanilla extract. The emulsification of butter and sugar creates a fine crumb structure.
Incorporate Dry Ingredients
Gradually add the dry mixture to the wet mixture, alternating with the milk. Begin and end with the dry ingredients. Mix on low speed just until combined; over‑mixing will develop gluten and result in a dense cupcake.
Fill the Muffin Cups
Spoon the batter into the prepared liners, filling each about three‑quarters full. This allows room for the cupcakes to rise without spilling over the edges.
🔥 Phase 2: Baking & Filling
While the cupcakes bake, we’ll prepare the silky custard that defines the Boston Cream experience.
Bake the Cupcakes
Place the tin in the preheated oven and bake for 15–18 minutes, or until a toothpick inserted into the center comes out clean. The cupcakes should be golden on top and spring back when lightly pressed.
Prepare the Pastry Cream
In a saucepan, bring the milk to a gentle simmer over medium heat. Meanwhile, whisk together the egg yolks, sugar, and cornstarch in a bowl until pale and thick. Once the milk simmers, slowly pour a third of it into the egg mixture, whisking constantly to temper the yolks. Return the mixture to the saucepan and cook, stirring constantly, until it thickens and begins to boil (about 2–3 minutes). Remove from heat, stir in butter and vanilla, then strain through a fine mesh sieve into a clean bowl. Cover with plastic wrap directly on the surface to prevent a skin from forming, and chill for at least 30 minutes.
Cool and Core the Cupcakes
Allow the baked cupcakes to cool in the tin for 5 minutes, then transfer to a wire rack to cool completely. Once cool, use a small paring knife or a cupcake corer to gently remove a core from the center of each cupcake, creating a pocket for the custard.
Fill the Cupcakes with Custard
Transfer the chilled pastry cream to a piping bag fitted with a medium round tip. Pipe a generous amount of custard into each cupcake core, allowing it to mound slightly above the surface. This creates the signature “cream” look when the ganache is poured over.
✨ Phase 3: Finishing & Plating
The final stage brings everything together with a glossy ganache that sets the visual and flavor tone.
Make the Chocolate Ganache
In a heat‑proof bowl, place the chopped dark chocolate. Heat the heavy cream in a small saucepan until it just begins to simmer, then pour it over the chocolate. Let sit for 2 minutes, then whisk until smooth and glossy. Stir in butter and sea salt for added shine and depth.
Glaze the Cupcakes
Using a spoon or a small offset spatula, drizzle the ganache over the top of each custard‑filled cupcake, allowing it to cascade down the sides. The ganache should coat the surface evenly and set within 10 minutes at room temperature.
Serve or Store
Serve the cupcakes at room temperature for the best texture. If you need to store them, keep them refrigerated in an airtight container; the ganache will maintain its sheen and the custard will stay silky for up to 3 days.
💡 Expert Tips & Tricks
🛒 Choosing the Best Ingredients
Invest in high‑quality vanilla beans or pure extract; the flavor intensifies the custard and the cupcake batter. When selecting chocolate, look for a bar that lists cocoa mass as the first ingredient and contains minimal soy lecithin. Fresh, pasture‑raised eggs provide richer yolks, contributing to a smoother custard. Finally, opt for European‑style butter with a higher butterfat content (82%+) for a tender crumb.
🔪 Preparation Techniques
Sift the flour and baking powder together to avoid lumps and ensure even leavening. When tempering the egg yolks with hot milk, pour slowly while whisking vigorously to prevent curdling. Use a kitchen scale for precise measurements; small variations in sugar or butter can dramatically affect texture.
🌡️ Mastering the Cooking Process
Maintain a steady oven temperature; avoid opening the door early. For the custard, constantly stir over medium heat and never let it sit unattended; the mixture can quickly transition from smooth to grainy. When melting chocolate for the ganache, use a double‑boiler or microwave in short bursts to avoid scorching.
🍽️ Presentation & Service
Pipe the custard slightly above the cupcake surface so the ganache forms a natural “cap.” Garnish each cupcake with a thin chocolate curl or a dusting of cocoa powder for visual elegance. Serve on a white platter to let the vibrant ganache colors pop, and accompany with a dollop of whipped cream if desired.
🏆 Pro Tips
Professional bakers differentiate themselves through precision, technique, and a deep understanding of how each component interacts.
- 🎯 Temperature Control of Ingredients: Using room‑temperature butter and eggs creates an emulsion that traps air, resulting in a lighter crumb. Cold ingredients can cause the batter to seize, leading to dense cupcakes.
- 🎯 Double‑Whisking the Egg Yolks: Whisking yolks with sugar and cornstarch until they turn a pale, ribbon‑like consistency incorporates air, which helps the custard achieve a silkier texture without relying solely on heat.
- 🎯 Ganache Consistency Management: The ideal ganache should have a viscosity that allows it to flow but also set quickly. This is achieved by maintaining a 1:1 ratio of chocolate to cream and adding a small amount of butter for sheen.
- 🎯 Using a Silicone Pastry Brush for Glazing: A silicone brush spreads the ganache evenly without tearing the custard surface, preserving the smooth appearance.
- 🎯 Resting the Filled Cupcakes: Allowing the cupcakes to rest for 10 minutes after filling lets the custard settle, preventing it from seeping out when the ganache is applied.
- 🎯 Precise Portion Scaling: When adjusting servings, scaling the batter and custard proportionally ensures the texture remains consistent; the built‑in portion adjuster automates this calculation.
"A perfect dessert is a balance of technique and heart; when both are present, the result transcends the plate." — Thomas Keller
🔄 Variations & Adaptations
The core structure of these cupcakes invites endless creativity. Below are several ways to personalize the recipe for dietary needs, flavor preferences, and special occasions.
🥬 Vegetarian / Vegan Version
Swap the eggs for a flaxseed “egg” (1 tbsp ground flaxseed + 3 tbsp water per egg) and use plant‑based butter. Replace dairy milk with oat or almond milk, and choose a vegan dark chocolate (minimum 70% cocoa). The custard can be made using silken tofu blended with coconut cream and a touch of agar‑agar to set.
- Flaxseed “egg” – provides binding and moisture.
- Silken tofu + coconut cream – creates a rich, dairy‑free custard.
🌶️ Flavor Variations
Play with complementary flavors to give the cupcakes a new personality. Below are three exciting directions:
Spicy Version
Infuse the custard with a pinch of cayenne pepper and a dash of smoked paprika. Finish the ganache with a thin drizzle of chili‑infused chocolate for a subtle heat that surprises the palate.
Mediterranean Version
Replace vanilla with orange zest and a splash of orange liqueur in the custard. Add finely chopped pistachios to the ganache and garnish with a dusting of ground cardamom.
Asian Inspired Version
Incorporate matcha powder into the cupcake batter (2 tsp) and blend a teaspoon of black sesame paste into the custard. Finish with a white chocolate ganache flavored with yuzu zest for a bright, citrusy contrast.
⚠️ Dietary Adaptations
Gluten‑Free
Use a 1:1 gluten‑free flour blend (rice flour, potato starch, tapioca starch) and add 1 tsp xanthan gum to mimic the elasticity of gluten.
Lactose‑Free
Replace whole milk with lactose‑free milk and use a dairy‑free butter alternative. Choose a dairy‑free dark chocolate for the ganache.
Low‑Calorie
Reduce sugar in the cupcake batter by 25%, use low‑fat milk, and substitute half of the heavy cream in the ganache with unsweetened almond milk. Opt for a dark chocolate with at least 85% cocoa to lower sugar content.
👶 Family / Kids Version
For younger palates, reduce the amount of vanilla and omit the sea salt in the ganache. Add a swirl of strawberry jam inside the custard for a fruity surprise. Top with colorful sprinkles instead of chocolate curls for visual fun.
📦 Storage & Reheating
🧊 Conservation
Refrigerator
- Duration: 3 days
- Recommended container: airtight glass or plastic container with a tight‑fitting lid
- Tip: Place a sheet of parchment paper between layers to prevent the ganache from sticking.
Freezer
- Duration: 2 months
- Method: Freeze unglazed cupcakes first, then add the ganache after thawing to maintain shine.
- Defrosting: Transfer to the refrigerator overnight, then bring to room temperature for 30 minutes before serving.
💡 For best texture, avoid freezing the custard‑filled cupcakes with ganache; the ganache can become grainy after thawing.
♨️ Reheating
🔥 Oven (Recommended)
- Preheat to 150°C (300°F).
- Cover cupcakes loosely with aluminum foil to prevent the ganache from over‑darkening.
- Heat for 8‑10 minutes.
- Remove foil and continue for 2‑3 minutes to restore the glossy finish.
⚡ Microwave (Quick)
- Place a cup of water in the microwave to create steam.
- Cover cupcakes with a microwave‑safe lid.
- Heat on medium power for 30‑45 seconds.
- Check and repeat in 10‑second intervals if needed.
🍳 Stovetop
If you’re in a pinch, place a heat‑proof plate with the cupcakes in a skillet over low heat, covered, for 3‑4 minutes. This gently revives the ganache without drying it out.
🍷 Perfect Pairings
🥗 Accompaniments
- Fresh Berries: A mix of raspberries and blueberries adds a tart contrast that cuts through the richness.
- Light Citrus Salad: Thinly sliced orange segments with a hint of mint refreshes the palate between bites.
- Whipped Cream with a Dash of Cinnamon: Adds an airy layer that complements the chocolate ganache.
🍷 Wine & Beverage Pairings
- Late Harvest Riesling: Its natural sweetness and acidity balance the chocolate and custard.
- Brachetto d'Acqui (Sparkling Red): Light bubbles and fruity notes enhance the dessert’s elegance.
- Non‑Alcoholic Option: Sparkling apple cider with a splash of vanilla‑infused simple syrup.
🍰 To Complete the Meal
Start with a light mixed greens salad tossed in a citrus vinaigrette, followed by a savory quiche or mushroom tart as a main course. Finish the dinner with a palate‑cleansing sorbet—lemon or raspberry—before serving the Boston Cream Cupcakes as the grand finale.
❓ Frequently Asked Questions
Q: Can I make the cupcakes ahead of time and add the ganache later?
A: Absolutely. Bake and cool the cupcakes, core them, and fill with custard. Store them uncovered in the refrigerator. When you’re ready to serve, simply prepare the ganache and glaze the cupcakes. This method prevents the ganache from becoming too firm during storage.
Q: How do I prevent the custard from curdling?
A: The key is tempering—slowly add hot milk to the egg‑yolk mixture while whisking continuously. Keep the heat moderate and stir constantly. Removing the custard from the heat as soon as it thickens and straining it removes any potential lumps.
Q: What if my ganache is too thick?
A: Warm the ganache gently over a bain‑marie or in short microwave bursts, stirring until it reaches a pourable consistency. Adding a teaspoon of warm cream can also loosen it without compromising shine.
Q: Can I replace the chocolate ganache with a white chocolate glaze?
A: Yes, substitute dark chocolate with high‑quality white chocolate and adjust the cream ratio (use slightly less cream) to achieve a smooth, glossy finish. Keep in mind that white chocolate is sweeter, so you may want to reduce sugar in the custard.
Q: How do I scale the recipe for a larger crowd?
A: Use the portion adjuster at the bottom of the recipe card. The script automatically recalculates ingredient quantities based on the desired number of servings, up to 20 portions.
Q: Is it possible to freeze the custard separately?
A: Freezing custard can change its texture, making it grainier upon thawing. If you must, freeze it in airtight containers and re‑whisk with a splash of cold milk after thawing to restore smoothness.
🎉 Let’s Get Baking!
These Boston Cream Pie Cupcakes with Ganache embody the perfect marriage of classic comfort and modern elegance. By mastering the tender vanilla base, the luxuriously smooth custard, and the glossy chocolate ganache, you’ll create a dessert that dazzles both the eyes and the palate. Whether you’re serving a sophisticated soirée or a casual family gathering, the cupcakes promise a memorable experience that captures the essence of a timeless New England favorite.
Don’t hesitate—gather your ingredients, follow the steps, and let the aromas fill your kitchen. Share your creations, ask questions, and let the community celebrate your success. Remember, every great baker learns by doing, so enjoy the process as much as the final bite.
Have you tried this recipe?
Leave a comment and rating below! Share your photos on Instagram with #BostonCreamCupcakes to be featured on our site.
Boston Cream Pie Cupcakes with Ganache
Vanilla cupcakes filled with silky custard and topped with a glossy dark chocolate ganache.
📝 Ingredients
Vanilla Cupcake Base
Pastry Cream Filling
Chocolate Ganache
👨🍳 Instructions
- 1
Preheat oven to 175°C (350°F) and line a 12‑cup muffin tin with paper liners.
- 2
Whisk together flour, baking powder, and salt in a medium bowl.
- 3
Beat melted butter with sugar until light, then add eggs one at a time, followed by vanilla.
- 4
Gradually add dry ingredients alternating with milk, mixing just until combined.
- 5
Spoon batter into liners, filling three‑quarters full.
- 6
Bake 15–18 minutes, or until a toothpick comes out clean.
- 7
While cupcakes bake, heat milk to a simmer. Whisk yolks, sugar, and cornstarch, temper with hot milk, then cook until thick.
- 8
Remove from heat, stir in butter and vanilla, strain, cover, and chill 30 minutes.
- 9
Core cooled cupcakes, pipe chilled custard into each center.
- 10
Melt chocolate over hot cream, stir in butter and salt to make ganache.
- 11
Drizzle ganache over each cupcake, allowing it to set.
- 12
Serve at room temperature or refrigerate up to 3 days.
🥗 Nutritional Information (per serving)
*Values are approximate and may vary based on specific ingredients used.