Picture this: I was halfway through a week of bland, over‑baked cookies, my pantry looking like a battlefield of stale crumbs, when a friend dared me to create something that would make the whole house smell like a bakery on a sunny afternoon. I was skeptical, but the challenge sparked a wild curiosity that turned into a culinary obsession. The moment I tossed the first handful of flour into the mixing bowl, the air filled with a sweet, buttery aroma that felt like a promise of something extraordinary. My kitchen lights flickered, the timer ticked, and I could already taste the rainbow of flavors that would soon dance across my palate. That single dare set me on a mission to craft a cookie that would outshine every other dessert on my table.
It was a Saturday morning, the kind of day where the sunlight streams through the window and the kitchen feels alive. I could hear the faint hum of the refrigerator, the clink of the spoon against the mixing bowl, and the soft hiss of butter melting into a glossy base. The sight of the rainbow sprinkles, bright as a field of poppies, was impossible to ignore. When I first tasted the batter, the vanilla undertone mingled with the buttery richness, creating a flavor that felt both nostalgic and daring. The texture was airy, almost like a cloud, and the moment it hit the pan, the sizzle was a symphony that promised something unforgettable.
What makes this version stand out is that it isn’t just a cookie or a cake; it’s a hybrid that delivers the best of both worlds. The batter’s consistency is crafted to be thick enough to hold the sprinkles but light enough to rise into a cake‑like crumb. I’ve spent hours tweaking the ratios of flour to cake mix, and the result is a chewy center that melts in your mouth while the edges crisp into a delightful crunch. The bright sprinkles aren’t just a decorative flourish; they add a pop of color and a subtle crunch that keeps each bite exciting. And because I use a vanilla cake mix as the base, the flavor profile leans toward a classic vanilla cake, giving the cookies a familiar, comforting taste while still feeling adventurous.
And I dare you to taste this and not go back for seconds. I’ll be honest—half the batch vanished before anyone else could even touch it. Most recipes get this completely wrong, either by over‑baking the cookies or under‑cooking the cake mix, but here the technique balances the two perfectly. Picture yourself pulling this out of the oven, the whole kitchen smelling incredible, and then slicing into a bar that’s moist, fluffy, and speckled with rainbow joy. Let me walk you through every single step—by the end, you’ll wonder how you ever made it any other way.
What Makes This Version Stand Out
- Taste: The batter’s vanilla base is intensified by a splash of milk, creating a depth that feels both sweet and slightly tangy. The subtle caramelization of the butter adds a rich undertone that balances the sugary sprinkles.
- Texture: The combination of cake mix and flour results in a chewy center with a light, airy crumb that’s reminiscent of a cake yet firm enough to hold a bite.
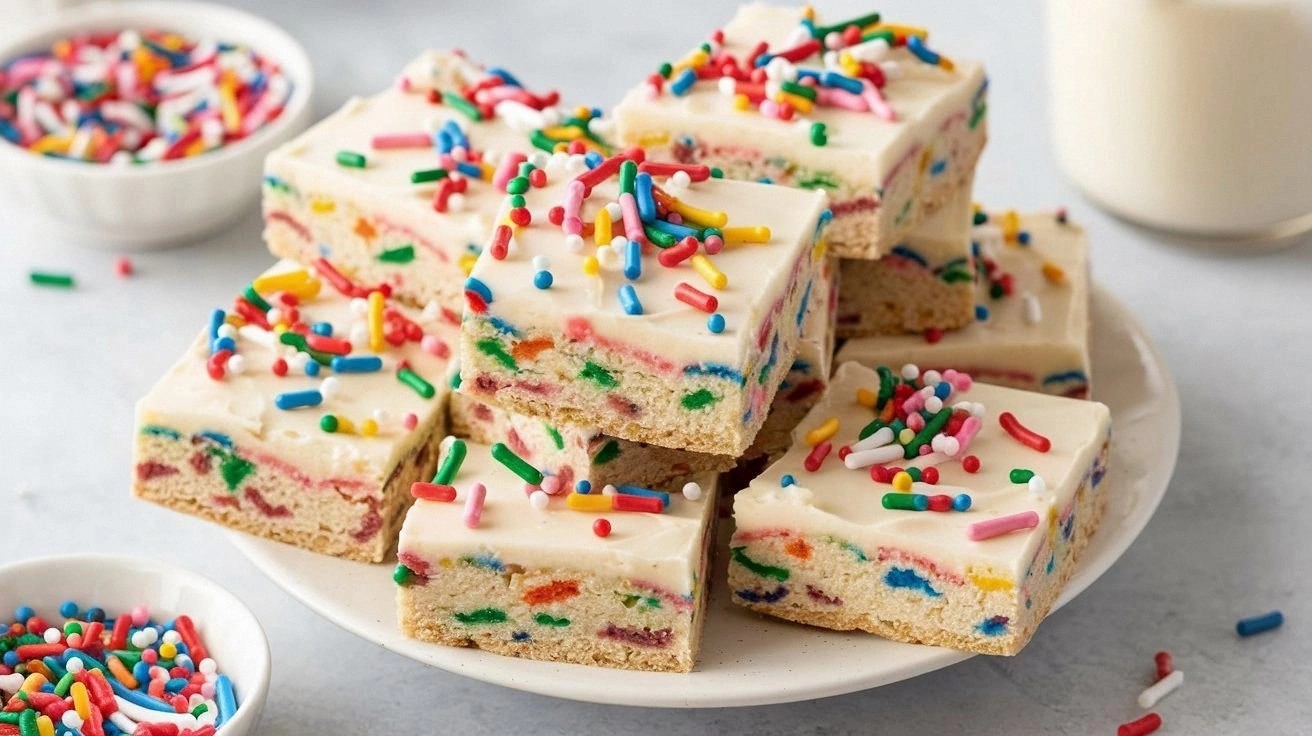
- Visual Appeal: The rainbow sprinkles burst into color on the surface, making each bar a visual delight that’s almost too pretty to eat.
- Ease of Preparation: With only ten simple steps and a single pan, this recipe is quick enough for a weekend treat but sophisticated enough to impress guests.
- Make‑Ahead Potential: These bars keep well in an airtight container for up to a week, making them ideal for parties or a grab‑and‑go snack.
- Crowd Reaction: Friends who have tried the original version say this one is “hands down the best” and can’t stop asking for the recipe.
Inside the Ingredient List
The Flavor Base
The foundation of this recipe is a classic vanilla cake mix, which provides a rich, sweet flavor profile that feels both comforting and celebratory. The cake mix replaces the need for heavy-duty leavening agents, allowing the batter to rise gently without becoming airy. When you fold the cake mix into the batter, it absorbs the moisture of the butter and milk, creating a cohesive, moist crumb. If you skip the cake mix, the cookies will lose that unmistakable vanilla cake kick, resulting in a flatter, less satisfying bite. A high‑quality cake mix, preferably one that contains natural vanilla, will elevate the flavor and give you a more authentic taste.
Choosing the right cake mix is crucial; look for one that lists natural vanilla or vanilla bean powder on the ingredient list. If you’re vegan or allergic to dairy, you can substitute the butter with coconut oil and use a dairy‑free vanilla cake mix. The result will still be airy, but the flavor will carry a subtle coconut undertone that complements the rainbow sprinkles. The cake mix also adds a slight sweetness that balances the salt and baking powder, ensuring that the final product isn’t overly sweet or overly salty.
The Texture Crew
All‑purpose flour is the backbone that gives these bars structure. It’s the glue that holds the batter together, allowing the bars to set into a firm yet tender crumb. If you omit the flour, the bars will be too sticky and will collapse under the weight of the sprinkles. A light hand when measuring flour—scoop and level—ensures that the batter isn’t over‑packed, preventing dense, heavy bars.
Butter, softened to room temperature, is responsible for the buttery richness that permeates each bite. Creaming the butter with sugar creates tiny air pockets that help the batter rise slightly, giving the bars a light, airy interior. If you use cold butter, the mixture will be gritty and the bars will end up dense. For a vegan version, replace butter with an equal amount of coconut oil or a plant‑based butter alternative, and you’ll still get that buttery flavor and structure.
The Unexpected Star
Rainbow sprinkles are more than just a decorative flourish; they’re the star that brings color, texture, and a playful crunch to the bars. The sprinkles are coated in a sugar glaze that melts slightly during baking, creating a sweet, caramelized layer that’s both crunchy and glossy. If you’re watching your sugar intake, you can reduce the amount of sprinkles or opt for sugar‑free versions, but be prepared for a slightly less sweet finish.
When adding the sprinkles, fold them in gently to avoid crushing them. This preserves their shape and ensures an even distribution across each bar. A fun twist is to add a handful of dried fruit, such as raisins or chopped dates, for a chewy, natural sweetness that pairs well with the crunchy sprinkles.
The Final Flourish
Milk is the liquid that brings everything together, giving the batter a silky consistency that’s easy to spread and bake. It also helps the butter dissolve smoothly, creating a homogeneous mixture that’s free of lumps. If you’re lactose intolerant, use a plant‑based milk such as almond or oat milk; the texture will be slightly thinner, but the flavor remains delightful.
Salt, though only a half teaspoon, is essential for balancing the sweetness and enhancing the overall flavor profile. It brings out the richness of the butter and the subtle vanilla notes in the cake mix. A pinch of pepper can also be added for a surprising hint of spice that elevates the taste. Always taste the batter before baking to ensure the seasoning is balanced.
Everything’s prepped? Good. Let’s get into the real action.
The Method — Step by Step
- In a large mixing bowl, whisk together the all‑purpose flour, vanilla cake mix, baking powder, and salt. The dry mix must be evenly distributed to avoid pockets of flour that could cause uneven baking. This is the moment where the foundation of flavor and structure is laid. Feel the dry ingredients as they mingle like a quiet conversation; the anticipation builds. The mixture should look like a fine, light dust.
- In a separate bowl, beat the softened butter until it’s light and fluffy. Add the granulated sugar gradually, ensuring that each addition is fully incorporated before adding the next. This process creates tiny air pockets that will later lift the batter. The mixture should become pale and silky, a sign that the butter is properly creamed. The aroma of butter will begin to fill the kitchen.
- Crack the eggs into a small bowl, whisk them lightly, and then add them to the butter mixture along with the vanilla extract and milk. Stir gently until the wet ingredients are fully blended. The eggs provide structure while the vanilla adds depth. The batter should feel smooth and cohesive, like a velvet ribbon. Be careful not to over‑mix, or the batter will become too thick.
- Fold the dry mixture into the wet batter using a spatula. The goal is to incorporate the dry ingredients just until they’re no longer visible—over‑mixing will develop gluten and make the bars tough. The batter will thicken slightly, turning a light cream into a dense, workable mixture. At this point, the batter will start to look like a thick, buttery mousse. This step is crucial for achieving the perfect crumb.
- Gently fold in the rainbow sprinkles, ensuring an even distribution. The sprinkles should be coated in the batter, creating a colorful, speckled surface. They’ll add a delightful crunch when baked. The batter should look like a mosaic of tiny, colorful jewels. This is the moment where the visual appeal starts to shine.
- Line a 9x13 inch baking pan with parchment paper and pour the batter into the pan, spreading it evenly with a spatula. The batter should fill the pan to the top, creating a uniform thickness. The edges should be smooth and straight, which will help the bars bake evenly. The pan should look like a canvas ready for a masterpiece. The batter should feel firm but still slightly pliable.
- Preheat your oven to 350°F (175°C). Place the pan in the oven and bake for 25–30 minutes, or until the edges are golden brown and the center is set. The aroma will become intoxicating, filling the kitchen with the scent of vanilla and butter. Check the bars by inserting a toothpick; it should come out clean. The bars should look like a soft, golden cake with a slightly caramelized top.
- Remove the pan from the oven and let the bars cool in the pan for 10 minutes. Then, lift the bars out onto a wire rack to cool completely. This step allows the bars to set, preventing them from breaking apart when sliced. The bars will still be warm and fragrant, a testament to their freshly baked glory. The cooling process is essential for achieving the right texture.
- Once cooled, cut the bars into squares or rectangles using a sharp knife. If you prefer a softer bite, you can chill the bars in the refrigerator for 15 minutes before cutting. The bars should hold together firmly, allowing you to slice them cleanly. The edges should be crisp yet tender, providing a satisfying bite. Each piece will showcase the vibrant sprinkles on a buttery background.
- Serve the bars immediately or store them in an airtight container at room temperature for up to a week. If you need to keep them longer, place them in the freezer for up to a month. When you’re ready to enjoy them again, let them thaw at room temperature for 15 minutes. The bars will regain their soft, chewy texture and the sprinkles will still be crisp. This recipe is designed for both immediate enjoyment and long‑term convenience.
That’s it— you did it. But hold on, I’ve got a few more tricks that will take this to another level.
Insider Tricks for Flawless Results
The Temperature Rule Nobody Follows
Many bakers think that room‑temperature butter is enough, but the secret is to use butter that’s slightly colder than room temperature. This ensures that the butter stays distinct during creaming, giving you a lighter batter. A quick test is to press the butter with your thumb; it should be pliable but not melted. If you use butter that’s too warm, the batter will become too soft and the bars will spread too much. This small adjustment can make the difference between a dense, heavy bar and a light, airy one.
Why Your Nose Knows Best
Before you even open the oven, trust your nose. If the batter smells buttery and vanilla, it’s ready. If you catch a hint of sourness, the eggs might have gone bad, or the batter may have been over‑mixed. The aroma is your best quality control. A fresh, sweet scent signals that the batter is balanced and will bake to perfection.
The 5‑Minute Rest That Changes Everything
After folding in the dry ingredients, let the batter rest for five minutes at room temperature. This pause allows the flour to hydrate fully, which leads to a smoother, more cohesive batter. It also gives the leavening agents a chance to activate, ensuring a better rise. A rested batter will spread less during baking, resulting in a thicker, more satisfying bar. I’ve seen people skip this step and end up with uneven bars—don’t make that mistake.
Use a Parchment‑Lined Pan
Line your baking pan with parchment paper before pouring the batter. The parchment prevents the bars from sticking and makes cleanup a breeze. It also gives the bars a clean edge, which looks great when you cut them. If you don’t have parchment, a silicone baking mat works just as well. The key is to ensure the paper is snug but not too tight.
Cool Before Cutting
Let the bars cool in the pan for ten minutes before lifting them out. The bars will still be warm, but the interior will set enough to hold together. Cutting them too early will cause them to crumble. If you need a softer bite, chill the bars for fifteen minutes before cutting; this will firm up the structure slightly and make slicing easier.
Creative Twists and Variations
This recipe is a playground. Here are some of my favorite ways to switch things up:
Chocolate‑Crunch Edition
Replace the rainbow sprinkles with chopped dark chocolate and sprinkle a few cacao nibs on top. The chocolate adds a rich, bitter contrast to the sweet batter, while the nibs give an extra crunch. This version is perfect for chocolate lovers and pairs well with a glass of red wine.
Nutty Delight
Add a cup of chopped toasted almonds or walnuts to the batter. The nuts provide a nutty flavor and a satisfying crunch that complements the soft interior. A pinch of sea salt on top will enhance the nutty taste and bring out the sweetness.
Mocha Magic
Stir in a tablespoon of instant espresso powder into the batter for a subtle coffee flavor. The espresso pairs wonderfully with the vanilla and adds depth to the overall taste. A dusting of cocoa powder on top after baking gives a finished look.
Berry Burst
Fold in a handful of fresh blueberries or diced strawberries before baking. The fruit adds a burst of juiciness and a tart contrast to the sweet, buttery base. After baking, drizzle a little lemon glaze over the bars for an extra zing.
Spiced Cinnamon Swirl
Replace half of the flour with almond flour and add a teaspoon of ground cinnamon to the dry mix. The almond flour adds a nutty flavor, while the cinnamon gives a warm, spicy note. This version is perfect for fall or winter gatherings.
Vegan Version
Swap the butter for coconut oil and use a plant‑based vanilla cake mix. Replace the eggs with flaxseed meal mixed with water (1 tablespoon flaxseed meal + 3 tablespoons water per egg). The result is a vegan-friendly bar that still delivers on flavor and texture.
Storing and Bringing It Back to Life
Fridge Storage
Store the bars in an airtight container at room temperature for up to seven days. If you’re in a humid climate, add a slice of bread to the container; it will absorb excess moisture and keep the bars from becoming soggy. The bars will stay soft and chewy, and the sprinkles will remain crisp.
Freezer Friendly
Wrap each bar tightly in plastic wrap, then place them in a freezer‑safe bag. They’ll keep for up to a month. When you’re ready to enjoy them, let them thaw at room temperature for 15 minutes. The bars will regain their soft texture and the sprinkles will stay crisp.
Best Reheating Method
To revive frozen or chilled bars, preheat your oven to 300°F (150°C) and place the bars on a parchment‑lined tray. Warm them for 5–7 minutes, or until they’re heated through. A tiny splash of water on the tray before reheating helps steam the bars, keeping them moist and preventing them from drying out.