I was standing in my kitchen at 2 a.m., half‑asleep, staring at a pan that smelled like burnt toast and disappointment. My roommate had dared me to “make the best scrambled eggs ever” after a night of endless takeout, and I was determined to prove that a simple egg could out‑shine any restaurant’s fancy brunch menu. The first attempt was a disaster: the eggs clumped together, the butter turned brown, and the whole thing tasted like rubber bands. I swear I heard the pan sigh in resignation.
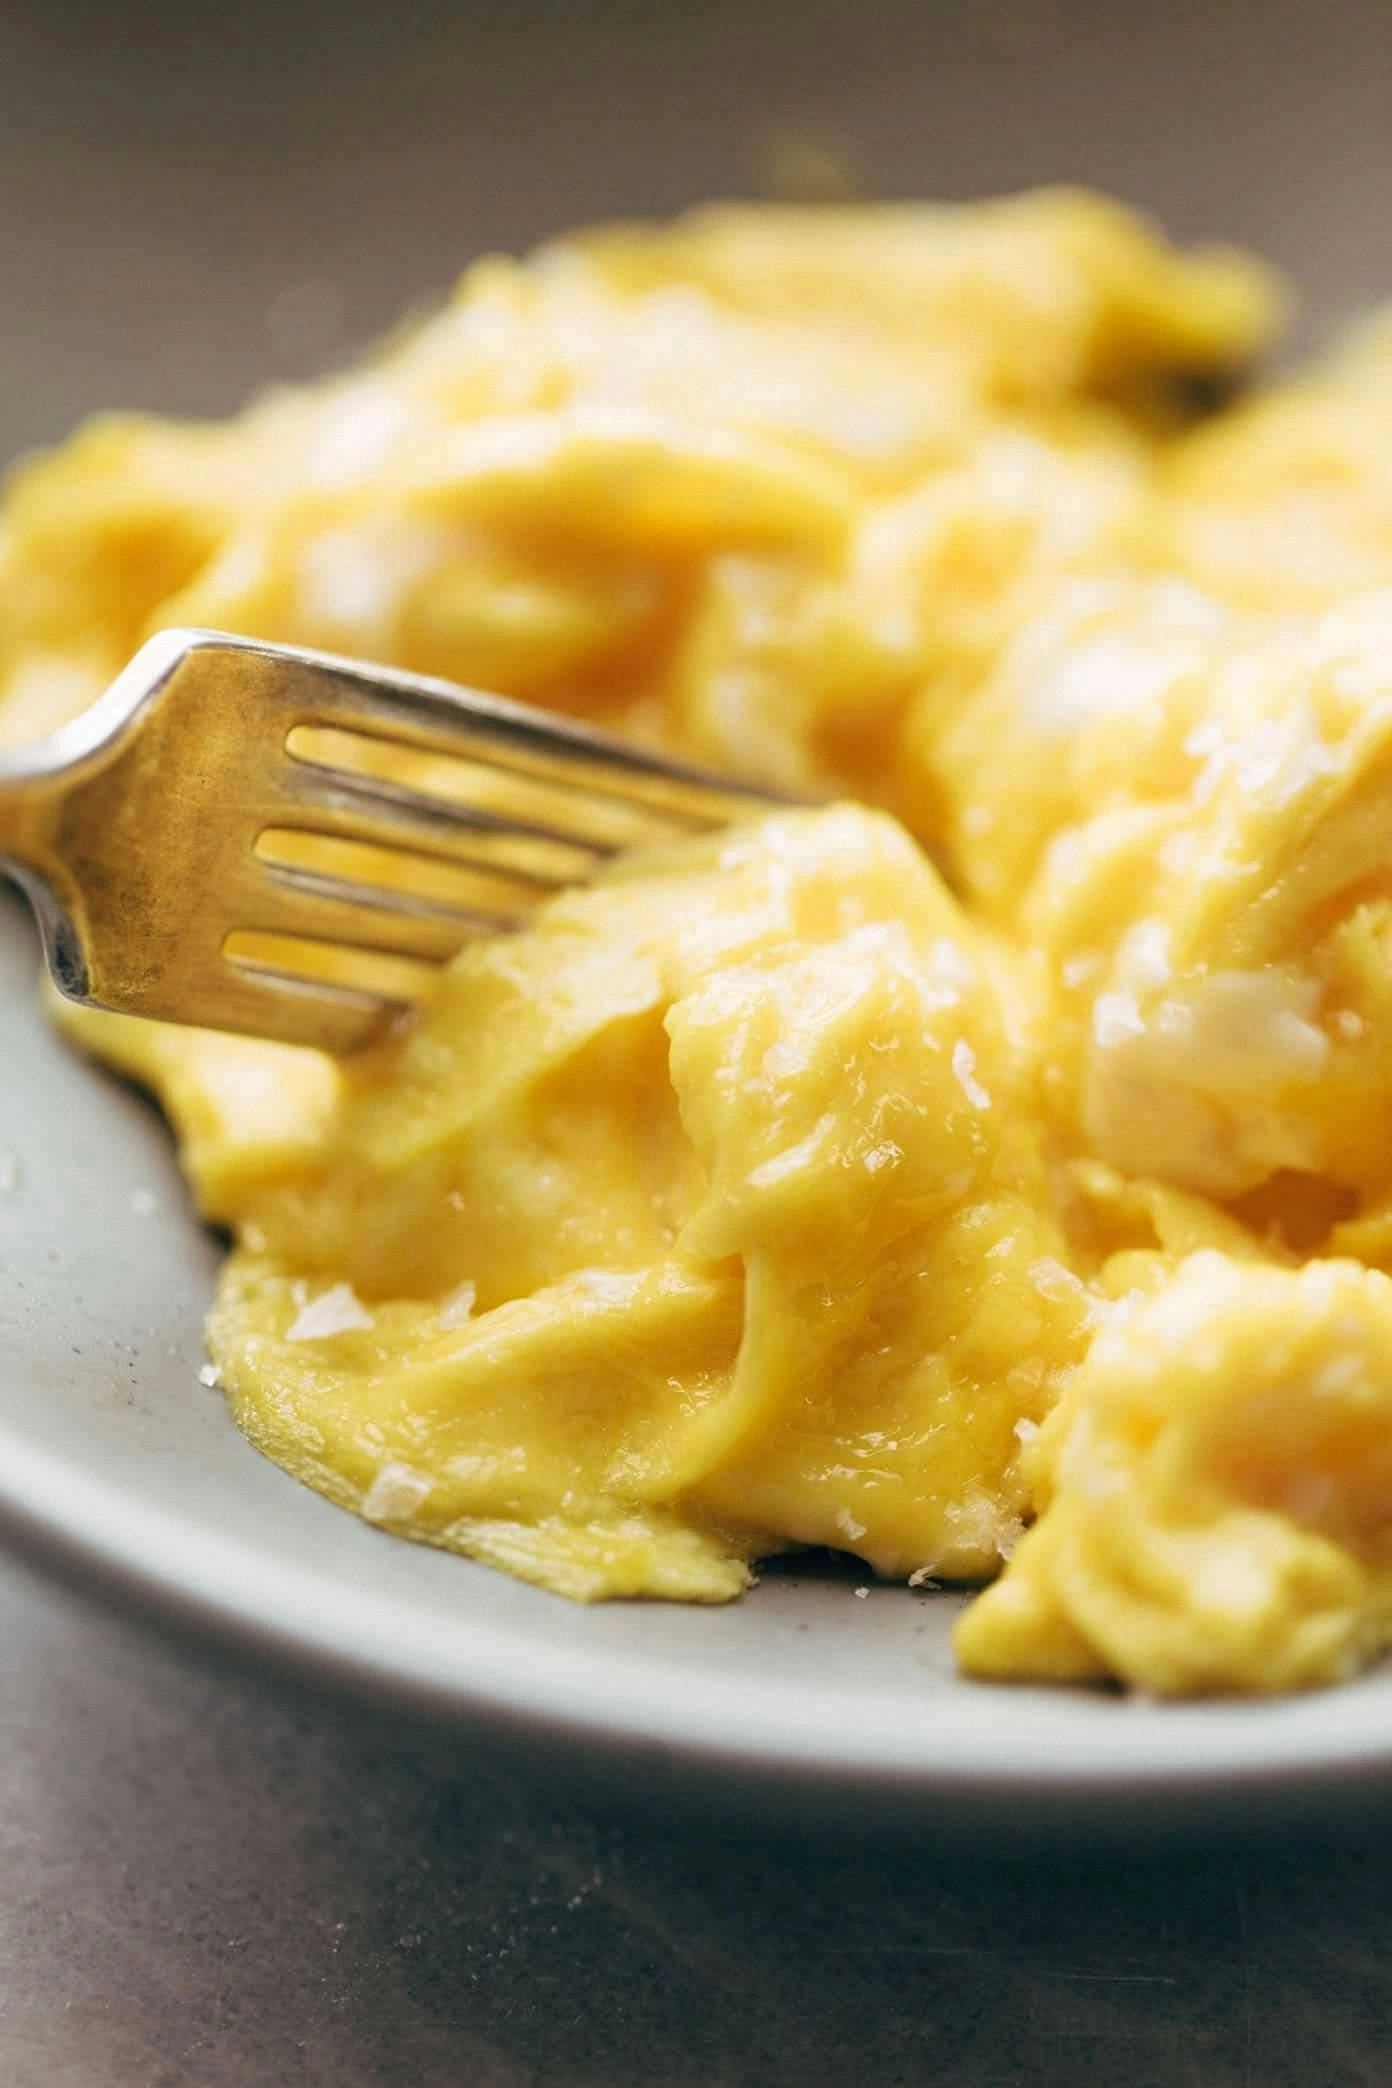
Fast forward two weeks, a notebook full of failed experiments, and a sudden epiphany involving a splash of cream, a whisper of butter, and the lowest possible heat you can imagine. I turned the stove down to a barely‑warm glow, whisked the eggs with a dollop of heavy cream until they looked like liquid sunshine, and then coaxed them over the flame like a gentle lullaby. The result? A cloud‑soft, buttery dream that melts on your tongue before you even realize you’re chewing. I dare you to taste this and not go back for seconds.
What sets this version apart isn’t just the texture—although calling it “silky” feels like an understatement—but the balance of flavors that sing in perfect harmony. The subtle tang of cream, the richness of butter, and a pinch of sea salt create a flavor profile that feels both luxurious and comfortingly familiar, like a warm hug from an old friend. Most recipes get this completely wrong, either over‑cooking the eggs or drowning them in butter. Here, the secret is timing, temperature, and a dash of confidence.
I’m going to let you in on a tiny secret that most chefs keep under their aprons: a splash of cold water added at the very end of cooking. It sounds absurd, but it stops the residual heat from turning your masterpiece into a rubbery mess, preserving that melt‑in‑your‑mouth softness. Okay, ready for the game‑changer? Let me walk you through every single step — by the end, you’ll wonder how you ever made it any other way.
What Makes This Version Stand Out
- Texture: The eggs are cooked low and slow, resulting in a custard‑like silk that stays creamy even as it cools. No rubbery edges, no dry flakes—just pure, buttery clouds.
- Flavor: A splash of heavy cream amplifies the natural richness of the yolk, while a pinch of kosher salt brings out a subtle depth that plain scrambled eggs lack.
- Simplicity: Only seven ingredients, all pantry staples, and a pan you already own. No fancy gadgets, no complicated techniques.
- Uniqueness: The final water‑burst trick locks in moisture, giving you that “just‑out‑of‑the‑pan” restaurant feel at home.
- Crowd Reaction: Guests often claim they’ve never tasted scrambled eggs this good, and the reaction is usually a stunned silence followed by frantic requests for seconds.
- Ingredient Quality: Using farm‑fresh eggs and real butter makes a measurable difference; the flavor shines through every bite.
- Cooking Method: Low‑heat, constant stirring creates a gentle coagulation, preventing the proteins from tightening up and forming curds.
- Make‑Ahead Potential: The water‑burst step means you can reheat leftovers without sacrificing that coveted silkiness.
Inside the Ingredient List
The Flavor Base
The foundation of any great scrambled egg is the egg itself. I use large, farm‑fresh eggs because the higher yolk‑to‑white ratio gives a richer, more buttery taste. If you skip the quality here, you’ll notice a watery, bland result that never quite achieves that velvety feel. You can substitute cage‑free eggs if that’s all you have, but expect a subtle difference in flavor depth.
Next comes heavy cream, the secret weapon that turns ordinary eggs into a luxurious custard. The cream adds fat and slows down the coagulation, allowing the proteins to set gently. If you’re out of cream, a splash of whole milk works in a pinch, though you’ll lose a bit of that silkiness.
The Texture Crew
Unsalted butter is the golden glue that binds everything together. As it melts, it creates a glossy coating that prevents the eggs from sticking while imparting a buttery aroma that fills the kitchen. Using a good quality butter (think European style) makes the difference between “good” and “life‑changing.”
Salt isn’t just seasoning; it enhances the natural flavors and helps the proteins unwind, contributing to a smoother texture. I recommend kosher salt for its clean, unobtrusive crunch. A pinch too much can make the eggs taste briny, so measure carefully.
Freshly ground black pepper adds a subtle heat that wakes up the palate without overpowering the buttery notes. If you like a little kick, a dash of white pepper works beautifully because it blends in without speckling the delicate color.
The Unexpected Star
Chopped chives bring a fresh, oniony brightness that cuts through the richness. Sprinkle them in at the very end so they retain their bright green color and snap. If you’re not a fan of chives, try finely diced parsley or a pinch of fresh dill for a different herbaceous note.
Gruyère cheese (optional) melts into the egg, adding a nutty undertone that deepens the umami profile. Use a high‑quality cheese for the best melt; pre‑grated varieties often contain anti‑caking agents that can affect texture.
The Final Flourish
A final splash of cold water (or even a few drops of milk) right before you remove the pan from heat stops the residual heat from turning the eggs into a rubbery mess. This tiny trick preserves the cloud‑soft texture for minutes, giving you a window of perfect eat‑ability that most recipes simply don’t offer.
Everything's prepped? Good. Let's get into the real action...
The Method — Step by Step
Gather all your ingredients and give them a quick visual check—eggs should be at room temperature, butter should be cut into small cubes, and the cream should be ready to pour. This preparation step is crucial; it prevents you from scrambling (pun intended) mid‑cook. I like to whisk the eggs, cream, salt, and pepper together in a wide bowl until the mixture is uniform and slightly frothy. That froth is the first sign you’re on the right track.
Place a heavy‑bottomed non‑stick skillet on the stove and set the heat to the lowest possible setting. Add the butter cubes and let them melt gently; you should hear a soft sizzle, not a roar. That sizzle when it hits the pan? Absolute perfection. Once melted, tilt the pan so the butter coats the entire surface. If the butter starts to brown, lower the heat immediately—burnt butter will ruin the flavor.
Kitchen Hack: Use a silicone spatula with a slightly angled edge; it slides under the eggs without breaking them, keeping that delicate texture intact.When the butter is fully melted and the pan is shimmering, pour in the egg‑cream mixture. It should hit the pan with a gentle hiss, not a frantic pop. This is the moment of truth. Let the eggs sit untouched for about 10 seconds; this thin layer will begin to set, creating a soft base.
Start stirring gently with your silicone spatula, pushing the eggs from the edges toward the center in a slow, folding motion. The goal is to form large, creamy curds, not tiny, over‑cooked nuggets. You’ll notice the edges start pulling away from the pan as they thicken—that’s the signal you’re approaching the perfect texture.
Watch Out: If you crank up the heat to speed things up, the proteins will seize, and you’ll end up with a dry, rubbery scramble. Patience is the secret weapon.Continue to stir, occasionally lifting the pan off the burner for a few seconds to control the temperature. This “off‑the‑heat” technique keeps the eggs from overheating while still allowing them to cook evenly. You’ll see the mixture become thicker, glossy, and almost sauce‑like. When the eggs are about 80% set—still a little runny in the center—remove the pan from the heat.
Now the magic happens: add a splash (about 1 tablespoon) of cold water or milk, and fold it in quickly. The sudden temperature drop stops the cooking process instantly, preserving that cloud‑soft texture. This next part? Pure magic. The eggs will look slightly looser for a heartbeat, then settle into a smooth, velvety finish.
Stir in the chopped chives and, if you’re feeling indulgent, the grated Gruyère. The heat of the eggs will melt the cheese just enough to create tiny pockets of gooey goodness without turning the whole dish into a cheesy sauce. Taste and adjust the seasoning with a pinch more salt or pepper if needed.
Transfer the scrambled eggs to a warm serving bowl (or plate) immediately. The residual heat in the pan will continue to cook them ever so slightly, so a prompt transfer keeps them at that perfect, melt‑in‑your‑mouth stage. Serve hot, paired with toasted sourdough, avocado slices, or a side of smoked salmon for an elevated breakfast.
That's it — you did it. But hold on, I've got a few more tricks that'll take this to another level...
Insider Tricks for Flawless Results
The Temperature Rule Nobody Follows
Never, ever start with high heat. The low‑and‑slow method is the backbone of this recipe. If you’re tempted to crank up the burner, remember that the proteins in the egg begin to tighten up at around 150 °F (65 °C). By staying below that threshold for as long as possible, you allow the fat from the butter and cream to coat the protein strands, resulting in that coveted silkiness. A friend once tried to speed things up on medium heat, and the eggs turned out rubbery—let's just say it didn't end well.
Why Your Nose Knows Best
Your sense of smell is a reliable guide. As the eggs approach doneness, you’ll detect a faint buttery aroma that’s slightly sweet. If you smell a faint burnt note, the pan is too hot and you need to remove it immediately. Trust that nose; it’s more precise than any timer.
The 5‑Minute Rest That Changes Everything
Once you’ve transferred the eggs to a bowl, let them rest for about five minutes before serving. This brief pause lets the residual heat evenly distribute, finishing the cooking process without over‑cooking. It also allows the flavors to meld, making each bite more harmonious. Pro tip: Cover the bowl loosely with foil to keep the heat in while preventing a skin from forming.
Cold Water Finale
Adding a splash of cold water at the end is not just a gimmick; it essentially “shocks” the proteins, halting further coagulation. This technique is borrowed from professional pastry chefs who use ice water to stop the cooking of custards. The result is a texture that stays buttery and soft even after a few minutes on the counter.
Seasoning in Layers
Season the eggs twice: once in the whisking bowl and once after cooking. The first layer penetrates the egg mixture, while the second adjusts the surface flavor. This double‑seasoning approach ensures every bite is perfectly seasoned, not just the first spoonful.
Creative Twists and Variations
This recipe is a playground. Here are some of my favorite ways to switch things up:
Mediterranean Sunrise
Swap the chives for a handful of sun‑dried tomatoes and a sprinkle of feta cheese. The salty feta and tangy tomatoes add a bright, Mediterranean twist that pairs beautifully with olives and fresh basil. Perfect for a brunch that feels like a seaside escape.
Spicy Sriracha Swirl
Add a drizzle of sriracha and a pinch of smoked paprika right before serving. The heat cuts through the richness, creating a balanced bite that’s both creamy and exhilarating. Serve with a side of avocado for a cooling contrast.
Herb Garden Medley
Replace chives with a mix of finely chopped parsley, dill, and tarragon. The herb medley introduces earthy, fresh notes that lift the dish without overpowering the buttery base. This version works great alongside smoked salmon or a slice of prosciutto.
Cheese Lover’s Dream
Fold in a blend of sharp cheddar, Gruyère, and a touch of blue cheese for a bold, umami‑rich experience. The melty cheeses create pockets of gooey goodness, making each bite a decadent surprise. Pair with toasted rye for an extra crunch.
Vegan Velvet (Egg‑Free)
Use silken tofu blended with nutritional yeast, a splash of plant‑based cream, and a dash of turmeric for color. Cook it using the same low‑heat method with vegan butter, and you’ll achieve a surprisingly similar silky texture. Top with chives or vegan cheese for a cruelty‑free indulgence.
Storing and Bringing It Back to Life
Fridge Storage
Transfer any leftovers to an airtight container and refrigerate within two hours. The eggs will keep for up to 24 hours. When you’re ready to eat, gently reheat in a non‑stick pan over low heat, adding a teaspoon of butter and a splash of water to revive the creaminess.
Freezer Friendly
Portion the scrambled eggs into freezer‑safe bags, flatten them for even freezing, and store for up to one month. To thaw, move the bag to the fridge overnight, then reheat in a pan with a bit of butter and water, stirring constantly.
Best Reheating Method
The secret to perfect reheating is low, gentle heat and moisture. Place the eggs in a skillet, add a tiny splash of water or milk (about a tablespoon per cup of eggs), and stir slowly. This steam‑infused method restores the original silkiness without turning the eggs rubbery.