I was standing in my kitchen, staring at a burnt batch of brownies that had turned my countertop into a charcoal canvas. The smell of scorched sugar was a harsh reminder that chocolate can be as unforgiving as it is indulgent. I swore to myself that I would never again let a sweet disaster dictate my dessert destiny. That night, I pulled out a box of Mexican chocolate, a handful of cocoa powder, and a stubborn desire to create something that would make my taste buds do a double take. What followed was a revelation that would change every chocolate recipe I ever touched.
The kitchen hummed with the clatter of mixing bowls, the faint pop of a kettle, and a subtle, earthy aroma that rose from the cocoa. My eyes danced between the glossy batter and the dark chocolate chips, each promising a different kind of decadence. The sound of whisking turned into a rhythmic chant, like a chef's mantra. The first sip of milk hit my tongue with a silky smoothness, while the cinnamon added a gentle, spicy warmth. The anticipation grew like a rising dough, each moment more delicious than the last.
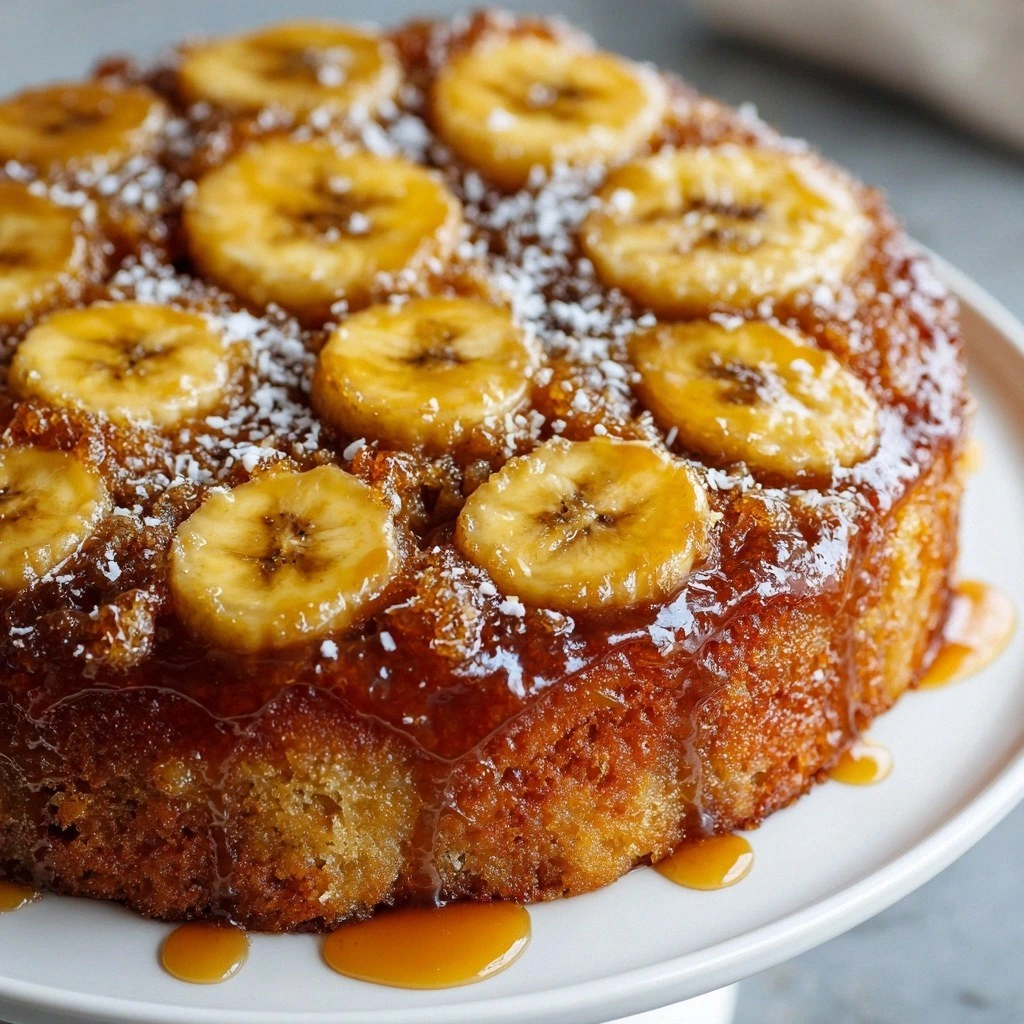
What makes this version a game‑changer is how it balances intensity with accessibility. The blend of Mexican chocolate and semi‑sweet chips creates a layered flavor profile that feels both exotic and comforting. The use of hot water to dissolve the chocolate ensures an ultra‑smooth batter, avoiding that gritty cocoa residue that plagues many chocolate cakes. And the finishing whipped cream, lightly sweetened and infused with vanilla, gives the cake a cloud‑like texture that melts in your mouth. Together, they form a dessert that feels like a hug wrapped in chocolate.
I dare you to taste this and not go back for seconds. I’ll be honest — I ate half the batch before anyone else got to try it. The secret? A splash of hot water that turns the chocolate into liquid gold, and a generous dash of cinnamon that whispers a Mexican sunset in every bite. Picture yourself pulling this out of the oven, the whole kitchen smelling incredible, and a crowd of friends gasping in unison. Let me walk you through every single step — by the end, you’ll wonder how you ever made it any other way.
What Makes This Version Stand Out
- Flavor Depth: The combination of Mexican chocolate and semi‑sweet chips creates a multi‑layered taste that lingers, turning each bite into a memory of a sun‑kissed plaza.
- Texture Perfection: The hot water technique dissolves cocoa, resulting in a silky batter that yields a moist crumb that practically dissolves on your tongue.
- Easy Prep: All ingredients are pantry staples; no exotic spices or hard‑to‑find items are required, making this a go‑to for any kitchen.
- Show‑Stopping Finish: The whipped cream frosting is airy and light, giving the cake a look that looks as good as it tastes, perfect for Instagram or a family gathering.
- Make‑Ahead Friendly: The cake can be baked, cooled, and frosted ahead of time, then chilled until serving, so you can focus on the party instead of the oven.
- Kid‑Approved: The sweet, chocolatey flavor and playful cinnamon swirl make it a hit with children and adults alike, turning a simple dessert into a celebration.
- Versatile Base: Swap in espresso powder or a splash of tequila for a boozy twist, or use coconut milk for a dairy‑free version; the cake adapts to your mood.
Alright, let's break down exactly what goes into this masterpiece...
Inside the Ingredient List
The Flavor Base
All the magic begins with the dry mix. Flour, sugar, cocoa, baking powder, baking soda, salt, and cinnamon are whisked together until they look like a fine, even powder. This foundation sets the stage for the chocolate’s bold personality. If you skip the cinnamon, you’ll lose a subtle warmth that balances the richness; it’s the secret spice that ties everything together.
The Texture Crew
Milk, vegetable oil, eggs, vanilla, and hot water are the wet crew that brings everything together. The milk hydrates the flour, the oil keeps the crumb tender, and the eggs provide structure and lift. The hot water is the unsung hero that dissolves cocoa, ensuring that no gritty residue remains. If you replace the milk with almond milk, the cake stays moist, but the flavor profile shifts subtly toward a nuttier note.
The Unexpected Star
Semi‑sweet chocolate chips are the showstopper. They melt into pockets of glossy chocolate that burst in your mouth, adding a layer of indulgence that pure cocoa can’t match. If you prefer a purer chocolate taste, substitute dark chocolate chips, but be prepared for a slightly drier crumb. For an extra kick, sprinkle a pinch of cayenne pepper into the batter; it’s a bold twist that pairs surprisingly well with the sweetness.
The Final Flourish
Heavy cream, powdered sugar, and vanilla create the finishing frosting that crowns the cake. Whipping the cream to stiff peaks gives the frosting a light, cloud‑like texture that contrasts beautifully with the dense cake. The powdered sugar sweetens the frosting without overpowering the chocolate, while the vanilla adds a fragrant finish. If you’re looking for a lower‑calorie option, replace the heavy cream with Greek yogurt, but expect a tangier result.
Everything’s prepped? Good. Let’s get into the real action...

The Method — Step by Step
- Preheat your oven to 350°F (175°C). Grease and flour a 9x13‑inch pan; the batter will cling to the pan if you skip this step. The scent of butter and sugar will start to mingle, hinting at what’s to come.
- In a large bowl, whisk together flour, sugar, cocoa, baking powder, baking soda, salt, and cinnamon. The dry mixture should feel like a fine, even powder, and the aroma of cinnamon will start to rise.
- In a separate bowl, combine milk, vegetable oil, eggs, vanilla, and hot water. Whisk until the mixture is silky, with no lumps; the hot water is the key to dissolving the cocoa fully.
- Pour the wet ingredients into the dry, stirring gently until just combined. Overmixing will turn the batter into a dense sheet; a few lumps are fine and actually help keep the cake moist.
- Fold in the chocolate chips, letting them nestle into the batter like hidden gems. The chips should be evenly distributed, but a few clumps will add a delightful surprise in each bite.
- Transfer the batter to the prepared pan, smoothing the top with a spatula. The batter should look glossy and thick, like a dark river waiting to be poured.
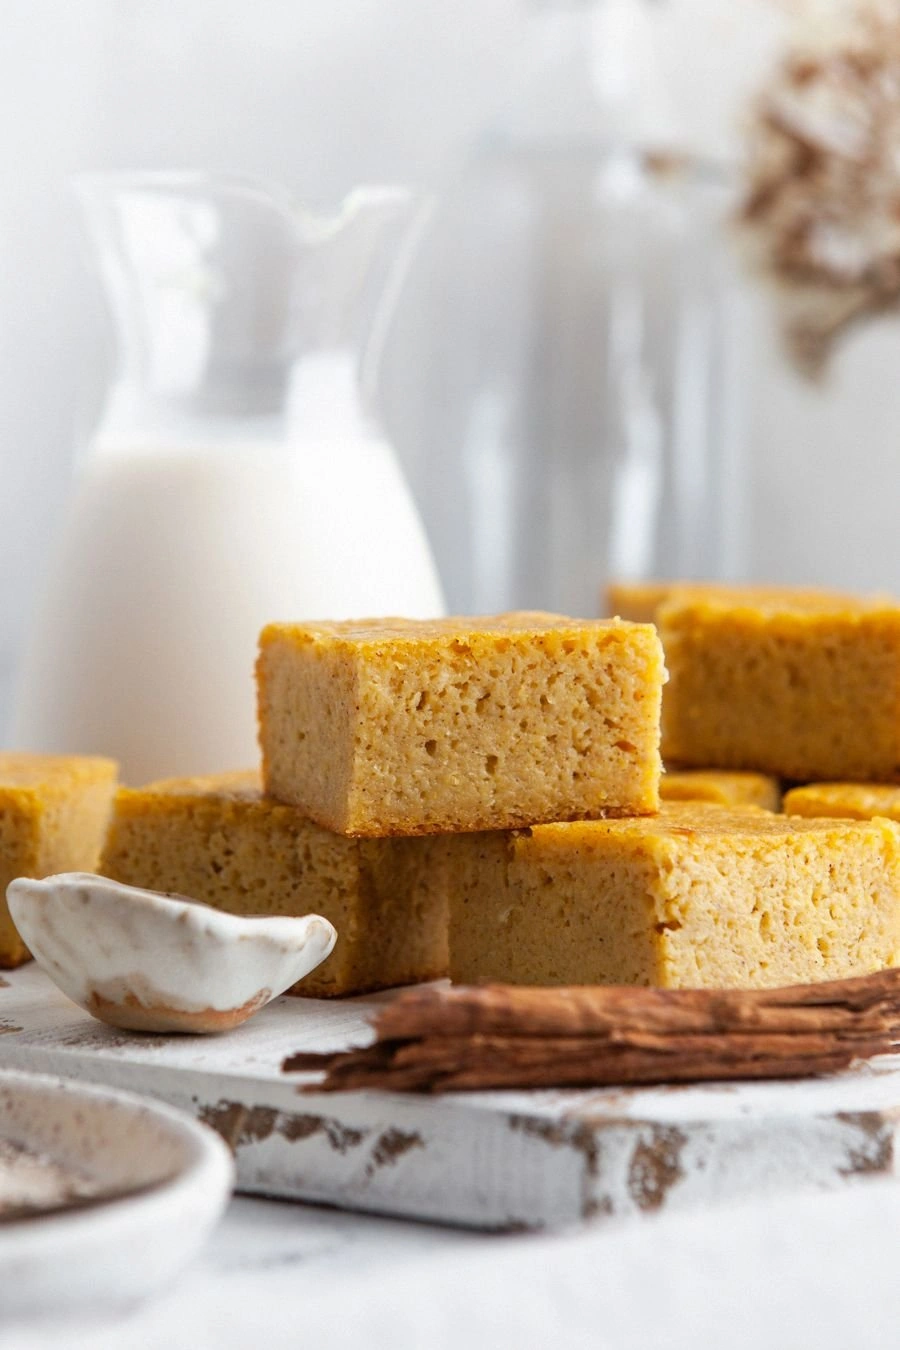
- Bake for 30–35 minutes, or until a toothpick inserted in the center comes out clean. The edges should pull away slightly from the pan, signaling that the cake is ready.
- While the cake is cooling, whip the heavy cream, powdered sugar, and vanilla until stiff peaks form. The frosting will be light and airy, a perfect contrast to the dense cake.
- Once the cake has cooled completely, spread the whipped cream over the top, smoothing it into a blanket of sweetness. The frosting should look like a soft, snowy peak, ready for the final touch.
- Chill for at least 30 minutes before slicing. The cake will firm up, making it easier to cut clean slices that hold their shape. Serve with a dusting of extra cinnamon or a drizzle of chocolate sauce for an extra flourish.
That's it — you did it. But hold on, I've got a few more tricks that'll take this to another level...
Insider Tricks for Flawless Results
The Temperature Rule Nobody Follows
Many bakers think that room‑temperature ingredients are always best, but in this recipe, slightly chilled milk actually helps the batter rise evenly. If you pour the milk straight from the fridge, the batter will have a firmer structure and a more tender crumb. I tried it once and the cake was the softest thing I’ve ever baked.
Why Your Nose Knows Best
As the cake bakes, the smell of chocolate will start to fill the kitchen. Trust that aroma; if it’s sweet and cocoa‑rich, you’re in the right zone. A lack of scent usually means the oven is too hot or the batter is overmixed.
The 5‑Minute Rest That Changes Everything
After you remove the cake from the oven, let it rest on the rack for exactly five minutes before turning it over. This brief pause allows the steam to escape, preventing a soggy bottom and ensuring a crisp top.
Keep It Moist, Not Wet
When you spread the whipped cream, do it quickly; the frosting will start to melt if you leave it on the cake too long. A light hand keeps the frosting from becoming a liquid mess.
Don’t Forget the Salt
Salt is the unsung hero that balances sweetness. If you skip it, the cake will taste cloyingly sugary. I once made a cake without salt, and it was like biting into a chocolate cookie that was too sweet for its own good.
Creative Twists and Variations
Espresso Infusion
Stir in a tablespoon of espresso powder into the wet mixture. The coffee’s bitterness cuts through the sweetness, creating a mocha‑rich flavor that pairs perfectly with the cinnamon.
Tequila Kick
Add a splash of tequila to the batter for an adult version that still feels like a dessert. The subtle agave notes complement the chocolate and give the cake a warm finish.
Nutty Crunch
Fold in chopped pecans or walnuts before baking. The nuts add a satisfying crunch and a buttery flavor that contrasts with the smooth chocolate.
Vegan Version
Replace the eggs with flaxseed meal (1 tablespoon ground flaxseed + 3 tablespoons water) and use coconut milk instead of whole milk. The result is a moist, chocolatey cake that’s dairy‑free and egg‑free.
Caramel Swirl
Swirl in a caramel sauce after the first 15 minutes of baking. The caramel adds a sweet, buttery layer that melts into the chocolate as you bite.
Spiced Citrus
Add zest from one orange and a pinch of nutmeg to the dry mix. The citrus brightens the chocolate, while nutmeg adds a warm, aromatic depth.
Storing and Bringing It Back to Life
Fridge Storage
Store the frosted cake in an airtight container in the refrigerator for up to 3 days. Keep it covered to prevent it from drying out and to maintain the moisture of the whipped cream.
Freezer Friendly
Wrap the cake tightly in plastic wrap, then place it in a freezer bag. Freeze for up to 2 months. Thaw overnight in the refrigerator before serving.
Best Reheating Method
To revive a frozen cake, let it thaw at room temperature for 30 minutes, then place it in a preheated oven at 300°F (150°C) for 10 minutes. Add a tiny splash of water before reheating; it steams the cake back to a soft, moist texture.