Picture this: I’m halfway through a week of bland salads, and the fridge is a lonely, unappetizing gray. Suddenly, a burst of sweet, buttery aroma slices through the kitchen like a knife through a cloud of stale bread. That scent is the unmistakable perfume of pears, cinnamon, and a whisper of nutmeg dancing together, and I’m instantly hooked. I was about to dismiss it as another “just another bake” when I realized the real magic lies in how these simple ingredients talk to each other. It was a dare from my roommate to turn this humble fruit into something that would make our taste buds do the cha‑cha.
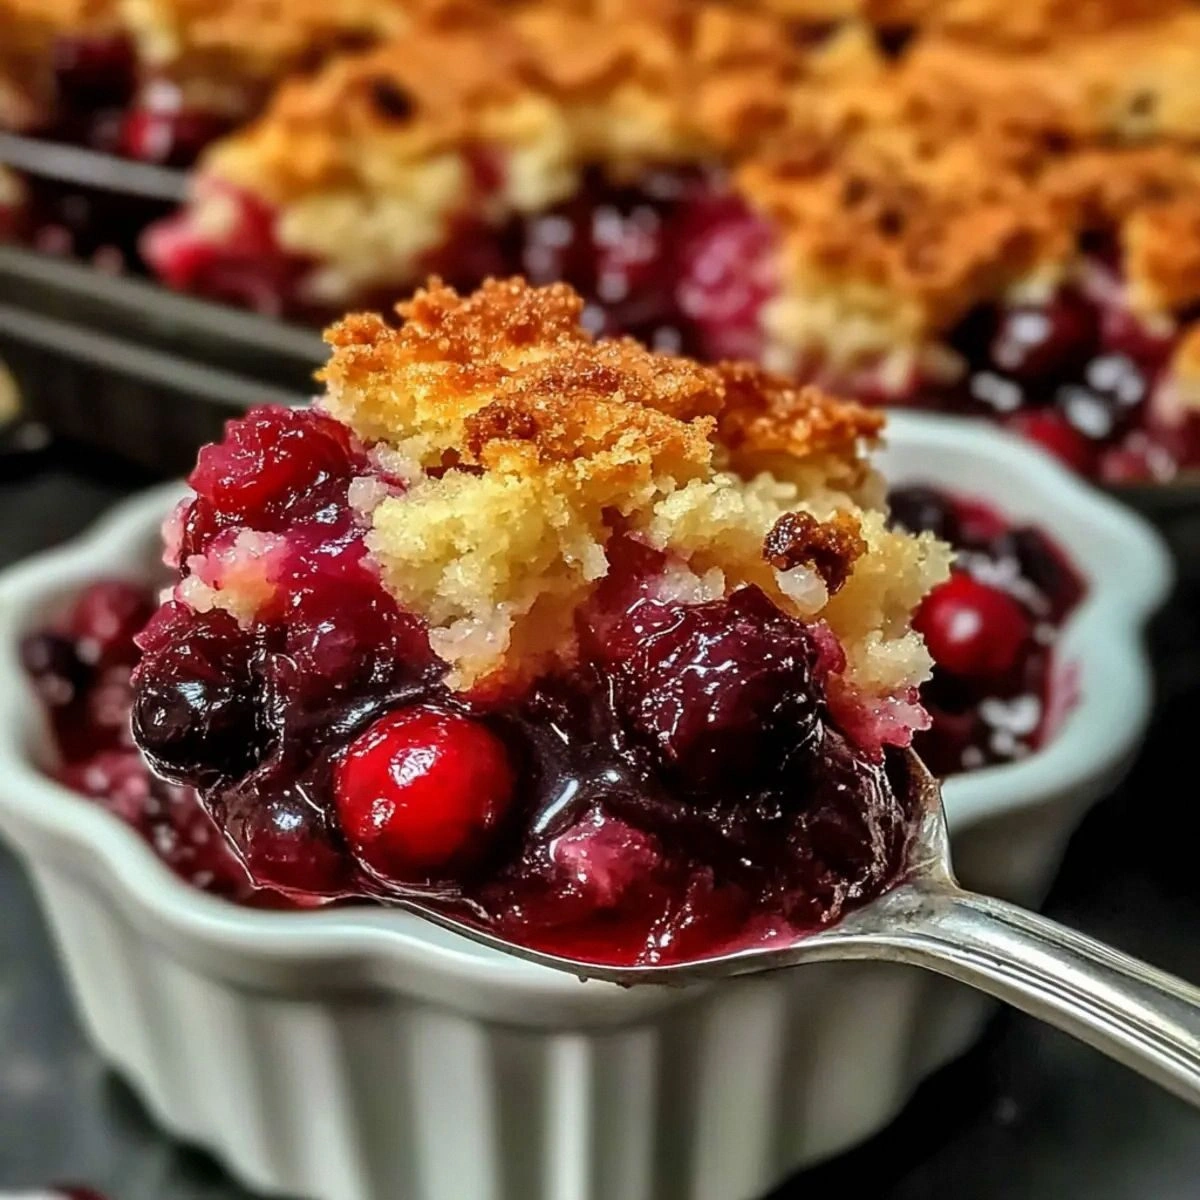
The first time I tasted it, the pears were not just sweet but silky, almost like they were whispering to the cinnamon. The buttery crust had a golden, flaky edge that cracked like thin ice when you pressed it, and the aroma filled every corner of the kitchen, turning the air into a comforting hug. The flavor was a gentle tug between the sharp citrus of lemon and the warm, earthy undertones of nutmeg, all wrapped in a sweet, caramelized glaze. I could taste the buttery richness mingling with the natural sweetness of the pears, and the nuts added that satisfying crunch that made each bite a multi‑sensory experience. It was the kind of dish that turns a regular Tuesday into a mini celebration.
Most pear recipes I’ve seen are either too dry or too sweet, but this version hits the sweet spot by balancing the fruit’s natural sugars with just enough butter and brown sugar to keep it moist without drowning it. The secret sauce? A sprinkle of ground cinnamon and a dash of nutmeg that elevate the pears from ordinary to extraordinary, creating a flavor profile that’s both nostalgic and fresh. I dare you to taste this and not go back for seconds—once you do, you’ll never settle for a plain pear bake again. The result is a dish that feels like a warm hug in a pan, with a crisp, caramelized top that shatters like thin ice when you break it apart.
If you’ve ever struggled with pears turning mushy or cinnamon baking too quickly, you’re not alone—this recipe is designed to solve those exact problems. It’s a game‑changer because it uses a simple technique that locks in moisture while creating a golden, caramelized crust. Picture yourself pulling this out of the oven, the whole kitchen smelling incredible, and the first bite sending a wave of comfort through your body. The anticipation is half the joy; the taste is the other half, and together they create an experience that feels like a cozy night in, even on a busy weekday.
Let me walk you through every single step—by the end, you’ll wonder how you ever made it any other way. This isn’t just a recipe; it’s a lesson in how the right timing, the right temperature, and the right ingredients can transform an ordinary fruit into a show‑stopper. I’ll share micro‑challenges, bold claims, and even a few kitchen hacks that will make this bake feel like a professional secret. The goal is simple: deliver a dessert that’s both comforting and wow‑worthy, with a texture that’s perfectly balanced and a flavor that lingers long after the last bite. Stay with me here—this is worth it.
What Makes This Version Stand Out
- Flavor: The combination of ripe pears, lemon zest, and a blend of cinnamon and nutmeg creates a complex, layered taste that’s sweet, tangy, and warm—nothing feels out of place. This harmony makes the bake feel like a cozy hug.
- Texture: The buttery crust is flaky yet tender, while the pears stay juicy and slightly caramelized on the inside. The nuts add a satisfying crunch that contrasts beautifully with the softness.
- Simplicity: With just ten ingredients, no fancy equipment, and a straightforward method, anyone can master this dish. Even novice cooks will feel confident and proud.
- Uniqueness: The subtle addition of nutmeg and the use of brown sugar in the crust give this bake a depth that most pear desserts lack. It’s a twist on the classic that feels both familiar and fresh.
- Crowd Reaction: Friends and family often ask for seconds, and the dish is a hit at gatherings because it’s comforting yet sophisticated enough for any occasion.
- Ingredient Quality: Using ripe pears, high‑quality butter, and fresh spices ensures the best flavor. The recipe scales well for larger groups without compromising taste.
- Cooking Method: Baking the pears with a buttery crust locks in moisture while allowing the spices to caramelize, giving the dish a complex, caramelized aroma that fills the kitchen.
- Make‑Ahead Potential: Prepare the batter and bake it fresh, or let it cool and refrigerate for up to 3 days—reheat gently for a quick dessert.
Inside the Ingredient List
The Flavor Base
4 cups ripe pears are the star of this bake. Their natural sweetness and mild acidity balance the buttery crust, preventing it from becoming overly rich. If you’re using slightly underripe pears, add a splash of lemon juice to brighten the flavor. Swapping pears for apples will change the profile slightly—apples bring a firmer bite and a different sweetness level, but the dish still works wonderfully.
The Aromatic Spice Mix
1 tablespoon ground cinnamon and 1 teaspoon nutmeg create a warm, earthy base that pairs perfectly with pears. Cinnamon adds a sweet, woody note, while nutmeg introduces subtle heat and depth. If you prefer a milder spice profile, reduce nutmeg to half a teaspoon; for a spicier kick, add a pinch of cayenne. These spices also help stabilize the butter’s flavor, keeping the crust from tasting too buttery.
The Texture Crew
1.5 cups all‑purpose flour and 0.5 cups brown sugar form the buttery crust. The flour provides structure, while the brown sugar adds caramelized sweetness and moisture retention. Skipping the flour would result in a crumbly, flat bake; skipping the sugar would produce a dry, overly buttery crust. For a gluten‑free version, substitute a 1:1 gluten‑free flour blend, but be aware the texture will change slightly.
The Unexpected Star
0.5 cups chopped walnuts or pecans add a nutty crunch that contrasts the soft pears. The nuts also contribute healthy fats, balancing the sweetness. If you’re allergic or just don’t like nuts, substitute toasted coconut flakes for a tropical twist. The key is to toast the nuts lightly before adding them to avoid a raw, bitter taste.
The Final Flourish
0.5 cups unsalted butter, 0.25 teaspoon salt, 2 tablespoons lemon juice, and 1 teaspoon vanilla extract round out the flavor and texture. Butter provides richness and a crisp crust; salt enhances every ingredient’s taste; lemon juice cuts the sweetness and adds brightness; vanilla adds depth and warmth. If you prefer a dairy‑free version, use coconut butter or a plant‑based butter substitute. Each of these components is essential to achieve the perfect balance.
Everything's prepped? Good. Let's get into the real action.
The Method — Step by Step
- Preheat your oven to 375°F (190°C). Line a 9‑inch square baking pan with parchment paper, leaving an overhang on two sides for easy lift‑out. The parchment ensures a clean release and a crisp edge. Let the oven heat up while you prepare the filling.
- Core the pears, slice them into ½‑inch thick wedges, and set them aside. If you’re using a mandoline, a gentle, even cut will help the pears cook uniformly. Toss the wedges with 2 tablespoons lemon juice to prevent oxidation and add a bright citrus note. Pat them dry with a paper towel before mixing with spices.
- In a large bowl, combine the sliced pears, 1 tablespoon ground cinnamon, 1 teaspoon nutmeg, and 0.5 cups chopped walnuts or pecans. Toss until the pears are evenly coated. The nuts should be evenly distributed to avoid pockets of crunch that can burn. This step is crucial for flavor distribution.
- In a separate bowl, whisk together 1.5 cups all‑purpose flour, 0.5 cups brown sugar, and 0.25 teaspoon salt until well combined. This dry mix will form the buttery crust. Keep the flour mixture dry to avoid clumping when you add butter later.
- Cut 0.5 cups unsalted butter into small cubes and add it to the dry mix. Using a pastry cutter or your fingers, work the butter into the flour until the mixture resembles coarse crumbs. The butter should be visible in the crumbs, ensuring a flaky crust.
- Fold the pear and spice mixture into the crumbly batter, gently mixing until the pears are coated but not over‑mixed. The goal is a gentle swirl of color; over‑mixing can turn the pears mushy. The batter should look like a thick, moist dough.
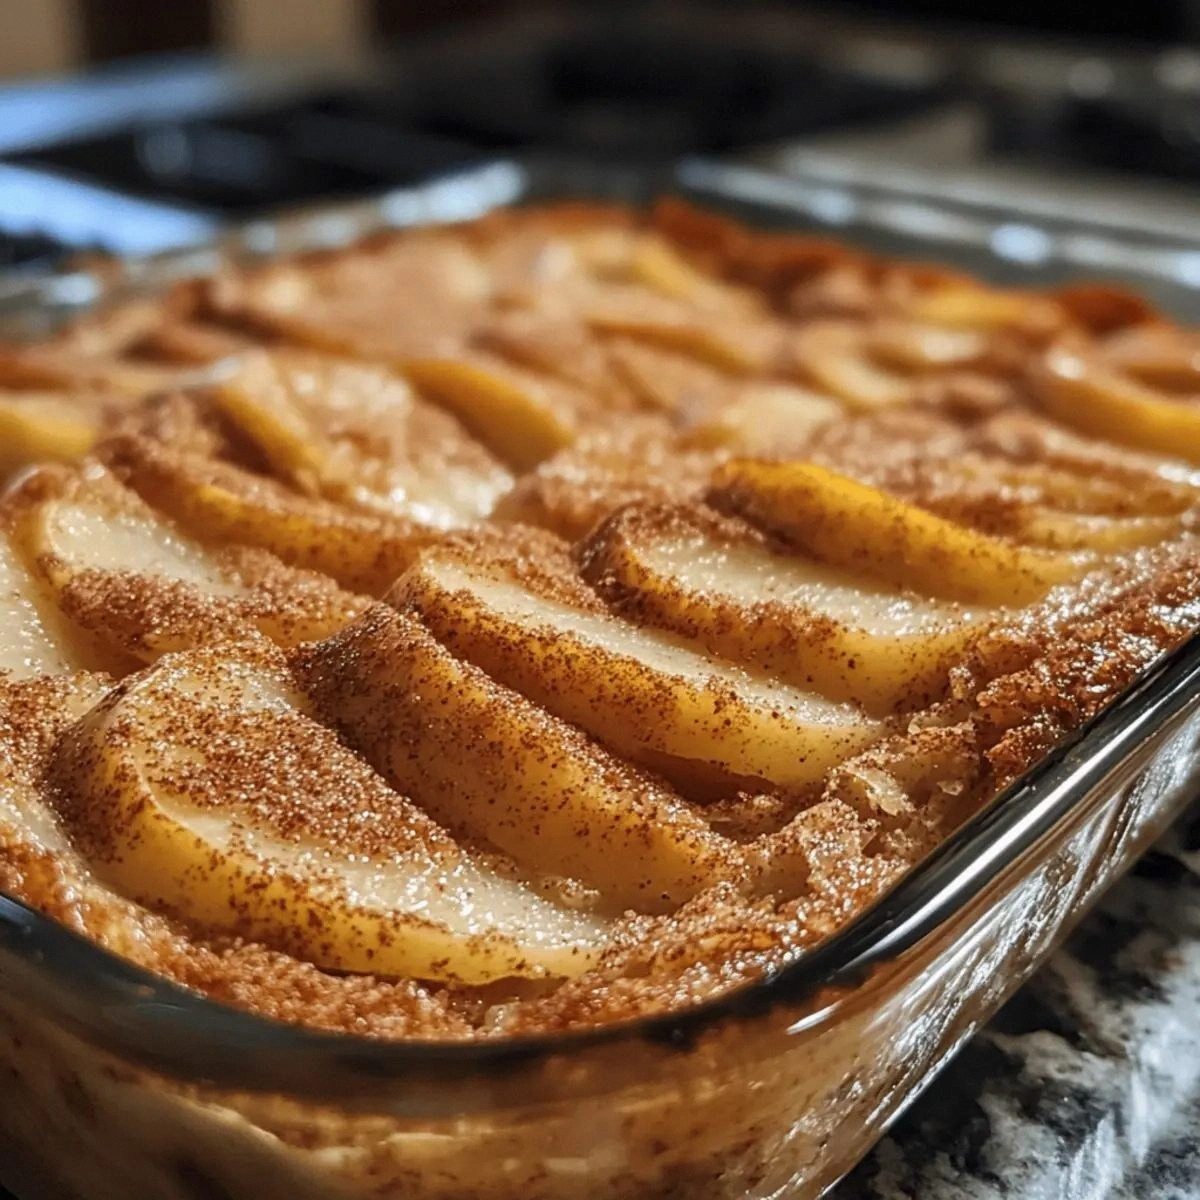
- Transfer the batter to the prepared pan, smoothing the top with a spatula. The batter should spread evenly and be about 1‑inch thick. The edges will begin to pull away from the parchment as it bakes.
- Bake for 30–35 minutes, or until the top is golden brown and a toothpick inserted in the center comes out clean. The crust should crackle slightly, and the pears should be bubbling. The aroma during this stage is the real reward.
- Remove from the oven and let cool in the pan for 10 minutes, then transfer to a wire rack to cool completely. Cooling allows the crust to set and the flavors to meld. While cooling, the aroma will linger, giving you a preview of the taste.
- Serve warm, optionally dusted with powdered sugar or drizzled with vanilla‑infused honey. The warmth of the bake contrasts with the cool, buttery crust, creating an indulgent experience. If you like a bit of extra spice, sprinkle a dash of cinnamon on top just before serving.
That's it — you did it. But hold on, I've got a few more tricks that'll take this to another level. These insider tips will help you avoid common pitfalls and elevate the flavor profile even further.
Insider Tricks for Flawless Results
The Temperature Rule Nobody Follows
Many bakers bake at a high temperature to get a quick crust, but this can cause the pears to dry out. I always bake at 375°F (190°C) for 30–35 minutes. The moderate heat allows the butter to melt slowly, creating a flaky crust while keeping the pears moist. If you’re using a convection oven, reduce the temperature by 25°F to avoid over‑browning.
Why Your Nose Knows Best
During baking, the aroma will intensify as the spices caramelize. Trust that scent; it signals the perfect moment for removal. If the smell is too sweet, it’s time to pull it out; if it’s still faint, give it a few more minutes. Your nose is a reliable indicator of doneness.
The 5‑Minute Rest That Changes Everything
After baking, let the bake rest for 5 minutes before cutting. This short rest allows the juices to redistribute, preventing a watery center. It also lets the crust set, giving you clean slices that hold their shape. Skipping this step often results in a crumbly, mushy texture.
The Nutty Crunch Balance
If you’re using walnuts, toast them lightly before adding to the batter. Toasting brings out the oils and adds a subtle roasted flavor that complements the pears. Avoid over‑toasting, as it can turn the nuts bitter. This simple step adds depth and complexity.
The Lemon Juice Lift
Lemon juice not only prevents browning but also brightens the flavor. Use freshly squeezed lemon juice for the best taste. If you’re out of lemons, a splash of apple cider vinegar works well as a substitute. The acidity balances the sweetness and enhances the spices.
Creative Twists and Variations
This recipe is a playground. Here are some of my favorite ways to switch things up:
Maple Walnut Wonder
Swap the brown sugar for maple syrup in the crust and add a splash of maple extract. The maple flavor complements the pears, creating a fall‑season dessert. Serve with a drizzle of maple glaze for an extra indulgence.
Citrus‑Spiced Surprise
Add zest from one orange and a pinch of ginger to the spice mix. The citrus zest brightens the dish, while ginger adds a subtle heat. This version feels lighter and is perfect for spring or summer.
Almond Joy Twist
Replace walnuts with sliced almonds and drizzle a little coconut milk over the top before baking. The coconut adds a tropical note, and the almonds give a smooth crunch. It’s a delightful change for those who love a nutty, coconut flavor.
Chocolate‑Covered Pears
After baking, melt dark chocolate and drizzle it over the warm pears. The chocolate coats the pears like velvet, adding richness and depth. Finish with a sprinkle of sea salt for contrast.
Savory Pear Bake
Omit the brown sugar and add a pinch of rosemary. This savory version pairs well with grilled chicken or pork. The herbs and spices create a unique flavor profile that’s both comforting and sophisticated.
Storing and Bringing It Back to Life
Fridge Storage
Cool the bake completely, then cover tightly with plastic wrap or foil. Store in the refrigerator for up to 3 days. The crust stays flaky, and the pears remain juicy. When ready to eat, let it sit at room temperature for 10 minutes for optimal flavor.
Freezer Friendly
Wrap the cooled bake in parchment paper, then place it in a freezer‑safe zip‑lock bag. Freeze for up to 2 months. To reheat, thaw overnight in the fridge, then warm in a 350°F (175°C) oven for 10–12 minutes. The texture will remain close to fresh.
Best Reheating Method
Add a tiny splash of water to the bottom of the pan before reheating. This steams the bake slightly, preventing it from drying out. Warm in a low oven (300°F/150°C) for 8–10 minutes. The result is a moist, fragrant dessert that tastes as good as the first time.
Now that you’ve mastered the fundamentals and learned a few secret hacks, you’re ready to wow your guests and enjoy a dessert that feels like a warm hug in a pan. Whether you bake it fresh or reheat a leftover, this pear cinnamon bake will become a staple in your culinary repertoire. Happy baking!