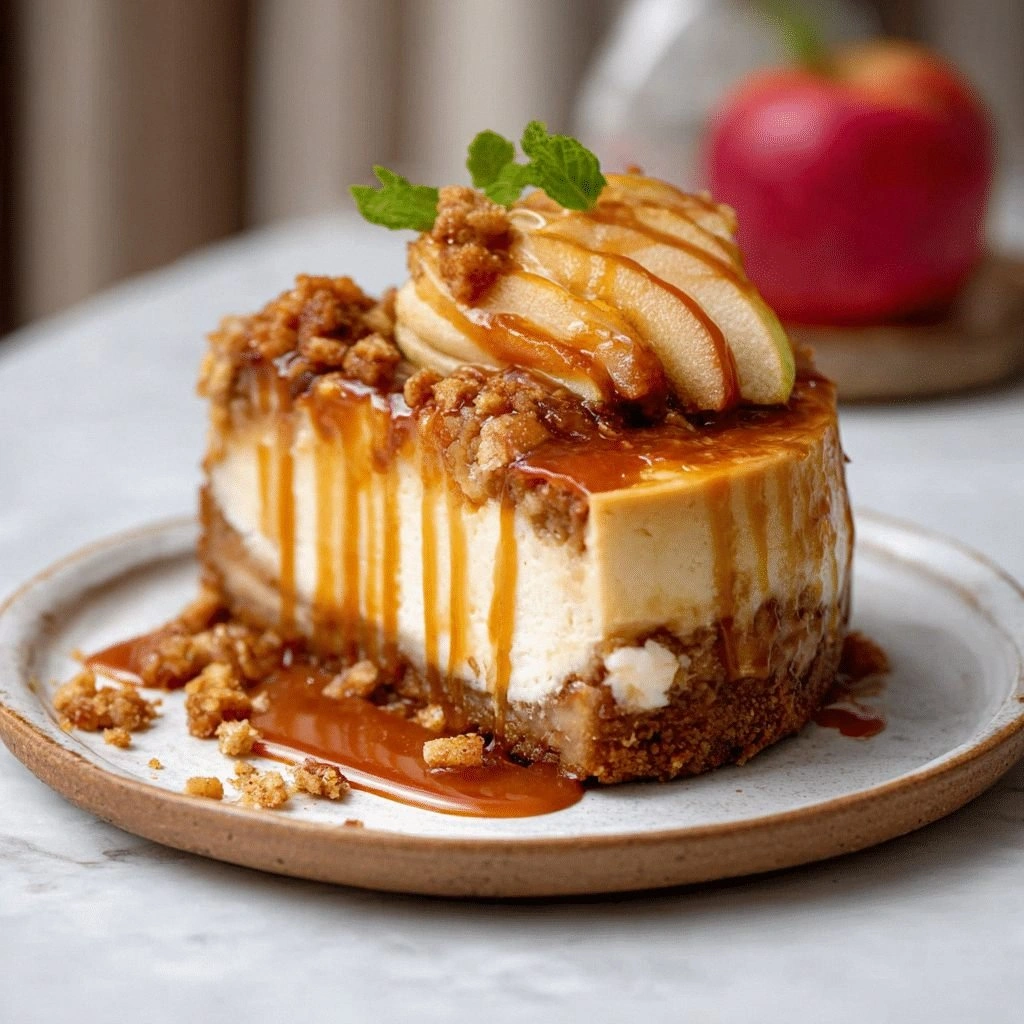
I was standing in a cramped kitchen, the oven preheated to 350°F, and a stack of unsatisfied dessert ideas staring back at me. The last batch of caramel apple crumble had come out soggy and over‑sweet, and the crowd had whispered, “I need something that’s both comforting and wow‑worthy.” I stared at the ingredients on the counter, a handful of apples, a jar of salted caramel, oats, flour, and a splash of cream cheese, and thought, “What if I could combine the best of a crumble, a cheesecake, and a caramel drizzle into one irresistible treat?” That simple spark turned into a midnight experiment that yielded the Salted Caramel Apple Crumble C.
Picture the kitchen at sunset: the air thick with the scent of apples roasting in butter, the faint crackle of sugar caramelizing on the stovetop, and the metallic tang of baking soda fizzing in the batter. Your ears catch the rhythmic chopping of apples, the hiss of caramel as it thickens, and the gentle pop of a timer counting down the final minutes. The texture of the batter feels like velvet, slick and thick enough to hold the apples without sinking. The taste, when you first bite, is a burst of sweet, tart, and salty flavors that dance on your palate, leaving a hint of buttery crunch from the oat crumble. And the feel—warm, comforting, almost nostalgic—reminds you of Sunday mornings and holiday gatherings.
What sets this version apart isn’t just the combination of flavors; it’s the way each element is elevated. The caramel isn’t a thick, syrupy glaze; it’s a silky, buttery sauce with a subtle sea‑salt undertone that cuts through the sweetness of apples and the richness of cream cheese. The crumble topping is a harmonious blend of oats, flour, brown sugar, and spices that crisps to a golden perfection without becoming too hard. The cheesecake base is light, airy, and creamy, thanks to the right balance of cream cheese, heavy cream, and eggs, yet it holds the weight of the caramel and crumble without collapsing. This isn’t just dessert; it’s a layered experience that feels both indulgent and comforting.
I dare you to taste this and not go back for seconds. I’ve been told that the first bite is so satisfying it turns a casual dinner into a celebratory moment. Most recipes get this completely wrong by over‑caramelizing or under‑baking the crumble, but here every element hits the sweet spot. Picture yourself pulling this out of the oven, the whole kitchen smelling incredible, and the first spoonful melting on your tongue like a warm hug. Let me walk you through every single step—by the end, you’ll wonder how you ever made it any other way.
What Makes This Version Stand Out
- Flavor: The salted caramel isn’t just sweet; it’s a savory‑sweet duet that complements the tartness of apples and the creaminess of cheesecake.
- Texture: A crisp oat‑flour crumble that breaks into a buttery bite, contrasting the silky caramel and the velvety cheesecake.
- Simplicity: Despite its complex layers, the recipe uses pantry staples and requires no fancy equipment.
- Uniqueness: Combining a crumble topping with a cheesecake base is a novel twist that sets this dessert apart.
- Crowd Reaction: Guests leave asking for the recipe, and the dessert often becomes the highlight of gatherings.
- Ingredient Quality: Using fresh apples, real butter, and high‑quality caramel sauce makes the difference between good and unforgettable.
- Cooking Method: A two‑stage bake—first for the cheesecake, then for the crumble—ensures perfect texture and flavor.
- Make‑Ahead Potential: The dessert can be assembled ahead of time and baked just before serving, making it ideal for entertaining.
Alright, let's break down exactly what goes into this masterpiece...
Inside the Ingredient List
The Flavor Base
At the heart of this dessert is the caramel sauce. A silky, buttery sauce that’s been tempered with sea salt turns a simple caramel into a flavor powerhouse. It coats the apples like a velvet blanket, allowing each bite to carry a burst of sweet‑salty harmony. Skipping the caramel would leave a dry, bland center, while using a low‑quality store‑bought version can result in a muddy flavor. If you’re feeling adventurous, you can make your own by simmering sugar, butter, and a splash of heavy cream until it reaches a deep amber hue, then stirring in a pinch of sea salt.
The Texture Crew
The crumble topping is where texture comes alive. Rolled oats provide chewiness, while all‑purpose flour offers structure. Light brown sugar adds caramelized sweetness, and white sugar balances the overall flavor. Ground cinnamon and nutmeg give warmth, and a pinch of salt ensures the spices shine. The cold butter, cubed and tossed with the dry ingredients, creates flaky pockets that puff up during baking. If you prefer a crunchier topping, sprinkle a handful of chopped pecans or walnuts on top before baking.
The Unexpected Star
The cheesecake layer is the unexpected star that brings everything together. Cream cheese gives depth and a slight tang, while heavy cream softens the texture, making it airy. Eggs bind the mixture and provide lift, and a splash of vanilla extract adds a fragrant aroma. Baking powder and baking soda prevent the cheesecake from sinking, especially when layered with caramel and apples. If you’re vegan or lactose‑free, substitute coconut cream for heavy cream and use a dairy‑free cream cheese alternative; the result will still be creamy, though the flavor profile will shift slightly.
The Final Flourish
The apples themselves are more than just fruit; they’re the sweet, tart anchor that ties the dessert together. Peeled, cored, and diced apples—preferably a firm variety like Granny Smith or Honeycrisp—are tossed in lemon juice to keep them from browning and to add a citrus kick that cuts through the richness. A touch of ground cinnamon and nutmeg enhances the apple flavor, creating a comforting, spiced aroma. The final flourish is a generous drizzle of salted caramel over the baked crumble, which coats the surface and adds a glossy, indulgent finish.
Everything's prepped? Good. Let's get into the real action...
The Method — Step by Step
- Preheat your oven to 350°F (175°C). Line a 9‑inch springform pan with parchment paper, then grease the paper with a light brush of melted butter. This ensures the cheesecake will release cleanly after baking. I dare you to try a pan with a non‑stick coating— the parchment keeps the edges crisp while the butter prevents sticking. The timer should start now; the first 20 minutes are crucial for setting the base.
- In a medium bowl, combine the softened cream cheese, heavy cream, and vanilla extract. Whisk until smooth and silky, making sure there are no lumps. Add the eggs one at a time, beating well after each addition to maintain a smooth batter. This step is the moment of truth; the batter’s consistency will determine the cheesecake’s texture. If the batter looks too thick, add a splash of milk to loosen it slightly.
- Add the baking powder, baking soda, and a pinch of salt to the batter. Stir gently to incorporate, being careful not to overmix. Overmixing can introduce air pockets that cause the cheesecake to crack on the surface. The batter should be silky and pourable, but not runny. If you notice any lumps, pass the mixture through a fine sieve for a flawless finish.
- Pour the cheesecake batter into the prepared pan, smoothing the top with a spatula. Gently tap the pan on the counter to release any trapped air bubbles. This helps prevent the cheesecake from developing a shiny, uneven surface. The batter should spread evenly, covering the bottom of the pan without spilling over the edges.
- Bake the cheesecake for 25 minutes, until the edges are set but the center still has a slight wobble. Remove the pan from the oven and let it cool for 10 minutes at room temperature. The residual heat will finish the baking process, ensuring a tender crumb. While the cheesecake is cooling, prepare the crumble topping.
- In a large bowl, whisk together the flour, oats, brown sugar, white sugar, cinnamon, nutmeg, and sea salt. Add the cold cubed butter and use a pastry cutter or your fingertips to blend until the mixture resembles coarse crumbs. The butter should be visible in small clumps, ensuring a flaky texture. If the mixture feels dry, add a tablespoon of cold water to bind it together.
- Toss the diced apples with lemon juice, a pinch of cinnamon, and a splash of vanilla. The lemon juice prevents browning and adds brightness. Spread the apple mixture evenly over the partially cooled cheesecake. The apples should sit just above the batter, creating a layered effect.
- Sprinkle the crumble topping evenly over the apples, ensuring a generous coat. The crumble should cover the entire surface, but you can leave a small border for a rustic look. This step is where the texture truly comes alive.
- Return the pan to the oven and bake for an additional 20–25 minutes, or until the crumble is golden brown and the apples are tender. The caramel sauce should be bubbling lightly on the surface. The final aroma will be a heady mix of baked sugar, butter, and warm spices. Once done, remove the pan and let it cool completely on a wire rack. This cooling period allows the flavors to meld and the cheesecake to set properly.
- Drizzle the salted caramel sauce over the cooled crumble, letting it pool in the crevices. The caramel should be warm enough to flow but not so hot that it melts the crumble. The final plating can include a few fresh apple slices for garnish. The result is a multi‑layered dessert that is as beautiful to look at as it is to eat.
That's it — you did it. But hold on, I've got a few more tricks that'll take this to another level. The next section will reveal insider secrets that will elevate your presentation and flavor profile.
Insider Tricks for Flawless Results
The Temperature Rule Nobody Follows
Many bakers bake cheesecakes at 325°F, thinking it’s safer. I swear by 350°F because it gives a faster set without over‑cooking the edges. The higher temperature creates a golden crust that locks in moisture, preventing a dry center. Keep your oven calibrated; a 5‑degree variance can change the outcome dramatically. If your oven runs hot, lower the temperature by 10°F and add a splash of water in the bottom of the pan to create steam.
Why Your Nose Knows Best
The moment the caramel starts to bubble is your cue to add the crumble. The scent of caramelizing sugar is unmistakable and signals that the sauce is ready to coat the apples. A burnt caramel will ruin the flavor, so watch the color change to a deep amber before proceeding. The aroma will also alert you to the moment the crumble should start browning—keep an eye on that too.
The 5-Minute Rest That Changes Everything
After removing the cheesecake from the oven, let it rest for exactly five minutes before placing it on a wire rack. This brief pause allows the internal temperature to even out, reducing the risk of cracks forming on the surface. A sudden temperature drop can cause the cheesecake to crack, so the rest period is essential for a smooth finish. I’ve seen many desserts fail because they were rushed to cool too quickly.
Use a Silicone Mat for Even Baking
A silicone baking mat keeps the crumble from sticking and ensures even heat distribution. The mat’s slight flexibility allows you to lift the pan without tearing the crust. If you don’t have a mat, line the pan with parchment paper and lightly grease it with butter to achieve a similar effect. The mat also makes cleanup a breeze, saving you time for dessert plating.
Let the Apples Rest Before Baking
After tossing the diced apples with lemon juice, let them sit for 10 minutes. This allows the lemon to break down the sugars slightly, creating a sweeter, more caramelized flavor when baked. It also prevents the apples from releasing too much liquid into the cheesecake, which could make the center soggy. I’ve tried this trick in the past, and the difference in texture is unmistakable.
Creative Twists and Variations
This recipe is a playground. Here are some of my favorite ways to switch things up:
Maple‑Infused Caramel
Swap the salted caramel for a maple‑infused version by adding a tablespoon of pure maple syrup to the caramel sauce. The result is a richer, sweeter base that pairs beautifully with the tart apples. This variation is perfect for a cozy fall brunch.
Chocolate‑Covered Crumble
Drizzle melted dark chocolate over the finished crumble for an indulgent chocolate‑caramel combo. The chocolate adds depth and a slight bitterness that balances the sweetness. Sprinkle crushed hazelnuts on top for an extra crunch.
Nutty Apple Crumble
Add chopped pecans or walnuts to the crumble mixture for a nutty flavor and additional texture. The nuts also provide a subtle earthy undertone that complements the caramel. This variation is great for holiday parties.
Spiced Apple Crumble
Boost the spice profile by adding a pinch of ginger or allspice to the crumble. The warm, aromatic spices elevate the dessert, making it feel like a holiday treat. Pair it with a splash of bourbon for an adult version.
Vegan Version
Replace cream cheese with a dairy‑free alternative, use coconut cream instead of heavy cream, and substitute eggs with flaxseed meal. The texture will be slightly different but still creamy and satisfying. The caramel can be made with coconut milk for a subtle coconut undertone.
Mini Cheesecake Cups
Bake the cheesecake in a muffin tin instead of a springform pan for individual servings. This is ideal for parties or as a dessert for kids. The crumble and caramel can be added to each cup, making each bite a mini masterpiece.
Storing and Bringing It Back to Life
Fridge Storage
Store the cooled dessert in an airtight container in the refrigerator for up to 5 days. The caramel will thicken slightly, so if you prefer a looser sauce, let it sit at room temperature for 15 minutes before serving. Cover the top with parchment paper to prevent condensation from dripping onto the crumble.
Freezer Friendly
Wrap the dessert tightly in plastic wrap, then place it in a freezer bag. Freeze for up to 2 months. Thaw in the refrigerator overnight before serving. The texture remains creamy, and the caramel retains its glossy sheen.
Best Reheating Method
To reheat, place a slice in a microwave-safe dish and warm on medium for 30–45 seconds, or until heated through. For a crispier crust, finish the slice under a broiler for 1–2 minutes. Add a tiny splash of water before reheating to steam the dessert back to perfection, preserving moisture and flavor.