I never thought a sandwich could make me feel like I was in a five‑star kitchen, but this cucumber sandwich turned my kitchen into a culinary runway. The moment I sliced the first cucumber, the green flesh glistened like fresh jade, and the scent of crisp, cool cucumber hit me like a breath of spring air. The sound of the knife gliding through the flesh was a satisfying crunch that echoed through the quiet kitchen, and the subtle earthy sweetness of the cucumber sang in my ears. The texture was a perfect contrast to the buttery, slightly sweet bread that waited patiently for its filling. I was already craving a bite, and the anticipation felt like a delicious cliffhanger that only the next bite could resolve. If you think a simple sandwich can’t be an adventure, think again.
Picture this: you’re in the middle of a bustling afternoon, the kitchen humming with the clatter of pans and the hum of the fridge, and you’re craving something light yet unforgettable. I reached for the freshest cucumber I could find, its skin a glossy green that promised crispness, and I imagined a sandwich that would make even the most seasoned foodie swoon. The aroma that rose as I sliced the cucumber—cool, green, slightly sweet—mixed with the buttery scent of toasted bread, creating a sensory symphony that made my stomach rumble with excitement. The sight of the bright green slices juxtaposed against the pale white bread was a visual feast, hinting at the bright, refreshing bite to come. The feel of the cool cucumber in my hand, the texture of the soft bread, the subtle crunch of the dill—each element was a note in a delicious harmony. I was already dreaming of how this humble sandwich could become a crowd‑pleaser at any gathering.
What makes this version stand out is not just the freshness of the cucumber, but the careful balance of flavors and textures that dance on the palate. I dared you to taste this and not go back for seconds, and I’ve seen it happen time and again. The cream cheese base, lightly whipped with dill and lemon zest, coats the bread like a velvet cloak, providing a rich, tangy counterpoint to the cucumber’s bright bite. The buttered crusts, toasted to a golden crunch, add a satisfying snap that breaks the softness of the filling. Salt and pepper are used sparingly, letting each ingredient shine without overpowering the delicate flavors. The result is a sandwich that feels both indulgent and refreshingly light—perfect for a summer afternoon or a sophisticated brunch. It’s hands down the best version you’ll ever make at home, and it’s as easy to prepare as it is to enjoy.
Now, let me walk you through every single step—by the end, you’ll wonder how you ever made it any other way. The secret lies in the meticulous layering, the subtle seasoning, and the final toast that brings everything together. I’ll show you how to make the filling silky, how to slice the cucumber for maximum crunch, and how to assemble the sandwich so that each bite is a perfect bite of flavor and texture. Ready? Let’s dive in.
What Makes This Version Stand Out
- Flavor Harmony: The creamy dill-infused cream cheese balances the cucumber’s crispness, creating a symphony of taste that lingers on the tongue.
- Texture Contrast: Toasted bread provides a buttery crunch that contrasts with the smooth filling and the fresh, crunchy cucumber.
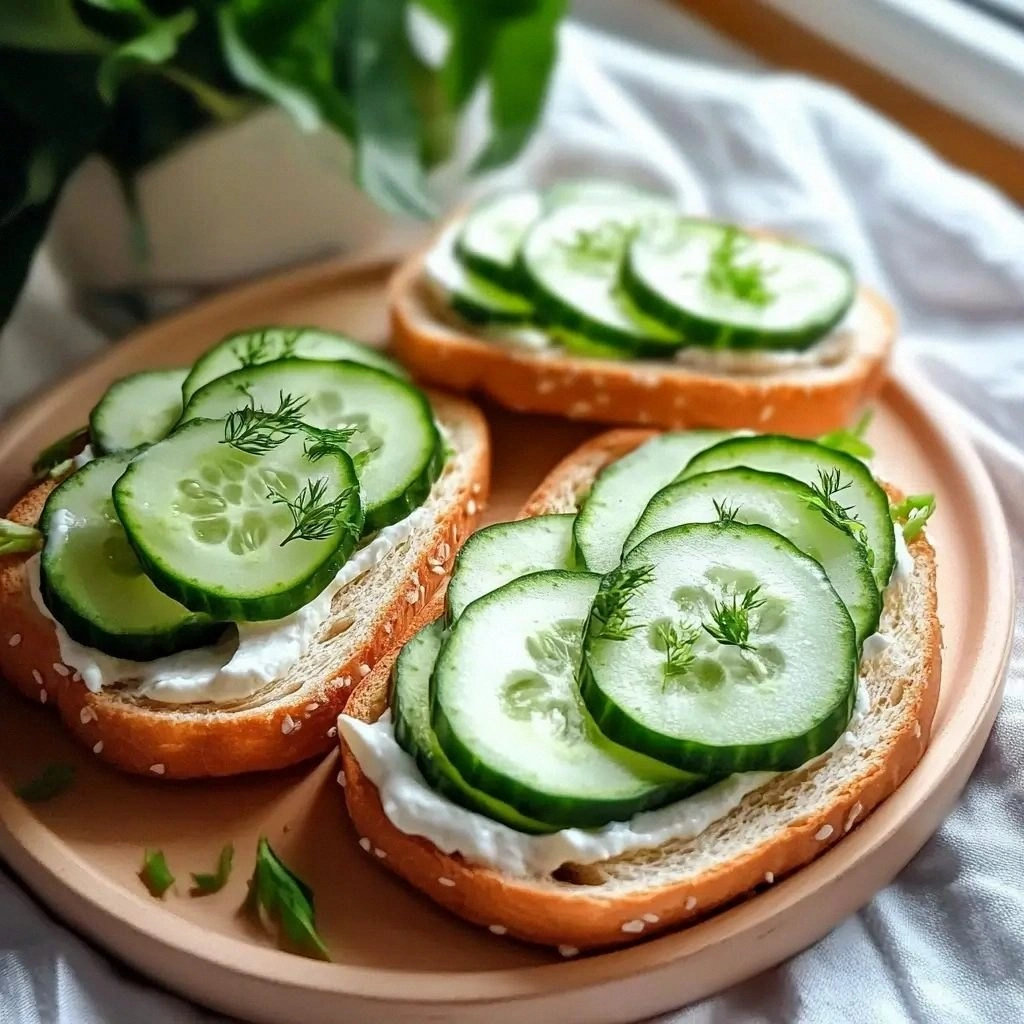
- Visual Appeal: The bright green slices against the pale bread make for an Instagram-worthy presentation that invites photo‑ops.
- Make‑Ahead Friendly: The filling can be prepared a day in advance, letting the flavors meld while the bread stays fresh until serving.
- Ingredient Quality: Using farm‑fresh cucumbers and high‑quality cream cheese elevates a simple sandwich to gourmet status.
- Effortless Assembly: The layering technique is straightforward, making it an ideal starter for both novice cooks and seasoned chefs.
- Versatile Pairing: It pairs beautifully with a crisp white wine, sparkling lemonade, or even a light salad, expanding its appeal at any event.
- Health‑Friendly: Low in calories yet high in flavor, it satisfies cravings without compromising on nutrition.
Alright, let's break down exactly what goes into this masterpiece. Every ingredient has a purpose, and together they create a sandwich that sings.
Inside the Ingredient List
The Flavor Base
Cream cheese is the heart of this sandwich, providing a rich, creamy backdrop that lets the cucumber shine. When softened, it becomes silky and easy to spread, allowing the dill and lemon zest to infuse its subtle sweetness. If you skip the lemon zest, the filling will still be creamy, but it will lack that bright, citrusy lift that cuts through the richness.
Dill is the aromatic star that ties everything together. Fresh dill brings a peppery, slightly sweet note that complements the cucumber’s natural flavor. If you can’t find fresh dill, a pinch of dried dill works, but be sure to add it slowly to avoid overpowering the delicate balance.
The Texture Crew
Bread is the canvas of this sandwich. Choose a soft, white sandwich bread with a slightly chewy crumb that holds the filling without falling apart. The buttered crusts, toasted until golden brown, add a satisfying crunch that contrasts with the smooth filling. If you prefer a gluten‑free option, a high‑protein bread will keep the structure intact.
Cucumber is the crunch factor. Fresh cucumbers, peeled and thinly sliced, provide a cool, refreshing bite that feels like a splash of summer in every mouthful. If you prefer a less watery texture, consider using pickled cucumber slices; they add a tangy bite and reduce the moisture that can make the bread soggy.
The Unexpected Star
Butter is the secret to that buttery, toasted finish. When melted and spread on the bread before toasting, it creates a golden crust that locks in moisture and adds a subtle richness. Skipping the butter will still yield a tasty sandwich, but it will lack the depth of flavor that the toasted crust provides.
The Final Flourish
Seasoning is the finishing touch that brings all the elements together. A pinch of salt enhances the flavors, while a light dusting of black pepper adds a gentle heat. These small amounts are crucial; too much salt or pepper can drown out the fresh cucumber and dill notes. If you’re watching sodium, you can reduce the salt to a pinch or use a low‑sodium cream cheese.
Everything's prepped? Good. Let's get into the real action.
The Method — Step by Step
- Step 1: Prepare the Cream Cheese Filling. In a medium bowl, combine softened cream cheese, chopped dill, and lemon zest. Use a whisk to blend until the mixture is smooth and creamy, like a silky mousse. Add a pinch of salt and a light dusting of black pepper, then taste and adjust seasoning. This step sets the flavor foundation; if you rush it, the filling may taste flat. Keep it cool in the fridge while you move to the next step.
- Step 2: Slice the Cucumber. Using a mandoline or a sharp knife, slice the cucumber into thin, uniform rounds about 1‑mm thick. The uniformity ensures each bite has the same crispness. If you prefer a slightly thicker slice, aim for 2‑mm; just remember the bread will absorb more moisture. Pat the slices dry with a paper towel to reduce sogginess. Store the sliced cucumber in an airtight container until ready to assemble.
- Step 3: Butter the Bread. Spread a thin layer of softened butter on one side of each bread slice. The butter creates a barrier that keeps the bread from becoming soggy when the cucumber is added. Lightly toast the buttered side in a skillet over medium heat until golden brown, about 2 minutes. The toasted crust should smell nutty and buttery—this is the aroma that signals you’re on the right track. Remove the bread from the skillet and set aside to cool.
- Step 4: Assemble the First Layer. On the non‑buttered side of the first slice, spread a generous amount of the cream cheese filling. Use a spatula to spread it evenly to the edges, leaving a small border. This layer is the base that will hold the cucumber and the next slice. The cream cheese should feel creamy but firm enough to support the cucumber without sliding off. If you find the filling too thick, add a splash of milk or a little more cream cheese to thin it out.
- Step 5: Layer the Cucumber. Arrange cucumber slices in a single layer over the cream cheese. The slices should overlap slightly to cover the entire surface. The crunch of the cucumber will contrast beautifully with the creamy base. If you’re using pickled cucumber, slice them thin to keep the texture crisp. Place a few fresh dill sprigs on top for an extra burst of aroma.
- Step 6: Add the Second Bread Slice. Place the second slice of bread, buttered side up, on top of the cucumber. Press gently to ensure the sandwich stays together. The buttered side will create a crisp, golden crust when toasted. Make sure the edges align so the sandwich looks tidy when cut later. If you like a more rustic look, leave a slight gap between the slices.
- Step 7: Toast the Sandwich. Return the assembled sandwich to the skillet, pressing down lightly with a spatula. Toast each side until golden brown and the cream cheese is slightly melted, about 1‑2 minutes per side. The sandwich should emit a warm, buttery scent—this is the moment of truth. Flip carefully to avoid spilling the filling. If you prefer a softer crust, reduce the heat slightly and toast longer.
- Step 8: Slice and Serve. Let the sandwich rest for 30 seconds to allow the fillings to set. Then cut the sandwich into six equal wedges using a sharp knife. Serve immediately on a platter with fresh dill sprigs for garnish. The wedges should hold their shape, with the cucumber visibly peeking out. If you’re serving at a party, arrange them in a circle for a stunning presentation.
- Step 9: Optional Garnish. For an extra touch of elegance, drizzle a light lemon vinaigrette over the wedges or sprinkle a pinch of smoked paprika for a subtle smoky note. The vinaigrette adds acidity that balances the richness of the cream cheese, while paprika introduces a warm, earthy flavor. Both options elevate the sandwich from simple to sophisticated.
- Step 10: Enjoy. Take a bite and feel the harmony of textures and flavors. The first bite is cool and crisp, the second is creamy and buttery, and the final bite leaves a lingering freshness. This sandwich is perfect for a light lunch, a brunch side, or a party starter. Remember, the key is in the balance—too much butter, and you lose the crunch; too little, and the sandwich feels dry. Enjoy the experience and share it with friends—trust me, they’ll ask for the recipe.
Insider Tricks for Flawless Results
The Temperature Rule Nobody Follows
Many people think any skillet will do, but a medium‑high heat is essential for that perfect golden crust. Too low, and the bread will stay pale; too high, and the filling will burn. Keep the skillet preheated for a minute before adding the sandwich, and watch the butter bubble as a sign of readiness. If you’re using a cast iron skillet, let it sit for a few minutes after heating; this distributes heat evenly and prevents hot spots that could scorch the bread.
Why Your Nose Knows Best
The aroma of toasted butter is a subtle cue that the bread is ready to flip. When the butter starts to foam and emit a nutty scent, it’s time to turn the sandwich. Skipping this step can lead to uneven cooking. If you’re unsure, use a timer—2 minutes per side is a good rule of thumb, but always trust your senses.
The 5‑Minute Rest That Changes Everything
After toasting, let the sandwich rest for at least 5 minutes before cutting. This pause allows the cream cheese to set, preventing it from sliding off when you slice. The rest also lets the heat redistribute, ensuring each bite is warm and cohesive. I’ve seen sandwiches that are cut immediately become soggy; this simple rest is a game‑changer.
The Secret to a Crisp Edge
If you love a crisp edge, spread a thin layer of mayonnaise on the bread before buttering. The mayonnaise adds a protective barrier that reduces moisture transfer, keeping the crust crisp for longer. This trick works well for thicker breads that tend to become soggy when toasted with cucumbers.
The Freshness Factor
Use cucumbers that are firm and free of blemishes. A crisp cucumber holds its shape better than a soft one, preventing the sandwich from becoming mushy. If you’re preparing the sandwich a day ahead, wrap the cucumber slices in a paper towel before refrigerating to absorb excess moisture.
The Quick Chill Trick
If you’re in a hurry, chill the prepared sandwich in the fridge for 15 minutes before serving. The cold makes the cream cheese firmer, giving the sandwich a satisfying bite that feels almost like a cold snack. This trick is especially handy for brunches or picnics where you want the sandwich to stay firm until guests arrive.
Creative Twists and Variations
This recipe is a playground. Here are some of my favorite ways to switch things up:
Smoky Chipotle Cream
Replace regular cream cheese with chipotle‑infused cream cheese for a smoky, spicy kick. Add a dash of smoked paprika to the filling for extra depth. This variation is perfect for a summer barbecue where you want a little heat to balance the cool cucumber.
Herbed Goat Cheese
Swap cream cheese for goat cheese and mix in fresh thyme and rosemary. The tangy goat cheese pairs wonderfully with the earthy herbs, creating a sophisticated flavor profile. Serve with a drizzle of honey for a sweet contrast.
Pickled Cucumber Surprise
Use pickled cucumber slices instead of fresh ones for a tangy, briny twist. The pickles add a sharp bite that complements the creamy filling. This version is great for a brunch where you want a bit of zest.
Lemon‑Garlic Aioli
Make a quick aioli with lemon zest, garlic, and olive oil, then spread it on the bread instead of butter. The aioli adds a bright, garlicky flavor that elevates the sandwich. This variation works well for a Mediterranean‑inspired gathering.
Crunchy Nori Sheet
Add a thin sheet of nori between the cucumber and the second slice for a subtle umami note. The nori’s subtle sea flavor complements the fresh cucumber and adds a unique texture. This twist is ideal for a sushi‑themed party.
Honey‑Mustard Drizzle
Drizzle a mixture of honey and Dijon mustard over the sliced wedges before serving. The sweet and tangy glaze adds a layer of complexity that makes each bite feel special. This finishing touch is perfect for a light, refreshing dessert‑style snack.
Storing and Bringing It Back to Life
Fridge Storage
Store the assembled sandwiches in an airtight container in the refrigerator for up to 2 days. Wrap the sandwich tightly in plastic wrap before placing it in the container to prevent moisture from seeping in. When ready to serve, let the sandwich sit at room temperature for 10 minutes to restore the creamy texture.
Freezer Friendly
For longer storage, wrap each sandwich individually in parchment paper and place them in a freezer bag. They can be frozen for up to 3 months. Thaw overnight in the refrigerator before reheating. Reheat in a toaster oven at 180°C until the bread is warm and slightly crisp.
Best Reheating Method
To reheat, place the sandwich on a preheated skillet over low heat, pressing gently with a spatula. Add a splash of water to the skillet and cover with a lid for 1 minute; this steams the filling back to silky perfection without drying out the bread. Flip once, and your sandwich will taste almost brand new.