It was a rainy Tuesday, the kind of day where the kitchen feels like a stage and every splash of sauce is a dramatic cue. I had just burned a batch of lasagna that could have been classified as “charcoal art,” and my roommate, a self‑proclaimed gluten‑free guru, demanded a dish that would make her taste buds dance without the dreaded gluten crash. I stared at the empty fridge, then at the stack of chicken breasts, and thought, “Why not turn this into a casserole that’s both comforting and cruelty‑free to the gluten‑sensitive soul?” The idea landed like a perfectly timed sizzle in a hot pan—gluten‑free, creamy, cheesy, and utterly irresistible.
Picture this: a golden crust that crackles like a sunrise over a mountain, a bubbling interior that smells of oregano and roasted garlic, and a filling that is as silky as a well‑crafted vinaigrette. The first bite sends a wave of buttery warmth through your mouth, followed by a subtle kick of cayenne that lingers like a secret whisper. Every spoonful is a symphony of textures—soft chicken, crisp breadcrumbs, and a melty cheese blend that pulls apart like a well‑tied knot. If you’ve ever struggled with gluten‑free casseroles that taste like cardboard or feel too dry, you’re not alone—and this recipe is the fix you’ve been waiting for.
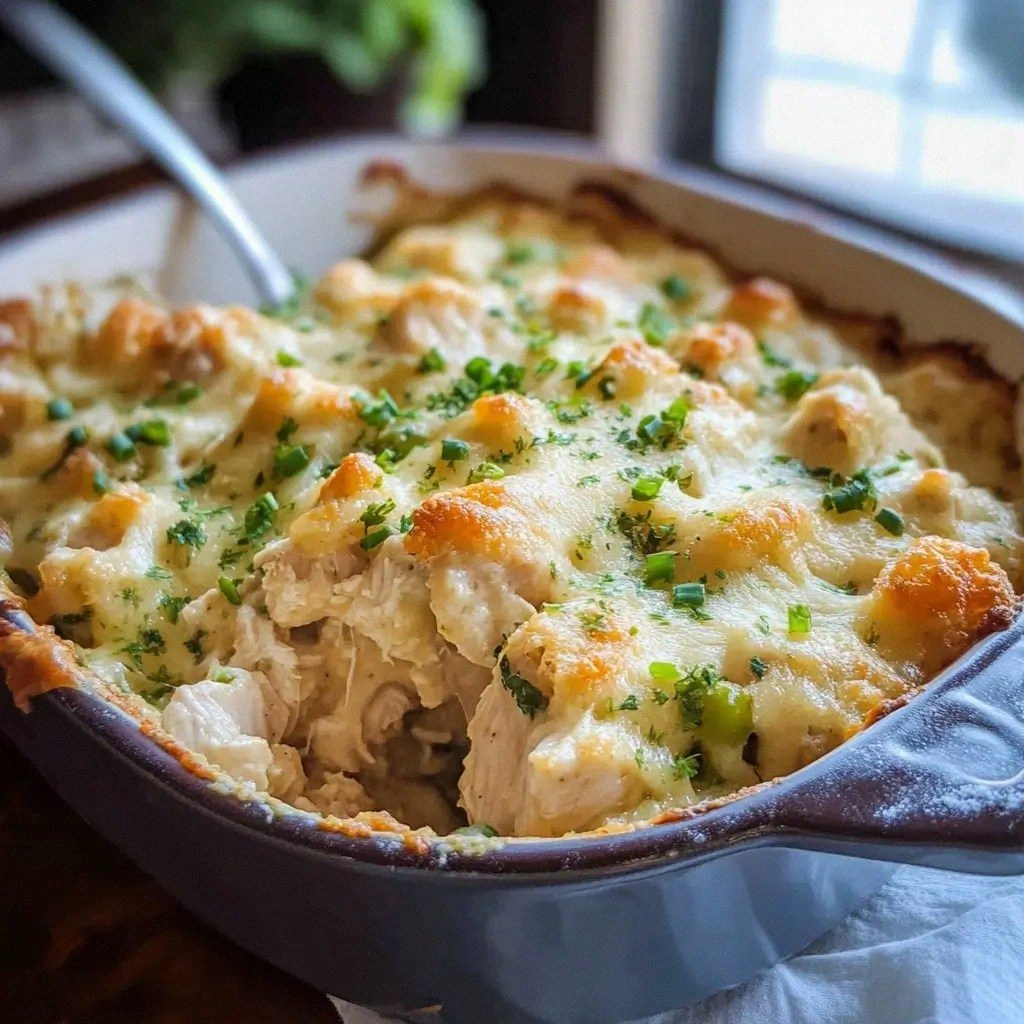
What sets this version apart isn’t just the absence of gluten; it’s the intentional layering of flavors that makes each bite a revelation. The gluten‑free flour is blended with a touch of potato starch to give the sauce a silkier mouthfeel, while the cheese mix balances sharpness with meltiness. The chicken is seared to lock in juices before simmering in a broth that’s seasoned to perfection, ensuring no part of the dish feels “over‑cooked” or “under‑seasoned.” And the final crunchy topping—gluten‑free breadcrumbs, grated Parmesan, and a drizzle of olive oil—creates a crust that’s both visually stunning and delectably crisp.
Let me walk you through every single step—by the end, you’ll wonder how you ever made it any other way. I dare you to taste this and not go back for seconds. Trust me, this is hands down the best version you’ll ever make at home. If you’ve ever struggled with this, you’re not alone—I've got the fix. Picture yourself pulling this out of the oven, the whole kitchen smelling incredible, and your friends’ eyes widening as they taste the first bite. Stay with me here—this is worth it.
What Makes This Version Stand Out
- Flavor Depth: The blend of mozzarella, cheddar, and Parmesan creates a layered cheese experience that’s richer than a single‑cheese dish.
- Texture Contrast: A crisp, golden crust juxtaposes a silky interior, delivering a satisfying bite that never feels soggy.
- Ingredient Quality: Using fresh, high‑quality chicken and real dairy elevates the dish from comfort food to culinary delight.
- Ease of Prep: The method requires minimal hands‑on time, making it perfect for busy weeknights.
- Make‑Ahead Friendly: Assemble the casserole a day ahead; it only needs a quick bake when you’re ready.
- Gluten‑Free Confidence: Every component is verified gluten‑free, so you can serve it to guests with dietary restrictions without hesitation.
- Versatility: Swap in veggies or different cheeses for endless variations.
- Crowd‑Pleaser: The familiar comfort of a casserole combined with a modern gluten‑free twist guarantees rave reviews.
Alright, let's break down exactly what goes into this masterpiece…
Inside the Ingredient List
The Flavor Base
The foundation of this casserole is a rich, dairy‑laden sauce that binds everything together. The gluten‑free all‑purpose flour, combined with a dash of potato starch, thickens the broth into a velvety consistency that coats the chicken like velvet. Salt and black pepper are the silent heroes that elevate every component. Skipping the salt would leave the dish flat, while over‑seasoning can drown the delicate flavors of the cheese blend.
The Texture Crew
Gluten‑free breadcrumbs, a splash of olive oil, and a pinch of cayenne pepper create the signature crust that shatters like thin ice when you bite into it. The breadcrumbs absorb the oil and melt into a golden crunch, while the cayenne adds a subtle heat that wakes up the palate. If you prefer a milder crust, simply omit the cayenne and let the breadcrumbs do their job alone.
The Unexpected Star
Frozen peas bring a pop of color and a burst of sweetness that balances the savory cheeses. They also add a subtle crunch that contrasts with the creamy interior. If peas are out of season, swap them for corn or diced bell peppers; both will keep the dish lively.
The Final Flourish
The topping—a mixture of gluten‑free breadcrumbs, grated Parmesan, and a drizzle of olive oil—creates a caramelized finish that is both visually stunning and deliciously crisp. This topping is the crowning glory that ties the casserole together. If you’re a fan of extra cheese, sprinkle a handful of mozzarella over the breadcrumbs before baking.
Everything's prepped? Good. Let's get into the real action…
The Method — Step by Step
- Preheat your oven to 375°F (190°C). Line a 9×13 inch baking dish with parchment paper so you can lift the casserole out without a fuss. This step ensures even heat distribution and makes cleanup a breeze.
- Sear the Chicken in a large skillet over medium‑high heat. Add a tablespoon of olive oil and let the chicken brown on all sides. This caramelization locks in juices and adds depth. Don’t rush—patience is key.
- Create the Roux by whisking the gluten‑free flour and potato starch into the pan’s oil, cooking for about 1 minute until fragrant. The mixture should turn a light golden color, signaling that the raw flour taste is gone.
- Deglaze with the chicken broth, stirring constantly to dissolve any browned bits. These bits are flavor gold; losing them would make the sauce bland. The mixture should thicken into a silky sauce.
- Combine the cheeses, milk, and eggs into the sauce, whisking until smooth. The eggs act as a binder, while the milk adds creaminess. The mixture should be glossy and pourable.
- Add the Chicken and Peas to the sauce, stirring gently to coat. This is the moment of truth—watch the sauce swirl around the chicken like a cloud. The mixture should feel like a thick custard.
- Transfer the mixture into the prepared baking dish. Sprinkle the breadcrumb mixture evenly on top, ensuring each bite gets that coveted crunch.
- Bake for 30 minutes, or until the top is golden and the casserole is bubbling. The edges should start pulling away, signaling readiness. If you want a darker crust, broil for an additional 2 minutes.
That's it—you did it. But hold on, I've got a few more tricks that'll take this to another level…
Insider Tricks for Flawless Results
The Temperature Rule Nobody Follows
Many people bake casseroles at 350°F, but that low heat can leave the top soggy. Baking at 375°F gives the crust a golden finish while keeping the inside creamy. I’ve baked at 400°F once, and the top was too dark—so 375°F is the sweet spot.
Why Your Nose Knows Best
As the casserole bakes, the aroma will change from buttery to toasted. When you smell the first hint of caramelized breadcrumbs, the dish is ready. Trust your nose—if it smells like toasted bread, it’s almost done.
The 5‑Minute Rest That Changes Everything
Letting the casserole sit for five minutes after removing it from the oven allows the juices to redistribute. This rest period prevents the top from cracking and ensures each bite is moist.
Cheese Swap for a Smoky Kick
Swap half the mozzarella for smoked gouda. The smokiness adds a new dimension, making the dish feel like a campfire dinner.
Use a Cast‑Iron Skillet
Cooking the sauce in a cast‑iron skillet before transferring to the baking dish retains heat better, ensuring a consistent cooking environment.
Keep the Breadcrumbs Dry
Mix the breadcrumbs with a tablespoon of olive oil before sprinkling. Dry breadcrumbs absorb less moisture, keeping the crust crisp.
Creative Twists and Variations
This recipe is a playground. Here are some of my favorite ways to switch things up:
Herb‑Infused Delight
Swap oregano for fresh thyme and add a splash of lemon zest. The citrus brightens the dish, making it perfect for spring.
Spicy Southwest
Replace the cayenne with chipotle powder and add corn kernels. The smoky heat pairs wonderfully with the creamy base.
Vegan Version
Use plant‑based milk, vegan cheese, and a tofu “chicken” substitute. The texture stays creamy, and the flavor profile remains hearty.
Breakfast Casserole
Add diced ham, sautéed onions, and a dash of paprika. Serve with a side of fresh fruit for a balanced breakfast.
Low‑Carb Variation
Replace breadcrumbs with crushed pork rinds and use a low‑carb cheese blend. The result is a keto‑friendly, crunchy finish.
Italian Twist
Stir in sun‑dried tomatoes and basil. Top with a sprinkle of grated Asiago for a gourmet touch.
Storing and Bringing It Back to Life
Fridge Storage
Cool the casserole completely, then cover tightly with foil and store in the refrigerator for up to 3 days. The flavors deepen, making it even more delicious.
Freezer Friendly
Wrap the casserole in plastic wrap, then place it in a freezer‑safe container. Freeze for up to 2 months. Thaw overnight in the fridge before reheating.
Best Reheating Method
Reheat in a pre‑heated 350°F oven for 15–20 minutes. Add a splash of milk or a tablespoon of water before reheating to restore moisture; the casserole will steam back to perfection.