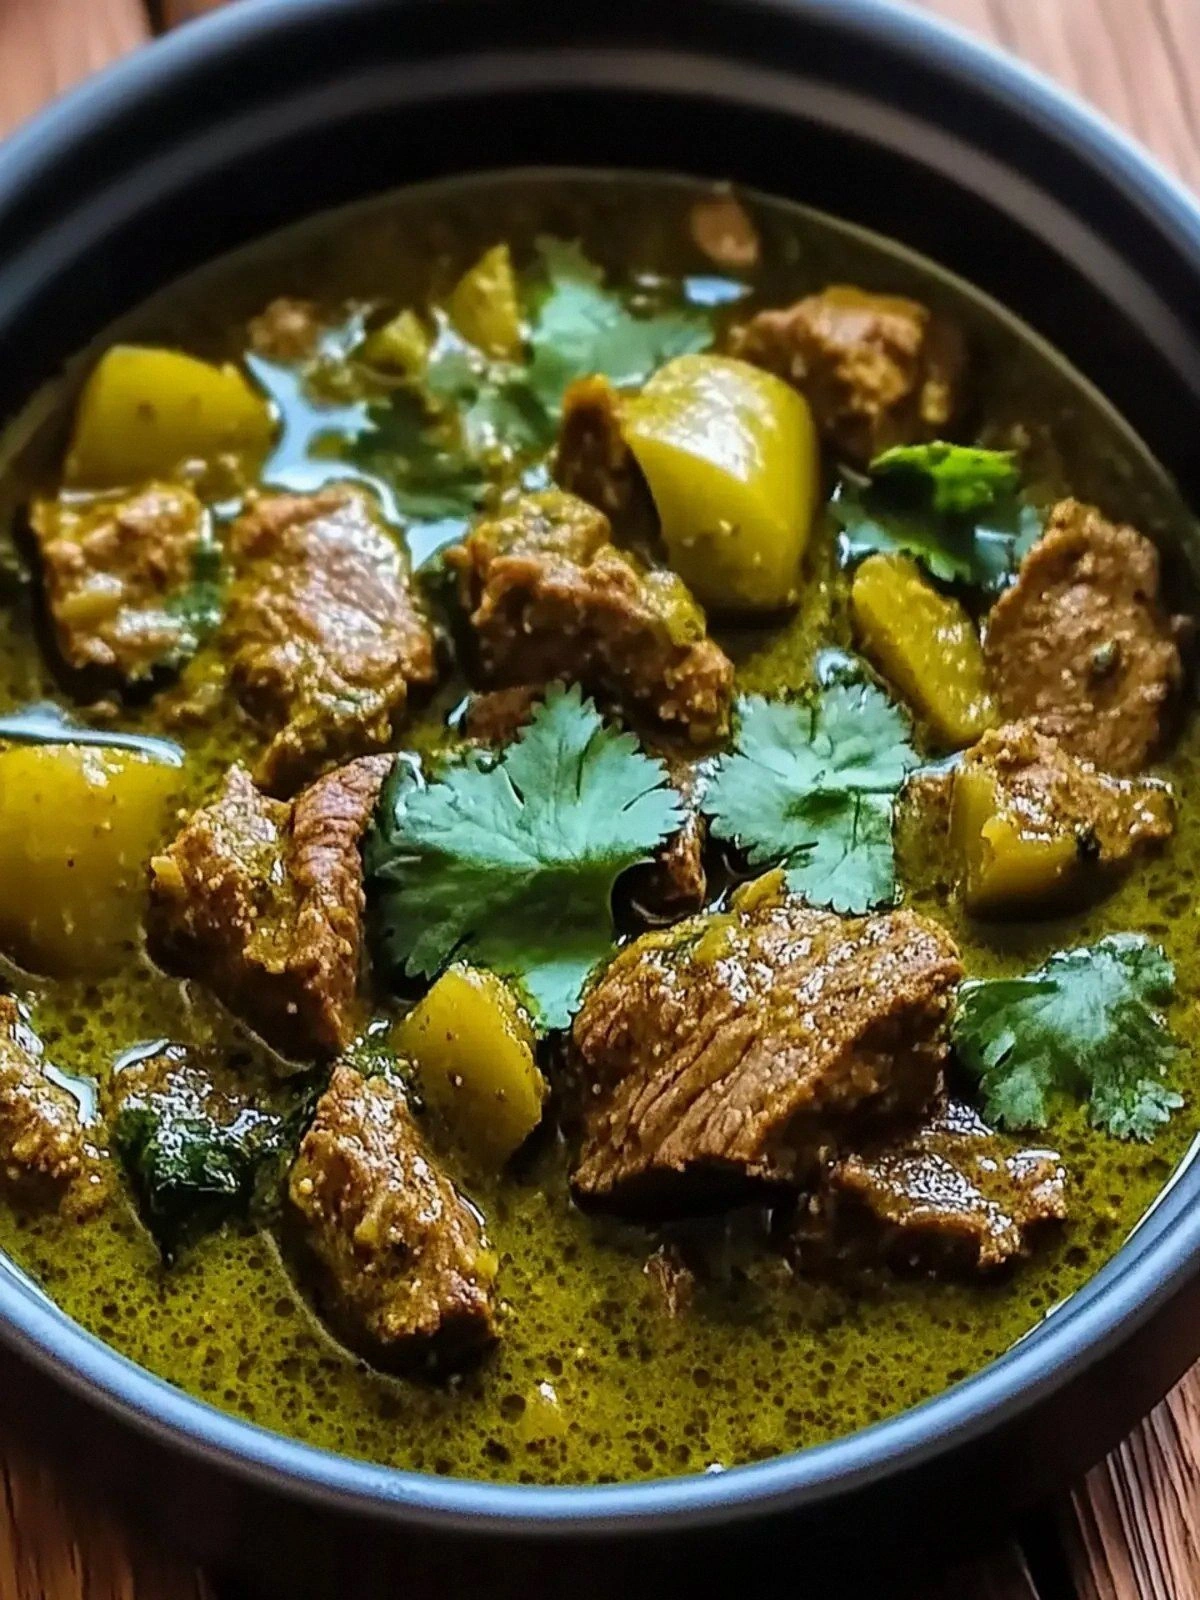
Savor Mexican Beef Chile Verde
Picture this: the kitchen is a battlefield, pots clanging, and you, armed with a skillet and a dare from a friend, are about to create a dish that will have everyone begging for seconds. The moment I first tasted this version, I knew it was something special—tender beef, a green tomato sauce that sings, and a heat that lingers like a good secret. I was skeptical at first, because most chile verde recipes end up bland or too hot, but this one balances everything like a seasoned maestro. The aroma alone is a promise of comfort, with the earthy scent of tomatillos mingling with cumin and coriander, while the sizzling sound of onions in olive oil is music to my ears. I can’t wait to show you every single step—by the end, you'll wonder how you ever made it any other way.
I dare you to taste this and not go back for seconds, because the flavors will haunt your palate in the best possible way. The sauce coats the beef like velvet, yet the chilies add a crisp bite that shatters like thin ice on a winter morning. If you’ve ever struggled to get the right balance of heat and acidity, you’re not alone—this recipe fixes that with a precise blend of tomatillos and fresh lime. The dish’s texture is a triumph: the beef stays moist and tender, while the green chilies provide a satisfying chew. And when you bring it to the table, the entire kitchen smells incredible, drawing everyone in like a magnet.
The secret to this version lies in its simplicity and the quality of its ingredients. By using fresh tomatillos and a combination of green chilies and jalapeños, I create a depth of flavor that most store-bought sauces can’t match. The beef is cut into bite-sized pieces, allowing it to absorb the sauce without becoming mushy. A touch of cumin and coriander gives it an earthy backbone, while a dash of oregano adds a subtle herbal note. The lime juice brightens the dish, cutting through the richness of the beef. And the final sprinkle of cilantro adds a fresh, almost citrusy finish that ties everything together.
Most recipes get this completely wrong, focusing on either too much heat or too much acidity. What actually works is a harmonious blend of fresh ingredients and careful timing. I’ll be honest—after the first batch, I ate half the pot before anyone else even had a chance. That’s why I’m sharing every detail, so you can avoid the common pitfalls and achieve the same mouth‑watering result. The next part? Pure magic. Stay with me here—this is worth it.
If you’ve ever struggled with green sauces that taste like paint, this recipe is your salvation. The combination of tomatillos, green chilies, and fresh lime gives a bright, tangy flavor that’s unmistakably Mexican. The beef’s rich umami is balanced by the acidity, making each bite feel like a well‑orchestrated symphony. The dish is versatile enough to be served over rice, with tortillas, or even as a hearty stew. And because it’s made in one pot, cleanup is minimal, which is a win for anyone who loves food without the hassle.
I’ll keep this conversation going by diving deep into the ingredients that make this dish stand out. Every component is chosen for its ability to elevate the overall experience, from the first sizzle to the last bite. I’ll also share some micro‑challenges, bold claims, and the kind of kitchen hacks that will make your cooking life easier. Ready? Let’s go.
What Makes This Version Stand Out
- Flavor: The green tomato base creates a bright, tangy profile that cuts through the richness of beef.
- Heat: A balanced blend of green chilies and jalapeños delivers a steady, not overwhelming, warmth.
- Texture: Slow‑braised beef stays tender while the sauce thickens into a silky consistency.
- Ingredient Quality: Fresh tomatillos and hand‑picked chilies give a depth that canned products can’t match.
- Cooking Method: One‑pot technique reduces cleanup while allowing flavors to meld beautifully.
- Make‑ahead Potential: This dish actually tastes better the next day, making it perfect for meal prep.
- Presentation: The vibrant green sauce makes the dish visually stunning, ideal for impressing guests.
- Versatility: Works as a main, a side, or a filling for tacos and burritos.
Alright, let's break down exactly what goes into this masterpiece. I’ll also throw in a kitchen hack that will save you time and keep the flavors sharp.
Inside the Ingredient List
The Flavor Base
The cornerstone of this dish is the sauce, built from a trio of green tomatoes, chilies, and aromatics. Tomatillos provide a tart, citrusy backdrop that lifts the beef’s natural richness. Green chilies add a mild heat that’s aromatic rather than scorching, while jalapeños introduce a sharper bite that keeps the dish lively. The combination of these greens ensures that each spoonful is a burst of freshness balanced by subtle spice.
If you skip the tomatillos, the sauce will lose its signature tang and become more like a tomato stew. The green chilies, on the other hand, contribute a unique earthy undertone that sets this dish apart from red‑based chiles. A good rule of thumb: use fresh, firm tomatillos for maximum flavor; if you’re out of them, a splash of lime juice can mimic the acidity, but the texture will differ.
Choosing the right chilies is essential. The green chilies should be firm, not bruised, and the jalapeños should be bright green. If you prefer a milder dish, you can reduce the number of jalapeños or remove the seeds. Conversely, for a hotter version, leave the seeds intact and consider adding a pinch of cayenne. The key is to adjust the heat to your personal preference while maintaining the sauce’s bright character.
The Texture Crew
Beef stew meat, preferably chuck roast, is cut into bite‑sized cubes for even cooking. This cut is ideal because it contains a good mix of fat and connective tissue, which break down into a tender, juicy texture during the braising process. The olive oil used for searing adds a subtle fruity note and helps develop a caramelized crust on the meat, sealing in the juices.
The onions and garlic form the aromatic foundation. When sautéed until translucent, they release a sweet, savory base that underpins the entire sauce. If you’re watching sodium, you can use low‑sodium beef broth or reduce the amount of salt added. The broth itself is the liquid medium that pulls together all the flavors, and it’s essential to use a good quality stock for depth.
The final flourish of fresh lime juice and chopped cilantro adds brightness and a fresh, almost citrusy finish. The lime cuts through the richness, preventing the dish from feeling heavy, while the cilantro offers a herbal note that lingers on the palate. If cilantro is not to your taste, parsley can be a suitable substitute, though it will alter the final flavor profile slightly.
Everything's prepped? Good. Let's get into the real action. This is where the magic happens, and I promise you’ll see the difference between a good dish and an unforgettable meal.
The Method — Step by Step
- Season the Beef: Pat the beef cubes dry with paper towels, then season generously with salt and pepper. This step is crucial for building flavor from the inside out. As the meat browns, the salt will help draw out moisture, creating a better sear. I always let the seasoned beef sit for 10 minutes before searing to allow the seasoning to penetrate.
- Brown the Beef: Heat 2 tablespoons of olive oil in a large Dutch oven over medium‑high heat. Add the beef in a single layer, working in batches to avoid overcrowding. The goal is a deep brown crust on each side; this caramelization locks in juices and adds depth. Once browned, remove the beef and set aside.
- Sauté Aromatics: In the same pot, reduce the heat to medium and add the diced onion. Cook until translucent, about 5 minutes, stirring occasionally. Add the minced garlic and cook for another 30 seconds until fragrant. The onions and garlic form the aromatic base that will carry the rest of the sauce.
- Deglaze: Pour in a splash of beef broth to loosen the browned bits from the bottom of the pot. Scrape them up with a wooden spoon; they’re packed with flavor. This deglazing step ensures no tasty residue gets left behind.
- Combine Tomatoes and Chilies: Add the peeled tomatillos, sliced green chilies, and diced jalapeños to the pot. Stir to combine, ensuring the tomatoes are coated in the aromatic base. The green chilies should be chopped finely so they integrate smoothly into the sauce.
- Add Spices: Sprinkle in 2 teaspoons of ground cumin, 1 teaspoon of dried oregano, 1 teaspoon of ground coriander, and 1 teaspoon of ground black pepper. Stir well, letting the spices toast for a minute to release their essential oils. The cumin and coriander add warmth, while oregano gives a subtle herbal note.
- Return Beef: Place the browned beef back into the pot, ensuring it’s submerged in the liquid. Pour in the remaining 4 cups of beef broth, covering the meat by at least an inch. Bring to a simmer, then reduce the heat to low. Cover the pot and let it cook gently for 45 minutes, or until the beef is fork‑tender.
- Adjust Consistency: If the sauce is too thick, add a bit more broth or water until it reaches your desired consistency. If it’s too thin, remove the lid and simmer uncovered for 10 minutes to reduce. The sauce should coat the beef like a velvet blanket.
- Finish with Lime and Cilantro: Stir in 2 tablespoons of fresh lime juice and ¼ cup of chopped cilantro. Taste and adjust seasoning if needed. The lime brightens the dish, while the cilantro adds a fresh, almost citrusy finish that lingers on the palate.
- Serve: Ladle the chile verde over warm rice, or serve with corn tortillas, shredded cheese, and a dollop of sour cream. The dish is best enjoyed hot, with a side of guacamole or a simple salad to balance the heat. And if you’re feeling adventurous, try spooning it over a slice of grilled steak for a hearty twist.
That’s it— you did it. But hold on, I've got a few more tricks that'll take this to another level. These insider tips will help you avoid common pitfalls and elevate the dish to professional standards.
Insider Tricks for Flawless Results
The Temperature Rule Nobody Follows
Many cooks believe that a high simmer is the key to a good stew, but that’s a myth. The real secret is low, steady heat, which allows the beef’s collagen to break down slowly, resulting in a tender, juicy bite. I always set my stovetop to a gentle low heat after the initial sear, then let the pot sit covered. This method also prevents the liquid from evaporating too quickly, keeping the sauce rich and concentrated.
Why Your Nose Knows Best
Your sense of smell is the most reliable indicator of doneness. When the beef is tender, the aroma will shift from raw meat to a savory, almost buttery scent. If you’re uncertain, take a quick sniff; it should be inviting, not sharp or metallic. This sensory checkpoint saves you from overcooking or undercooking the dish.
The 5‑Minute Rest That Changes Everything
After the stew finishes cooking, let it rest for 5 minutes before serving. This brief pause allows the juices to redistribute, ensuring each bite is moist. The sauce also thickens slightly during this rest period, creating a richer mouthfeel. I’ve found that this small step can make a noticeable difference in texture.
Use a Dutch Oven for Depth
While a skillet works, a Dutch oven provides superior heat retention and even cooking. The heavy lid traps steam, which helps the beef become tender faster. If you don’t have a Dutch oven, a heavy‑bottomed pot will also do the trick. The key is to maintain a consistent temperature throughout the cooking process.
Finish with a Splash of Cream
If you like a creamier sauce, stir in a tablespoon of sour cream or heavy cream at the end. This adds a silky texture and balances the acidity of the tomatillos. Keep the heat low when adding cream to prevent curdling. The result is a luscious, velvety sauce that coats the beef beautifully.
Let the Sauce Sit Overnight
One of my favorite tricks is to let the chile verde sit in the fridge overnight. The flavors meld and deepen, making the dish even more delicious. When reheating, add a splash of water or broth to restore moisture. This makes it a perfect make‑ahead meal for busy weeknights.
Creative Twists and Variations
This recipe is a playground. Here are some of my favorite ways to switch things up:
Spicy Chipotle Twist
Add a tablespoon of chipotle adobo for a smoky heat that pairs beautifully with the green tomatoes. The adobo sauce also brings a subtle sweet undertone, balancing the acidity. This version works well as a topping for pulled pork or as a sauce for grilled vegetables.
Roasted Pepper Variation
Replace half of the green chilies with roasted red peppers for a sweeter, milder sauce. The roasted peppers add a caramelized flavor that complements the beef’s richness. Serve over polenta or with crusty bread for a comforting meal.
Herb‑Infused Green Chili
Add a handful of fresh mint or basil to the sauce for a refreshing twist. The herbs brighten the dish and add a layer of complexity. This variation is especially good with grilled fish or shrimp.
Low‑Calorie Version
Swap the beef broth for vegetable broth and use lean beef or ground turkey. Reduce the olive oil to 1 tablespoon and increase the volume of onions and garlic. This keeps the dish flavorful while cutting calories.
Mexican Street Tacos
Serve the chile verde in warm corn tortillas with diced onions, fresh cilantro, and a squeeze of lime. Add a dollop of crema or a sprinkle of crumbled queso fresco for extra richness. This version turns the dish into a quick, crowd‑pleasing meal.
Make It Vegan
Use seared tempeh or tofu instead of beef and replace the beef broth with vegetable stock. Add a tablespoon of nutritional yeast for a savory depth. This vegan version retains the bright green sauce and satisfies the cravings for Mexican comfort food.
Storing and Bringing It Back to Life
Fridge Storage
Store the chile verde in an airtight container in the refrigerator for up to 5 days. The flavors will continue to develop, making it even more delicious. When you’re ready to eat, reheat gently on the stove or in the microwave.
Freezer Friendly
This dish freezes beautifully for up to 3 months. Portion it into single servings and freeze in freezer bags. When reheating, thaw overnight in the refrigerator and gently warm on the stovetop with a splash of water.
Best Reheating Method
Add a tiny splash of water or broth before reheating to restore moisture. The sauce should be heated until it reaches a gentle simmer. Avoid boiling, as it can cause the sauce to separate. Serve hot for the best flavor experience.