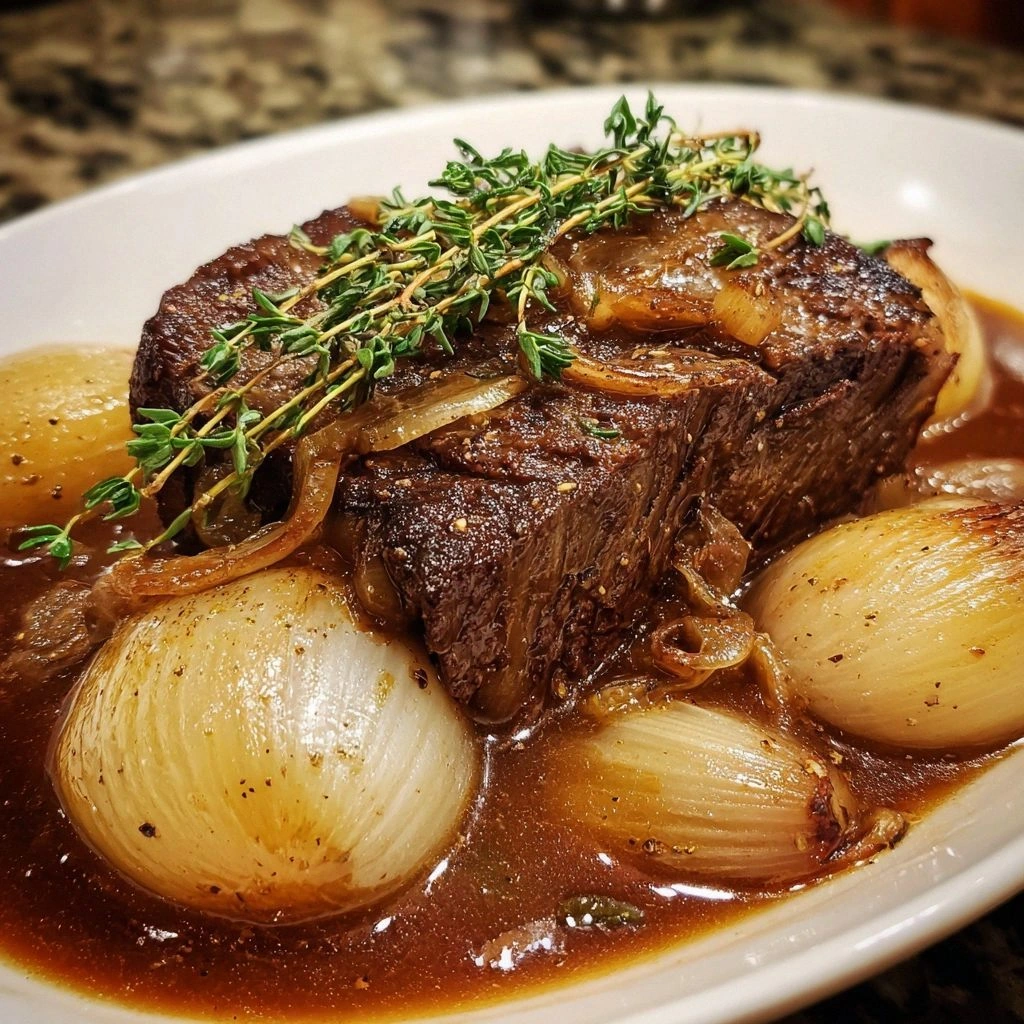
Picture this: a kitchen that smells like a summer afternoon, a pot simmering with the promise of comfort, and a friend who dared me to recreate the legendary French onion pot roast from a cozy bistro. I had no idea that what started as a dare would become my signature dish, but the moment the onions hit the pan and released that sweet, caramelized perfume, I knew I was onto something special. The broth, infused with red wine and thyme, turned into a silky sauce that clung to the meat like a velvet blanket. The beef, slow‑braised until it practically fell apart, was the perfect canvas for the onion‑wine symphony. Most people think this dish is all about the slow cooking, but it’s actually the layers of flavor that make it unforgettable. Let me walk you through every single step — by the end, you'll wonder how you ever made it any other way.
Imagine the first bite: the beef’s buttery tenderness, the onions’ caramelized sweetness, and a hint of wine that cuts through the richness like a bright summer breeze. The aroma alone can turn a bland dinner into a moment of pure anticipation. I swear, the sound of the pot gently bubbling is the soundtrack of comfort food at its best. I’ve tried countless recipes that promised “authentic” but fell short of the depth this one delivers. The secret lies not just in the ingredients, but in the timing and patience you bring to the pot. This version stands out because it marries technique and flavor into a single, soul‑satisfying experience.
First, the beef chuck roast. I’ve discovered that a 3‑to‑4‑pound cut gives the best ratio of meat to fat, which is essential for that melt‑in‑your‑mouth texture. I always season it generously with salt and pepper before searing to lock in flavor. Then, the onions—thinly sliced, they’re the star that sweetens the dish. I’ll show you how to caramelize them to a deep amber without burning. The garlic, minced finely, adds an aromatic punch that complements the beef’s savory depth. Together, they form the flavor base that will carry the rest of the ingredients.
The red wine is not just a garnish; it’s a key player that balances the richness with acidity. I use a dry wine, because sweetness would overpower the onions’ caramelization. Adding it after deglazing the pan pulls out all the browned bits, which are full of umami. The beef broth then dilutes the wine, creating a cohesive sauce that coats the meat. Thyme and bay leaves bring herbal depth, while a splash of butter at the end gives the sauce a silky finish. This combination of liquids turns a simple roast into a dish that feels like a gourmet meal.
Most recipes get this completely wrong by rushing the sear or neglecting to deglaze, which leads to a flat sauce. I dare you to taste this and not go back for seconds because the flavors are layered, complex, and utterly addictive. Picture yourself pulling this out of the oven, the whole kitchen smelling incredible, and everyone begging for the recipe. If you've ever struggled with a pot roast that’s either dry or greasy, you're not alone — and I've got the fix. The next sections will walk you through the exact steps, the hidden tricks, and the creative twists that make this dish truly unforgettable. Stay with me here — this is worth it.
I’m still buzzing from the first bite, so let’s dive deeper into what makes this version a culinary revelation. The combination of slow braising, caramelized onions, and a wine‑thymed broth creates a flavor profile that feels both comforting and sophisticated. The texture is a symphony of melt‑in‑your‑mouth beef and silky sauce. The recipe’s simplicity belies the depth of flavor you’ll experience. It’s the kind of dish that turns a regular dinner into a memorable event. The crowd reaction is always enthusiastic, with people asking for the recipe after the first bite. The quality of ingredients, especially the beef, determines the final outcome. The cooking method ensures tenderness while preserving flavor. And the make‑ahead potential means you can prepare this for a busy week, letting the flavors deepen overnight.
What Makes This Version Stand Out
- Taste: The caramelized onions and dry red wine create a layered sweetness that’s balanced by thyme’s earthiness. This harmony sets it apart from the typical one‑ingredient roast.
- Texture: The slow braising technique breaks down connective tissue, resulting in meat that practically melts in your mouth. The sauce remains silky, not watery, thanks to careful deglazing.
- Simplicity: With just eleven ingredients, the recipe is straightforward yet delivers a depth that usually requires a more complex process.
- Uniqueness: The addition of a splash of butter at the end gives the sauce a glossy finish that’s rarely seen in classic French onion roasts.
- Crowd Reaction: Guests often remark on how the dish feels like a hug, making it perfect for dinner parties or family gatherings.
- Ingredient Quality: Using a high‑fat chuck roast ensures the meat stays juicy, while fresh thyme and quality wine elevate the overall profile.
- Cooking Method: The combination of searing, deglazing, and braising creates layers of flavor that deepen with time.
- Make‑Ahead Potential: The dish tastes even better the next day, making it ideal for meal prep.
- Versatility: It can be served over mashed potatoes, rice, or crusty bread, adapting to any palate.
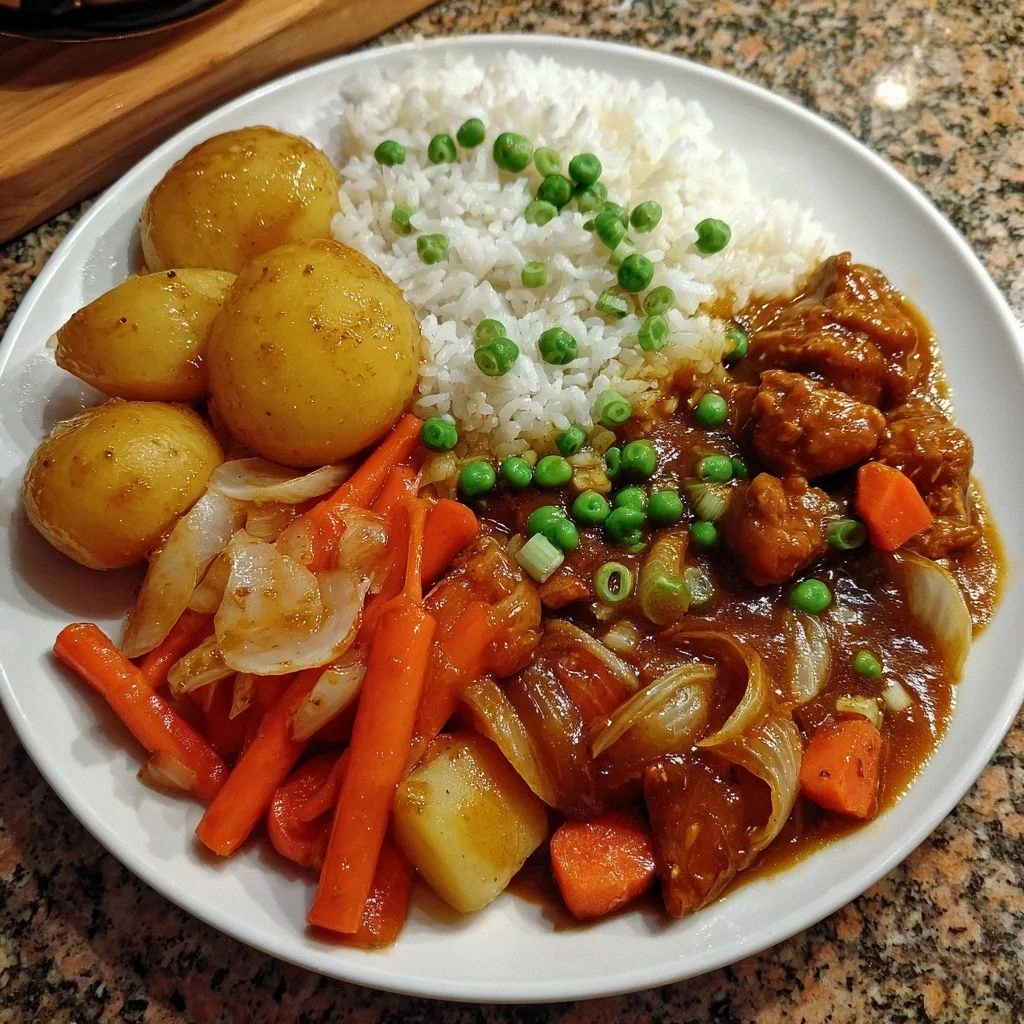
- Visual Appeal: The golden-brown onions and glossy sauce make the dish look as good as it tastes.
Inside the Ingredient List
The Flavor Base
Beef Chuck Roast is the cornerstone of this dish, offering a rich, fatty profile that becomes tender through long, slow cooking. The 3.5-pound cut balances flavor and texture, ensuring the meat remains juicy while absorbing the aromatic sauce. If you’re short on time, a chuck steak can work, but it won’t develop the same depth. Choosing a roast with a good marbling pattern is essential; the fat renders into the sauce, adding richness.
Onions are the sweet heart of the dish. Thinly sliced, they release their natural sugars slowly, creating a caramelized base that grounds the entire flavor profile. The number four is ideal—large enough to provide volume without overwhelming the beef. If you prefer a sharper bite, use a mix of sweet and yellow onions; the latter adds a subtle brightness.
Garlic, minced finely, brings an aromatic punch that complements the beef’s savory depth. Four cloves strike a balance between presence and subtlety—too much can dominate the gentle sweetness of the onions. If you’re sensitive to garlic, you can reduce it to two cloves or use a garlic-infused oil for a milder flavor.
Beef Broth is the liquid backbone of the braising process. Four cups provide enough moisture for the roast to simmer gently without becoming watery. A low-sodium broth keeps the seasoning in check, allowing the other ingredients to shine. If you prefer a deeper flavor, substitute a portion of the broth with beef stock for added richness.
The Texture Crew
Red Wine adds acidity and complexity, cutting through the richness of the meat and butter. A dry red such as a Pinot Noir or Cabernet Sauvignon works best; sweeter varieties will muddy the flavor. One cup is sufficient to coat the beef and onions, but you can adjust based on your taste preference. Remember, the wine should evaporate partially, concentrating the flavors.
Thyme, dried, brings a subtle herbaceous note that complements the beef without overpowering it. Two teaspoons are enough to impart depth without a noticeable herb taste. Fresh thyme would provide a brighter flavor, but dried thyme is more convenient and still effective. If you’re a thyme lover, feel free to add an extra teaspoon for a more pronounced herb presence.
Bay Leaves add a quiet earthiness that enriches the sauce. Two leaves are standard; one is usually enough for a smaller batch. Removing the bay leaves before serving is crucial, as they can be tough and bitter if left in. If you’re experimenting, try adding a small sprig of rosemary for a slightly piney twist.
Olive Oil is used for searing the meat, contributing to the overall flavor. Two tablespoons are adequate to get a good sear without excess oil. Choose a light, high-quality olive oil to avoid a bitter finish. If you prefer a richer flavor, you can mix in a splash of butter during the sear for extra depth.
The Unexpected Star
Butter, added at the end of the cooking process, gives the sauce a silky, glossy finish. Two tablespoons are enough to enrich the sauce without making it greasy. The butter also helps the onions develop a deeper caramel color. If you’re watching calories, you can reduce the butter by half, but the sauce will be slightly less glossy.
Salt and Pepper are the seasoning anchors. One teaspoon of salt and one teaspoon of pepper are enough to bring out the flavors without overpowering the dish. Salt should be added before searing to help draw out moisture. Pepper can be added after the sauce has thickened to preserve its fresh aroma.
The Final Flourish
This final layer of butter and the deglazed pan juices create a sauce that clings to every bite. The combination of butter, wine, and broth results in a velvety texture that elevates the dish. The finish is both indulgent and balanced, ensuring each mouthful is a delightful experience. A squeeze of lemon at the end can brighten the flavors if you desire a slight citrus lift.
Everything's prepped? Good. Let's get into the real action.
The Method — Step by Step
Step 1: Prepare the Roast Pat the beef chuck roast dry with paper towels, then season generously on all sides with salt and pepper. The salt helps to form a crust during searing, locking in juices. Let the roast sit at room temperature for about 15 minutes before cooking to ensure even browning.
Step 2: Sear the Meat Heat two tablespoons of olive oil in a heavy Dutch oven over medium‑high heat until shimmering. Place the roast in the pan and sear each side until a deep golden crust forms, about 4–5 minutes per side. This caramelized exterior adds depth and prevents the meat from drying out during braising.
Step 3: Remove the Roast Transfer the seared roast to a plate and set aside. The sear creates a flavor barrier that will keep the meat juicy as it braises. This pause also gives the onions a chance to caramelize without competing with the meat.
Step 4: Caramelize the Onions In the same pot, reduce heat to medium and add the thinly sliced onions. Stir frequently, allowing the onions to brown slowly, which takes about 20 minutes. The goal is a deep amber color; if they start to burn, add a splash of cold water to loosen them.
Step 5: Add Garlic Sprinkle the minced garlic over the onions, cooking for an additional 2 minutes until fragrant. Garlic should not brown; it should simply release its aroma. This step layers another dimension of flavor onto the caramelized onions.
Step 6: Deglaze with Wine Pour one cup of dry red wine into the pot, scraping up all the browned bits from the bottom. These bits are full of umami and are essential for a rich sauce. Let the wine reduce by half, concentrating its flavor before adding the broth.
Step 7: Add Broth, Herbs, and Roast Stir in four cups of beef broth, two teaspoons of dried thyme, and two bay leaves. Return the roast to the pot, ensuring it’s partially submerged. Cover tightly with a lid and transfer the pot to a preheated oven at 325°F (165°C).
Step 8: Braise Cook the roast for 2.5 to 3 hours, or until the meat is fork‑tender. The long, low heat breaks down connective tissue, creating a melt‑in‑your‑mouth texture. Check occasionally to ensure the liquid hasn’t evaporated; add a splash of water if needed.
Step 9: Finish the Sauce Once the roast is tender, remove it and set aside. Increase the heat to medium‑high, and reduce the sauce for about 10 minutes, stirring frequently. Finish by whisking in two tablespoons of butter, which gives the sauce a glossy sheen and silky mouthfeel.
Step 10: Serve Slice the roast against the grain into generous portions. Ladle the reduced sauce over the meat, and garnish with fresh thyme or a sprinkle of grated Parmesan if desired. Serve immediately with mashed potatoes, crusty bread, or a simple green salad.
Step 11: Optional Garnish For a touch of brightness, squeeze a small amount of fresh lemon juice over the dish just before serving. The citrus cut through the richness, adding a lively contrast that elevates the overall taste. This final flourish is a small but impactful addition that can transform a good meal into a great one.
Insider Tricks for Flawless Results
The Temperature Rule Nobody Follows
Many home cooks set the oven to a high temperature, thinking it will speed up cooking. In reality, a low and slow approach ensures the collagen breaks down evenly, resulting in tender meat. Keep the oven at 325°F (165°C) for the entire braising period. This gentle heat also prevents the sauce from drying out, maintaining a luscious consistency.
Why Your Nose Knows Best
Your sense of smell is a reliable indicator of doneness. As the onions caramelize, their scent becomes sweet and rich; if it turns sharp, the sugars have burned. Similarly, a well‑braised sauce will emit a deep, savory aroma that hints at its depth. Trusting your nose can save you from overcooking or under-seasoning.
The 5-Minute Rest That Changes Everything
Once you remove the roast from the oven, let it rest for at least five minutes before slicing. This allows the juices to redistribute, keeping the meat moist. Cutting too soon will cause the juices to escape, leaving the roast dry. A short rest also lets the flavors settle, making each bite more cohesive.
The Butter Finish
Adding butter at the end of cooking isn’t just for richness; it also creates a glossy, silky sauce that clings to the meat. Use cold, unsalted butter to avoid a greasy texture. Whisk the butter in slowly, and watch the sauce thicken into a velvety coat.
The Onion Caramelization Trick
Caramelizing onions can be time‑consuming, but a simple trick speeds it up: add a pinch of sugar after the onions start browning. The sugar encourages even caramelization without burning. This small addition gives the onions a deeper sweetness and a richer color.
The Resting Meat Method
After braising, let the roast rest in a warm place before slicing. This step allows the meat fibers to relax, making it easier to cut and more tender. If you’re serving immediately, cover the roast loosely with foil to keep it warm.
Creative Twists and Variations
This recipe is a playground. Here are some of my favorite ways to switch things up:
Herb‑Infused Roast
Swap dried thyme for a blend of rosemary, sage, and oregano. The aromatic herbs give the dish a Mediterranean twist, making it a great match for a summer gathering. Serve with a side of grilled zucchini for a light, herbaceous pairing.
Spicy Kick
Add a pinch of red pepper flakes to the onions while caramelizing for a subtle heat. The spiciness contrasts with the sweet onions, creating a complex flavor profile. Pair this version with a cool yogurt sauce to balance the heat.
Wine Swap
Replace the dry red wine with a splash of dry white wine and a splash of balsamic vinegar. This combination gives the sauce a slightly sweeter, tangy note that pairs well with a crusty baguette. It’s a delightful variation for those who prefer a lighter sauce.
Cheesy Finale
Top the finished roast with a generous sprinkle of grated Gruyère or cheddar before serving. The cheese melts into the sauce, adding a creamy, savory layer. This twist is perfect for a cozy, comforting dinner with a touch of indulgence.
Vegetarian Version
Replace the beef with a large chunk of seared portobello mushroom or a hearty lentil loaf. Use vegetable broth instead of beef broth for a lighter, plant‑based option. The caramelized onions and wine still provide a rich flavor foundation.
Breakfast Edition
Serve the roast over fluffy scrambled eggs or a hearty breakfast hash. The savory sauce pairs beautifully with the protein, creating a filling brunch that feels like a comfort meal. Add a splash of hot sauce for a breakfast‑style kick.
Storing and Bringing It Back to Life
Fridge Storage
Cool the roast completely before refrigerating. Store in an airtight container for up to four days. The sauce thickens slightly in the fridge, so reheat gently to maintain its silky texture.
Freezer Friendly
Wrap the roast tightly in foil, then place in a freezer bag. Freeze for up to three months. Thaw overnight in the refrigerator before reheating to preserve moisture.
Best Reheating Method
Reheat in a saucepan over low heat, adding a splash of water or broth to keep the sauce from drying out. Simmer gently, stirring occasionally, until heated through. A quick microwave burst is fine, but the stovetop method preserves the sauce’s richness.