Personal Introduction
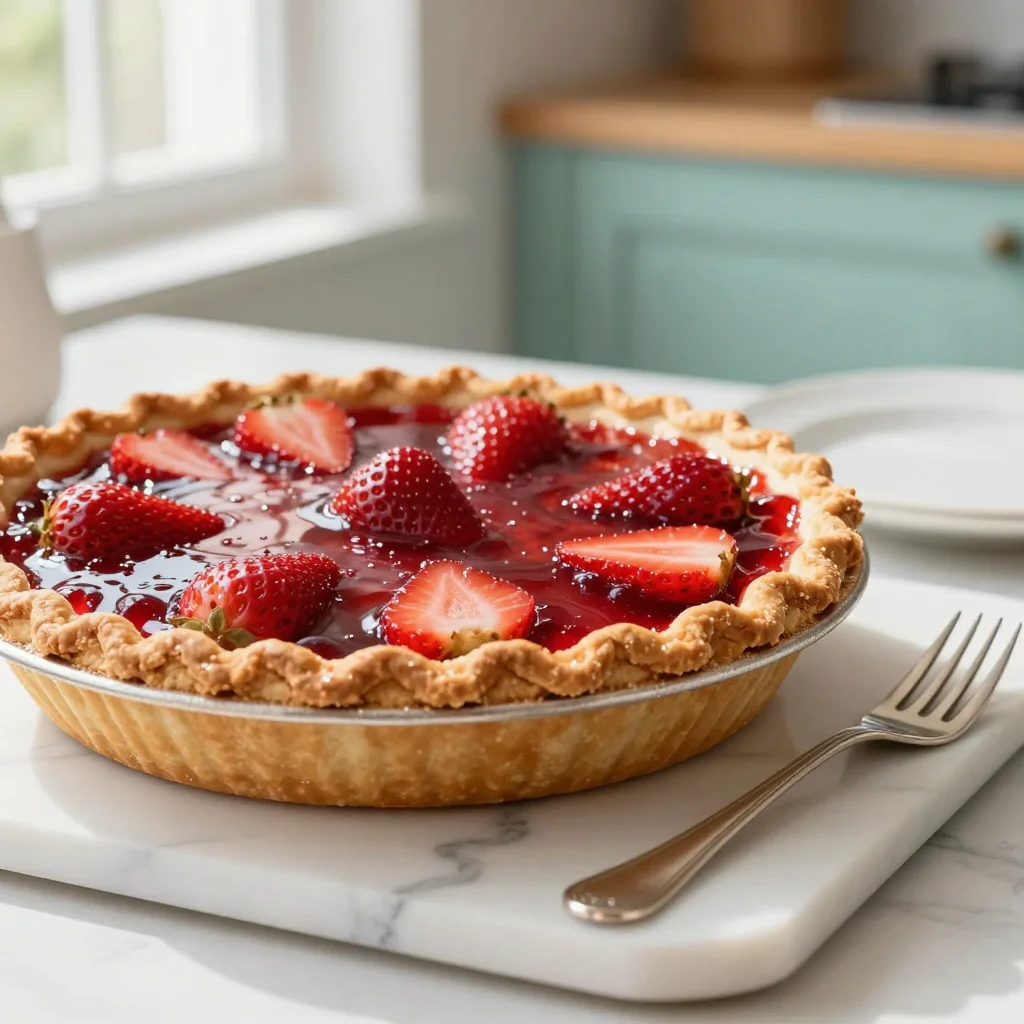
The first time I tasted a strawberry tart glazed with a shimmering gelatin sheen, I was transported back to a sun‑drenched garden in early summer, where the scent of ripe berries mingled with the soft hum of bees. I remember my grandmother’s kitchen, the wooden table dusted with flour, and the anticipation that built as we waited for the oven’s gentle roar. That memory sparked a lifelong love affair with fruit‑filled pastries, and it’s this very nostalgia that fuels my passion for perfecting the Strawberry Pie with Gelatin Glaze.
This pie hails from classic French patisserie, where the balance between a buttery crust, a luscious fruit filling, and a glossy finish is considered an art form. While the original version uses a simple apricot glaze, I’ve chosen gelatin for its crystal‑clear finish and subtle texture, allowing the vivid red of the strawberries to truly shine. The result is a dessert that feels both timeless and contemporary—perfect for a brunch, a holiday feast, or an impromptu celebration.
In this article, I’ll guide you through every step, from selecting the freshest strawberries to achieving that perfect, mirror‑like glaze. You’ll learn the science behind gelatin, the tricks for a flaky crust, and the secrets to a filling that’s both bright and structurally sound. By the end, you’ll be equipped to create a show‑stopping pie that dazzles both the eyes and the palate.
I’m thrilled to share this recipe with you, and I hope it becomes a cherished part of your own culinary story. Let’s get started!
🌟 Why This Recipe Will Capture Your Heart
This Strawberry Pie with Gelatin Glaze isn’t just another dessert; it’s a celebration of color, texture, and flavor that elevates any occasion.
- ✨ Visual Spectacle: The gelatin glaze creates a glass‑like surface that reflects light, turning each slice into a miniature work of art.
- ✨ Freshness Amplified: The glaze locks in the natural juices of the strawberries, preserving their bright, summery flavor for hours.
- ✨ Balanced Sweetness: A careful blend of sugar and lemon juice ensures the tart isn’t cloying, letting the fruit’s natural acidity shine.
- ✨ Fool‑Proof Crust: By chilling the dough and using a butter‑flour ratio that guarantees flakiness, even novice bakers achieve a professional finish.
- ✨ Versatile Presentation: Serve it warm with a dollop of vanilla whipped cream, or chilled with a scoop of strawberry sorbet for a refreshing contrast.
- ✨ Crowd‑Pleaser: The combination of familiar flavors and a striking appearance makes it a hit at both casual family dinners and formal gatherings.
🥗 Ingredients
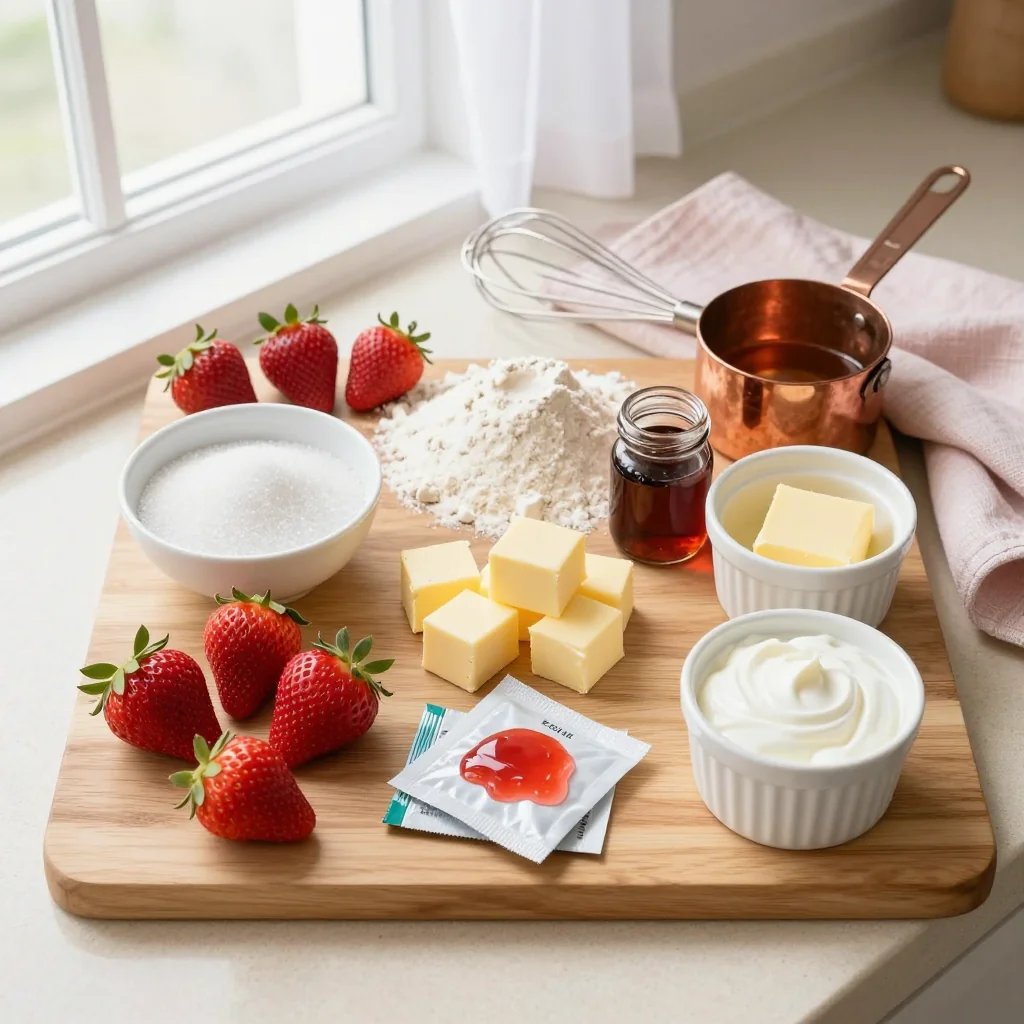
📝 Complete Ingredient List
For the Crust:
- 250 g all‑purpose flour
- 170 g unsalted butter, cold and cubed
- 50 g granulated sugar
- 1 pinch salt
- 60 ml ice‑cold water
For the Strawberry Filling:
- 800 g fresh strawberries, hulled and halved
- 100 g granulated sugar
- 30 g cornstarch
- 15 ml lemon juice
- 1 tsp vanilla extract
For the Gelatin Glaze:
- 10 g unflavored gelatin powder
- 60 ml cold water
- 80 g powdered sugar
- 15 ml fresh orange juice (optional for a citrus note)
🔍 Focus on Key Ingredients
Strawberries
Strawberries are the star of this pie, providing natural sweetness, acidity, and a vivid color that the gelatin glaze amplifies. When selecting strawberries, look for a deep crimson hue and a sweet fragrance. For the best texture, choose berries that are firm yet yielding to gentle pressure. If you can’t find fresh strawberries in season, frozen ones (thawed and well‑drained) work, though the flavor will be slightly less aromatic.
Unflavored Gelatin
Gelatin is the secret behind the glossy, mirror‑like finish. It sets at room temperature but remains soft enough to bite through, creating a pleasant mouthfeel. Bloom the gelatin in cold water for about five minutes before gently heating it with the powdered sugar. This ensures a smooth, lump‑free glaze that adheres perfectly to the fruit surface.
Unsalted Butter
Cold butter creates layers of steam as the crust bakes, resulting in a flaky, tender texture. Using unsalted butter gives you full control over the salt level, allowing the pinch of salt in the dough to balance the sweetness of the filling without overwhelming it.
🔄 Quick Substitutions
| If you don’t have... | Use instead... |
|---|---|
| All‑purpose flour | Pastry flour (for an even more tender crust) |
| Cornstarch | All‑purpose flour (use double the amount) |
| Unflavored gelatin | Agar‑agar (use 1/4 of the amount, adjust liquid) |
👨🍳 Step‑by‑Step Instructions
Follow these detailed steps to create a flawless strawberry pie with a glossy gelatin glaze. Take your time, and enjoy the sensory journey from dough to dazzling dessert.
📋 Phase 1: Preparation and Mise en Place
Start by gathering all tools and pre‑chilling your ingredients.
Make the Crust Dough
In a large bowl, whisk together the flour, sugar, and salt. Add the cold butter cubes and, using a pastry cutter or your fingertips, rub the butter into the dry ingredients until the mixture resembles coarse crumbs with some pea‑size pieces. Drizzle the ice‑cold water over the mixture, stirring gently with a fork until the dough just comes together. Form the dough into a disc, wrap it in plastic, and refrigerate for at least 30 minutes. This resting period relaxes the gluten and firms the butter, essential for a flaky crust.
Prepare the Strawberry Filling
While the dough chills, rinse the strawberries, remove their stems, and halve them. In a saucepan, combine the strawberries, granulated sugar, lemon juice, and vanilla extract. Cook over medium heat, stirring occasionally, until the strawberries release their juices and the mixture begins to simmer. Sprinkle the cornstarch over the fruit, whisk vigorously to avoid lumps, and continue cooking for another 2‑3 minutes until the filling thickens and becomes glossy. Remove from heat and let it cool slightly while you roll out the crust.
🔥 Phase 2: Baking and Assembly
This phase brings the crust to golden perfection and layers the luscious filling.
Roll Out and Blind‑Bake the Crust
Preheat the oven to 190 °C (375 °F). Lightly flour a clean surface and roll the chilled dough into a 30 cm (12‑inch) circle, about 4 mm thick. Transfer the dough to a 23 cm (9‑inch) tart pan with a removable bottom, gently pressing it into the corners. Trim excess dough, then prick the base with a fork. Line the crust with parchment paper and fill with pie weights or dried beans. Bake for 12‑15 minutes, then remove the weights and parchment, and bake an additional 5‑7 minutes until the crust is lightly golden. Let it cool on a wire rack.
Fill the Crust
Once the crust is completely cool, spoon the strawberry filling into the center, spreading it evenly. The filling should be thick enough to stay in place but still glossy. Smooth the top with a spatula to create an even surface for the glaze.
Prepare the Gelatin Glaze
In a small bowl, sprinkle the gelatin powder over the 60 ml of cold water and let it bloom for 5 minutes. Meanwhile, combine the powdered sugar and orange juice (if using) in a saucepan. Gently heat the mixture over low heat, stirring until the sugar dissolves. Add the bloomed gelatin, stirring continuously until fully dissolved and the glaze is smooth and glossy. Remove from heat and allow it to cool for 2‑3 minutes; it should be warm but not hot to the touch.
✨ Phase 3: Finishing Touches and Serving
The final stage ensures a perfect shine and a delightful presentation.
Apply the Gelatin Glaze
Place the pie on a cooling rack over a tray to catch any drips. Starting from the center, gently pour the warm gelatin glaze in a circular motion, allowing it to flow naturally over the strawberries. Use a spatula to guide the glaze over any edges that need extra coverage. The glaze will set within 10‑15 minutes, forming a thin, translucent film that enhances the fruit’s color.
Chill the Pie
Refrigerate the glazed pie for at least 30 minutes to allow the gelatin to fully set. This step also helps the filling firm up, making slicing clean and effortless.
Slice and Serve
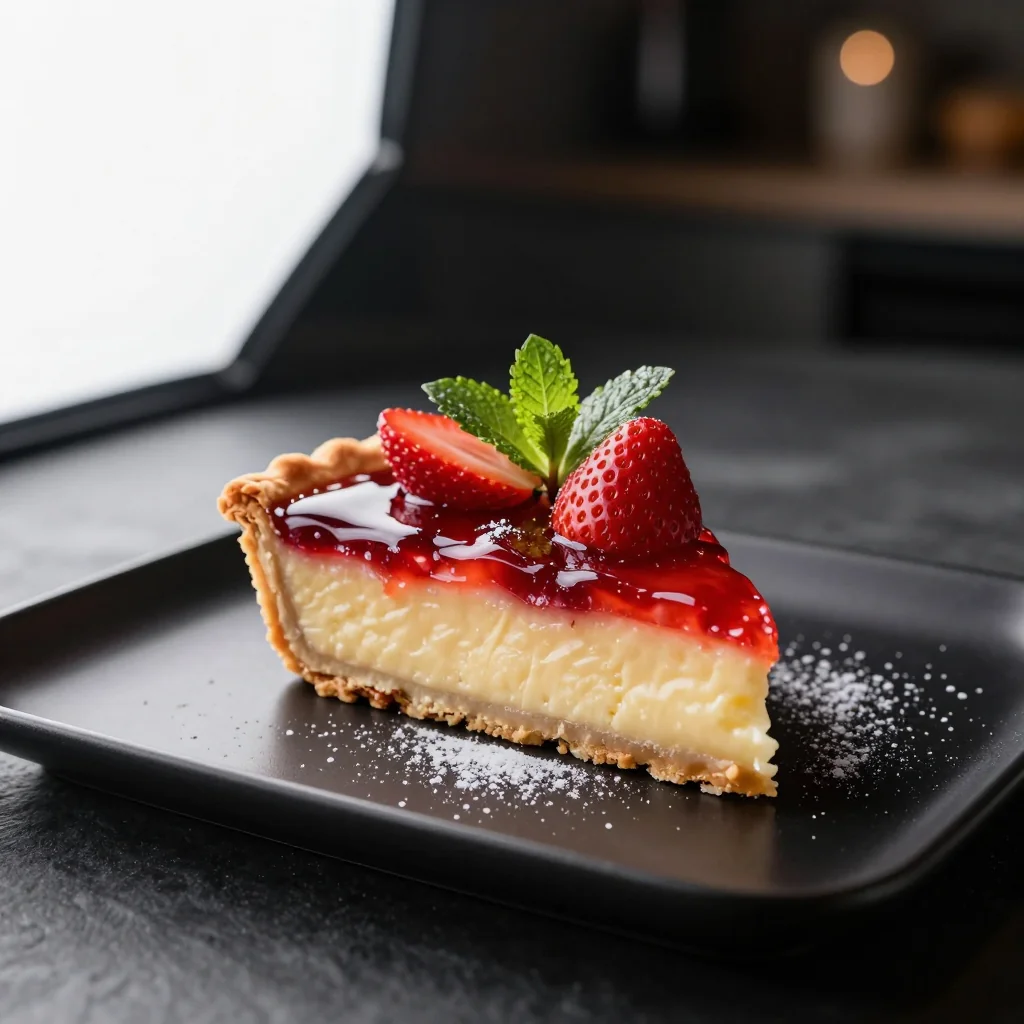
Using a sharp, warm knife (dip the blade in hot water and wipe dry), cut the pie into eight equal wedges. Serve each slice on a dessert plate, optionally garnished with a dollop of lightly sweetened whipped cream or a sprig of fresh mint for added color contrast.
💡 Expert Tips and Tricks
🛒 Choosing the Right Ingredients
Pick strawberries that are fully red with a sweet aroma; avoid any that are white‑tipped or overly soft. For the crust, use high‑fat European butter for the best flakiness. If possible, source fresh gelatin sheets instead of powder; they dissolve more evenly and give a smoother glaze.
🔪 Preparation Techniques
Keep all components cold until the moment of assembly. When rubbing butter into the flour, work quickly to prevent the butter from melting. For the filling, mash a few strawberries with a fork before cooking to release natural pectin, which helps the mixture thicken without excessive cornstarch.
🌡️ Mastering the Cooking Process
Blind‑bake the crust on a preheated stone or heavy baking sheet to ensure even heat distribution. When making the glaze, never boil the gelatin; a gentle simmer is enough to dissolve it without breaking its setting ability.
🍽️ Presentation and Service
Allow the glaze to set fully before moving the pie; a gentle tilt can cause drips. Use a clean, warm knife for slicing to achieve clean cuts. Finish each plate with a light dusting of powdered sugar or a few fresh mint leaves for contrast.
🏆 Pro Tips
Professional pastry chefs rely on precision, timing, and subtle adjustments to transform a good pie into an unforgettable one.
- 🎯 Temperature Control: Keep your dough between 0‑4 °C (32‑39 °F) while working. If the dough warms up, refrigerate it for 10 minutes before continuing. This prevents gluten development and preserves butter layers.
- 🎯 Layered Butter Technique: Fold the butter into the flour three times, creating thin layers. This lamination produces steam pockets that lift the crust, resulting in a buttery, airy texture.
- 🎯 Gelatin Bloom Ratio: Use a 1:6 gelatin‑to‑water ratio (e.g., 10 g gelatin to 60 ml water). This ensures a firm yet flexible glaze that won’t crack when sliced.
- 🎯 Fruit Acidity Balance: Add a splash of lemon juice not only for flavor but also to balance the natural sugars, preventing the glaze from becoming overly sweet.
- 🎯 Glaze Application Timing: Apply the glaze when it’s warm (around 35‑40 °C / 95‑104 °F). Too hot and it will seep into the crust; too cool and it will set before spreading.
- 🎯 Final Chill: A 30‑minute chill after glazing allows the gelatin to set fully, giving a mirror finish that reflects light beautifully.
"A perfect glaze is the silent ambassador of a dessert, speaking louder than any garnish." — Chef Pierre Gagnaire
🔄 Variations and Adaptations
The beauty of this pie lies in its adaptability. Whether you’re catering to dietary needs or craving new flavor twists, the base recipe provides a flexible canvas.
🥬 Vegetarian/Vegan Version
Replace the butter with a plant‑based margarine that has a high fat content, and use a vegan gelatin alternative such as agar‑agar. The glaze will set firmer, so reduce the agar‑agar to 2 g and increase the liquid slightly. For the filling, substitute the granulated sugar with coconut sugar for a deeper flavor.
- Vegan butter (same weight as butter)
- Agar‑agar powder (2 g) dissolved in 60 ml water
🌶️ Flavor Variations
Experiment with complementary flavors to customize the pie for different occasions.
Spicy Version:
Add a pinch of cayenne pepper to the strawberry filling and a drizzle of chili‑infused honey on the glaze for a sweet‑heat contrast.
Mediterranean Version:
Mix finely chopped fresh basil into the filling and replace orange juice in the glaze with a splash of Limoncello for a bright, aromatic twist.
Asian Fusion Version:
Incorporate a teaspoon of toasted sesame oil into the filling and finish the glaze with a few drops of yuzu juice for a citrus‑nutty profile.
⚠️ Dietary Adaptations
Gluten‑Free:
Use a blend of almond flour and rice flour (2:1 ratio) for the crust, and add a tablespoon of xanthan gum to mimic elasticity.
Lactose‑Free:
Swap butter for lactose‑free margarine and ensure the gelatin is pure gelatin without dairy additives.
Low‑Calorie:
Reduce the sugar in both filling and glaze by half, use a sugar substitute like erythritol, and replace half of the butter with applesauce in the crust.
👶 Family/Children Friendly Version
For younger palates, omit the lemon juice and reduce the sugar slightly. Add a few diced banana slices to the filling for extra sweetness, and serve with a side of vanilla yogurt for a creamy contrast.
📦 Storage and Reheating
🧊 Conservation
Refrigerator:
- Duration: 3 days
- Container: Airtight glass or plastic container
- Tip: Cover the surface with a thin layer of plastic wrap to prevent the glaze from drying.
Freezer:
- Duration: 2 months
- Method: Freeze the pie without the glaze; add the glaze fresh after thawing.
- Defrosting: Transfer to the refrigerator overnight, then apply fresh glaze.
💡 For optimal texture, avoid freezing the gelatin glaze; it can become grainy after thawing.
♨️ Reheating
🔥 Oven (Recommended):
- Preheat to 160 °C (325 °F).
- Cover the pie loosely with aluminum foil to protect the glaze.
- Heat for 12‑15 minutes until the filling is warm.
- Remove foil and warm an additional 3‑4 minutes to revive the crust’s crispness.
⚡ Microwave (Quick):
- Place a slice on a microwave‑safe plate.
- Cover with a microwave‑safe lid or parchment.
- Heat on medium power for 45 seconds, then check and continue in 15‑second bursts.
🍳 Stovetop:
For a single slice, warm in a non‑stick skillet over low heat, covered, for 3‑4 minutes, turning once.
🍷 Perfect Pairings
🥗 Side Dishes
- Light Arugula Salad: A peppery arugula salad with a citrus vinaigrette balances the sweetness of the pie.
- Vanilla Mascarpone Cream: A dollop adds richness without overwhelming the fruit.
- Fresh Berry Compote: A mix of blueberries and raspberries adds color contrast.
🍷 Wine & Beverage Pairings
- Rosé (dry): Its bright acidity complements the strawberry’s tartness.
- Moscato d'Asti: Lightly sparkling and sweet, it mirrors the dessert’s fruit profile.
- Non‑Alcoholic: Sparkling elderflower water with a twist of lemon.
🍰 Complementary Courses
Start the meal with a crisp green salad dressed in a light vinaigrette, follow the pie with a cheese board featuring Brie and a drizzle of honey, and finish with a simple espresso to cleanse the palate.
❓ Frequently Asked Questions
Q: Can I use frozen strawberries instead of fresh?
Yes, you can. Thaw the strawberries completely, drain any excess liquid, and pat them dry with paper towels. Frozen berries release more water during cooking, so you may need to increase the cornstarch by an additional tablespoon to achieve the desired thickness.
Q: What if I don’t have gelatin powder?
Unflavored gelatin sheets work perfectly; use three sheets (approximately 10 g) and bloom them in the same amount of cold water. If you prefer a vegetarian alternative, agar‑agar can be used, but reduce the amount to one‑quarter and increase the liquid slightly to maintain a smooth glaze.
Q: How do I prevent the crust from becoming soggy?
Blind‑baking the crust creates a barrier that resists moisture from the filling. Additionally, ensure the strawberry filling is thickened adequately before adding it to the crust. A final chill helps the filling set, further protecting the crust from soaking.
Q: My glaze turned cloudy—what went wrong?
A cloudy glaze usually indicates that the gelatin was boiled or that the sugar wasn’t fully dissolved. Always dissolve gelatin at low heat, never a rolling boil, and whisk the powdered sugar until completely smooth before adding the gelatin.
Q: Can I prepare the pie a day ahead?
Absolutely. Bake the crust and prepare the filling a day in advance, store them separately in the refrigerator. Assemble the pie, apply the glaze, and chill on the day you plan to serve. This ensures the glaze remains glossy and the crust stays crisp.
Q: Is it possible to make a mini version for individual servings?
Yes. Use a 12‑cm (5‑inch) tart pan for each serving, adjusting ingredient quantities proportionally (about 1/8 of the full recipe). The baking time may be reduced to 20‑25 minutes for the crust and 10‑12 minutes for the filling.
🎉 To Your Oven!
This Strawberry Pie with Gelatin Glaze combines the comforting familiarity of a classic fruit tart with a modern, show‑stopping finish. The flaky buttery crust, the bright, slightly tangy strawberry filling, and the crystal‑clear gelatin glaze work together to create a dessert that is as delightful to look at as it is to eat. By following the detailed steps and employing the pro tips, you’ll achieve a professional‑grade result that will impress family, friends, and even the most discerning food critics.
I encourage you to experiment with the variations, adapt the recipe to your dietary preferences, and make it your own. Share your creations, ask questions, and let the community celebrate your successes. Happy baking!
Have you tried this recipe?
Leave a comment and rating below! Share your photos on Instagram with #StrawberryGelatinPie to be featured.
Strawberry Pie with Gelatin Glaze
A dazzling strawberry tart with a glossy gelatin glaze that sparkles on every plate.
📝 Ingredients
Crust
Filling
Gelatin Glaze
👨🍳 Instructions
- Prepare the crust dough and chill for 30 minutes.
- Roll out, blind‑bake, and cool the crust.
- Cook the strawberry filling until thickened.
- Fill the baked crust with the strawberry mixture.
- Bloom gelatin, dissolve with sugar and orange juice.
- Pour the warm glaze over the filling, creating a glossy coat.
- Chill the assembled pie for at least 30 minutes.
- Slice with a warm knife and serve.
- Optional: garnish with whipped cream or mint.
- Enjoy and share your creation!
🥗 Nutritional Information (per serving)
*Nutrition facts are estimated.

💬 Comments and Reviews
Leave a Comment
[Space for reader comments]